New Site Design

I don't know how many of you have noticed this, but I just published a new design for Code Koala. Hooray!!

Along with the change in design came several improvements to the site, including a contact me form and some code optimizations.

Here are some screenshots to illustrate the difference:

Version 1.0

Version 1

Version 2.0

Version 2

Codename: Little Weebl

So Mindy and I went in for the first official ultrasound today. We were quite surprised to see our little spec turn into an active little iddy-bitty baby. It was moving around a lot, and at one point we even saw it waving at us!

Little Weebl's first ultrasound, picture 1

We found out that Mindy is pregnant around the 5th of December, and we waited to let people know until after Christmas, when we officially broke the news to the family. We still haven't told very many people, but now that we have some pictures to show off we think it's about time.

Little Weebl's first ultrasound, picture 2

With all of the movement we saw during the ultrasound, we decided to nickname our baby "Weebl" after the genius Weebl and Bob.

Little Weebl's first ultrasound, picture 3

Windows 7 Public Beta Screenshots

Here are some screenshots of the Windows 7 public beta. I installed it in a VirtualBox virtual machine and allocated 600MB of RAM to it.

The new and improved sloading screen

The new and improved sloading screen.

The login screen

The login screen

Logging in....

Logging in....

The desktop.... and a fish!!

The desktop.... and a fish!!

Your choices of Microsoft-sponsored security--the ones that will slow down your computer the most

Your choices of Microsoft-sponsored security--the ones that will slow down your computer the most!

Oh oh!!  It's Internet Explorer 8!  Chews up my site like a charm.

Oh oh!! It's Internet Explorer 8! Chews up my site like a charm.

Captionless taskbar icons until you hover.

Captionless taskbar icons until you hover.

The new Windows Media Player

The new Windows Media Player.

It's version 12!

It's version 12!

Setting your desktop theme

Setting your desktop theme.

Minesweeper wants hardware accelerated graphics

Minesweeper wants hardware accelerated graphics.... why??

All-new Minesweeper

The all-new Minesweeper.

I won!

I won!

Paint

Paint. Very perty.

The start menu

The start menu.

All programs in the start menu

Looking at all programs in the start menu.

Gadgets and the clock thingy

Some desktop gadgets and the clock thingy.

Slashdot

Slashdot in IE 8.

Chrome

Downloading Google Chrome.

WTF?  Verifying application requirements??

What the....? Verifying application requirements??

Ahh... Chrome.

Ahh... Chrome.

Control Panel--stupid people's version

Control Panel--stupid people's version

Control Panel--all options

Control Panel--all options

Administrative tools

Administrative tools

Some things never change... but what's up with the 200MB partition??

Some things never change... but what's up with the 200MB partition??

First UAC popup...

First UAC popup...

Second UAC popup...

Second UAC popup...

Installing Avast

Installing Avast Antivirus.

Windows services

Windows services.... there are a ton of these as usual.

Pong Service for Wireless USB??

Pong Service for Wireless USB??

Heh... Preliminary scan results show that malicious or potentially unwanted software might exist...

Heh... Preliminary scan results show that malicious or potentially unwanted software might exist...

Oh, nevermind... we're good.

Oh, nevermind... Windows says we're good now.

Shutting down... took long enough to get a delayed screenshot.

Shutting down... took long enough to get a delayed screenshot. Could have probably shot 20 more.

Stage 1 of the sloading screen

Stage 1 of the sloading screen.

Stage 2 of the sloading screen

Stage 2 of the sloading screen.

Avast has started its scan

Avast has started its scan.

1% complete... after a few minutes!!

1% complete... after a few minutes!!

Done! after about 30 minutes...

Done! after about 30 minutes...

Third UAC popup...

Third UAC popup...

Trusted publishers?

Trusted publishers? These two screens kept coming up each time I would try to update Avast's antivirus database...

The Resource Monitor.  I was doing nothing at the time.

The Resource Monitor. I was doing nothing at the time.

Activating my copy of Winders 7

Activating my copy of Winders 7

w00t.  I'm legit.

w00t. I'm legit.

Benchmarking my system.

Benchmarking my system.

My VM ranks in at a solid 1.0!

My VM ranks in at a solid 1.0!

Details, details...

Details, details...

The classic Windows theme and a buffalo butt

The classic Windows theme and a buffalo butt...

Why all the games??

Why all the games?? Why not include something a little more productive??

Miscellaneous Site Updates

I figured I should probably post something since I haven't done so yet this year. I've been making several changes to the site lately. Most of them are pretty subtle, but I hope they're useful to you. Updates include

  • You can now send an article to some friends by clicking on the "envelope" icon in the top-right corner of each article. It's a pretty simple mechanism.

  • You can save any of my articles to your hard drive for later consumption in the form of a PDF. Just click the "save" button in the top right corner of any article, and you will be able to view/save the latest revision of the respective article as a PDF. One thing to note on this, though, is that the program I use to generate the PDFs does not support the line numbers in code blocks. Sorry folks.

    For those of you who are interested, I'm using rst2pdf to generate the PDFs from my reStructuredText-based articles.

  • I've removed the calendar from the sidebar and replaced it with my newest useless side project: django-bibliophile. It allows me to share my reading progress with my visitors, because I know you all care that much. I plan on officially releasing the project in the near future.

  • Pagination has been implemented in parts of the article archive.

  • I've added an "article distribution" chart when looking at a year's blog articles.

  • Other random improvements.

Installing Slackware 12.2 On Your EeePC (701 4G, in my case)

Welcome to my second article about installing Slackware on an Asus EeePC. This is a follow-up article to the one I posted in May 2008 soon after Slackware 12.1 was released. In this article, I will assume that you're doing a fresh installation of Slackware 12.2 and that you have access to an external USB CD/DVD ROM drive.

In all honesty, the installation process is extremely similar to what I did with 12.1. However, looking back at my previous article, I realize that my steps may not have been the most useful in the world. This time around I will try to be more helpful.

Getting Slackware

The first, and most obvious step, is to get a copy of Slackware. Simply head on over to http://www.slackware.com/getslack/ and retrieve the appropriate ISO(s) using whichever method you prefer. I downloaded the DVD version of Slackware. If you download the CD ISOs, you really only need the first 3 ISOs. The remaining 3 are source packages for the binary packages you install from the first three discs. Rarely do you need the source code for these packages.

After retrieving the Slackware ISO(s), you must burn them to a disc of some sort: ISOs that are ~650MB should be burned to CDs and anything larger should (obviously) be burned to a DVD. Be sure you burn each ISO using the "burn disc image" functionality in your disc writing software--simply burning the ISO file onto the disc in a regular data session will not do what we need.

Booting The Install Disc

After you have a good copy of the installation disc (the DVD or the first of the CDs), put the disc into your CD/DVD ROM drive and reboot your computer. To ensure that your computer boots from the disc rather than the hard drive, hit F2 when you see the initial boot screen. Then go to the "Boot" tab and verify that your external CD/DVD drive takes precedence over the internal SSD. While we're in the BIOS, let's hop over to the "Advanced" tab and set "OS Installation" to "Start". This will increase the chances that your external drive will be recognized or something.... mine didn't work until I made that change. When you're all done with that, exit your BIOS, saving your changes.

The computer will reboot, and it should access your installation disc immediately after the initial boot screen disappears. Once you boot from the installation disc, you should be presented with a screen which allows you to pass some settings to the installation kernel.

The installation boot screen

To make the installation go faster, use the following boot string:

hugesmp.s hdc=noprobe

This makes it so the installation will see the internal SSD as /dev/sda instead of /dev/hdc, which also boosts the read/write times by about 13 times.

During the boot process you will be asked to specify your keyboard map. Unless you want something special here, just hit the enter key to proceed.

Partition Your SSD

Next you will need to login as root and partition your SSD. You can do this using one of the following two commands:

fdisk /dev/sda
cfdisk /dev/sda

Here are some steps in case you're not familiar with these utilities:

  1. Remove all partitions (unless you know what you're doing)
    1. fdisk: d to delete (you may have to select multiple partitions to delete if you have more than one for some reason)
    2. cfdisk: Select all partitions individually with up/down arrow keys and use the left/right arrow keys to select delete from the menu at the bottom. Hit enter to run the delete command when it's highlighted.
  2. Create one partition that takes the whole SSD (again, unless you know what you're doing)
    1. fdisk: n (for new); enter; p (for primary); enter; 1 (for the first primary partition); enter; enter (to start at the beginning of the drive); enter (to select the end of the drive)
    2. cfdisk: Select the new command with the left/right arrow keys and hit enter when it's selected. Make it a primary partition, and have it take the whole SSD (3997.49MB in my case).
  3. Set the type of the new partition to be Linux
    1. fdisk: t (for type); enter; 83 (for Linux); enter
    2. cfdisk: Use the left/right arrow keys to select the type command at the bottom and hit enter when it's selected. Choose 83.
  4. Set the new partition (or the first, if you decided to make more than one) to be bootable
    1. fdisk: a (for bootable); enter; 1 (for primary partition 1); enter
    2. cfdisk: Select the bootable command from the bottom using the left/right arrow keys. Hit enter when it's selected.
  5. Write the changes to the partition table and quit
    1. fdisk: w
    2. cfdisk: Use the left/right arrow keys to select the write command from the bottom. Hit enter when it's selected. Type 'yes' to verify your intent, acknowledging that your previous data will be "gone". Then select the quit command.

Installing Slackware

As soon as your partitioning has finished, go ahead and run setup to begin the actual installation program.

The first screen of the installation program

Since we don't have a swap partition, can jump straight to the TARGET option. Use the arrow keys to highlight this option and hit enter. Select /dev/sda1 from the list, and format it with ext2. On the EeePC, most people prefer this format since it is a non-journaling filesystem. That means fewer writes to the SSD, which supposedly translates to a longer lifetime.

After the SSD is formatted, you will be asked to select the installation source. Again, I'm assuming that you want to use your fresh Slackware 12.2 disc, but you are free to choose what you want if you know what you're doing.

Selecting the installation source

I went with the default "Install from a Slackware CD or DVD" and told it to auto scan for my disc drive. It was found at /dev/sr0.

Choosing Your Packages

Next, you are given the opportunity to tweak the package series which will be installed on your EeePC. I chose the following series: A, AP, K, L, N, TCL, X, and XAP. I planned on using XFCE instead of KDE on my EeePC simply because it is much more light-weight and still capable of what I need. If you want KDE, be sure to check the appropriate series.

Selecting the packages to install

Once you mark each of the package series you wish to install, hit the "OK" button. You'll then have to choose which prompting mode to use. I chose menu, simply to be a little more picky about which packages I wanted installed. Installation took approximately 28 minutes with my package selection and setup.

Configuring Your System

When all of the packages are done being installed, you will be presented with some other screens to finish up the installation process.

  1. Choose whether or not you want to make a bootable USB... I skipped it.
  2. Choose how you wish to install LILO. I chose simple.
  3. Choose your frame buffer mode for the console. I chose 640x480x256.
  4. Specify any optional kernel parameters. Ensure that the hdc=noprobe from earlier is here to speed up your system considerably.
  5. Specify whether you wish to use UTF-8 on the console. I chose no.
  6. Specify where to install LILO. I chose MBR.
  7. Specify your mouse type. I chose imps2.
  8. Specify whether or not you wish to have gpm run at boot, which allows you to use your mouse in the console. I chose yes.
  9. Configure your network.
  10. Give your EeePC a hostname. This can be whatever you'd like.
  11. Specify the domain for your network. This can be whatever you'd like as well.
  12. Configure your IP address information. I just chose DHCP.
  13. Set the DHCP hostname. I left this blank.
  14. Review and confirm your network settings.
  15. Choose which services you wish to have running immediately after booting.
  16. See if you want to try custom screen fonts. I usually don't bother.
  17. Specify whether your hardware clock is set to local time or UTC.
  18. Choose your timezone.
  19. Select your preferred window manager. I chose XFCE.
  20. Set the root password.

At this point Slackware has been installed on your EeePC and you can exit the setup menu and hit Ctrl-Alt-Delete to reboot your computer.

First Boot

You should now go back into your BIOS and set "OS Installation" back to "Finished", exit and save changes, and reboot again.

Slackware's default LILO boot screen

You should then see the Slackware boot screen. By default, it has a 2-minute timeout, which seems absolutely absurd to me, so we'll change that later. Just hit enter for now and watch your new Slackware boot. The first boot will usually take a bit longer than subsequent reboots because all sorts of things need to generate their first configuration file.

When your system is ready, you'll be presented with a login prompt. Just login as root, using the password you specified in the last step of the installation process.

Tweaking Your Slackware

Here are some of the first things I do when I install a new copy of Slackware:

Add An Unprivileged User

This step is very important, because one thing that sets Linux apart from other operating systems is security ;). If you run your Linux system as root all the time, you're begging for problems.

To create a new unprivileged user, I use the adduser command. It walks you through the process of creating a user. This is the user you should use to do your day-to-day computing. Only use the root user when performing system administration tasks. Trust me :)

Tell X Windows to Start Automatically

I have no problem with the command line interface in Linux. I actually enjoy it quite a bit. However, on a device such as the EeePC, not having a GUI just doesn't seem all that practical. It's also not very impressive to your potential converts when they look over your shoulder and see that your tiny gadget just displays a black and white screen when you turn it on...

So, to help ourselves be a little more productive and to impress our followers, let's tell X Windows to start up automatically when we turn on the computer. To do that, we want to edit /etc/inittab and change the following line:

id:3:initdefault:

to be:

id:4:initdefault:

You can use whatever program you feel comfortable with, such as vi or nano. The next time you reboot your computer, you should see a GUI as soon as all of the services are fully loaded.

Along with this step, I suppose we can mention the configuration of X Windows. I usually run xorgsetup as root to get things up and running. Usually there is also a bit of tweaking to get things like the scroll wheel on the mouse to function. This part in particular took quite some time for me to figure out.

Enable The Scroll Wheel on the Trackpad

Some of you might be able to live without being able to scroll a page or whatever without using the scroll feature on most mouse devices these days, but I'm not one of them. Here is my entire /etc/X11/xorg.conf file:

Section "ServerLayout"
    Identifier     "X.org Configured"
    Screen      0  "Screen0" 0 0
    InputDevice    "Mouse0" "CorePointer"
    InputDevice    "SynapticMouse" "AlwaysCore"
    InputDevice    "Keyboard0" "CoreKeyboard"
EndSection

Section "Files"
    RgbPath      "/usr/share/X11/rgb"
    ModulePath   "/usr/lib/xorg/modules"
    FontPath     "/usr/share/fonts/TTF"
    FontPath     "/usr/share/fonts/OTF"
    FontPath     "/usr/share/fonts/Type1"
    FontPath     "/usr/share/fonts/misc"
    FontPath     "/usr/share/fonts/75dpi/:unscaled"
EndSection

Section "Module"
    Load  "xtrap"
    Load  "GLcore"
    Load  "record"
    Load  "dri"
    Load  "dbe"
    Load  "extmod"
    Load  "glx"
    Load  "freetype"
    Load  "type1"
    Load  "synaptics"
EndSection

Section "InputDevice"
    Identifier  "Keyboard0"
    Driver      "kbd"
    Option       "XkbModel"  "pc104"
    Option       "XkbLayout"  "us"
EndSection

Section "InputDevice"
    Identifier  "Mouse0"
    Driver "mouse"
    Option "Device" "/dev/input/mice"
    Option "Protocol" "IMPS/2"
    Option "Buttons" "5"
    Option "zAxisMapping" "4 5"
    Option "SHMConfig" "on"
EndSection

Section "InputDevice"
    Identifier "SynapticMouse"
    Driver "synaptics"
    Option "Device" "/dev/input/mice"
    Option "Protocol" "auto-dev"
    Option "SHMConfig" "on"
EndSection

Section "Monitor"
    Identifier   "Monitor0"
    VendorName   "Monitor Vendor"
    ModelName    "Monitor Model"
EndSection

Section "Device"
        ### Available Driver options are:-
        ### Values: <i>: integer, <f>: float, <bool>: "True"/"False",
        ### <string>: "String", <freq>: "<f> Hz/kHz/MHz"
        ### [arg]: arg optional
        #Option     "NoAccel"               # [<bool>]
        #Option     "SWcursor"              # [<bool>]
        #Option     "ColorKey"              # <i>
        #Option     "CacheLines"            # <i>
        #Option     "Dac6Bit"               # [<bool>]
        #Option     "DRI"                   # [<bool>]
        #Option     "NoDDC"                 # [<bool>]
        #Option     "ShowCache"             # [<bool>]
        #Option     "XvMCSurfaces"          # <i>
        #Option     "PageFlip"              # [<bool>]
    Identifier  "Card0"
    Driver      "intel"
    VendorName  "Intel Corporation"
    BoardName   "Mobile 915GM/GMS/910GML Express Graphics Controller"
    BusID       "PCI:0:2:0"
EndSection

Section "Screen"
    Identifier "Screen0"
    Device     "Card0"
    Monitor    "Monitor0"
    DefaultDepth 24
    SubSection "Display"
        Viewport   0 0
        Depth     1
    EndSubSection
    SubSection "Display"
        Viewport   0 0
        Depth     4
    EndSubSection
    SubSection "Display"
        Viewport   0 0
        Depth     8
    EndSubSection
    SubSection "Display"
        Viewport   0 0
        Depth     15
    EndSubSection
    SubSection "Display"
        Viewport   0 0
        Depth     16
    EndSubSection
    SubSection "Display"
        Viewport   0 0
        Depth     24
    EndSubSection
EndSection

A lot of that stuff might not be necessary, but it's what works for me. Normally the process for enabling the scroll wheel is pretty easy, but something seems to have changed in this respect with the release of Slackware 12.2. I had to edit the /etc/modprobe.d/psmouse script to make this line:

options psmouse proto=imps

look like:

options psmouse proto=any

After making that change, things seemed to work a lot better.

Make LILO to Boot Faster

There are a couple tricks we can use to make LILO boot our EeePC slightly faster. The first is to add the compact option somewhere, and the second is to decrease the menu timeout.

Open up /etc/lilo.conf with a text editor of your choosing as root. Add a single line with the word compact somewhere. I put it under the line that says boot = /dev/sda so the top of lilo.conf looks like this:

# LILO configuration file
# generated by 'liloconfig'
#
# Start LILO global section
# Append any additional kernel parameters:
append="hdc=noprobe vt.default_utf8=8"
boot = /dev/sda
compact

I also changed the line that said timeout = 1200 to be timeout = 50 to make LILO only hang around for 5 seconds instead of 2 minutes.

After making these changes, we must reinstall LILO to the MBR with the new settings:

lilo -v

Here's my /etc/lilo.conf with most of the commented lines removed:

# LILO configuration file
# generated by 'liloconfig'
#
# Start LILO global section
# Append any additional kernel parameters:
append="hdc=noprobe vt.default_utf8=0"
boot = /dev/sda
compact

# Boot BMP Image.
# Bitmap in BMP format: 640x480x8
bitmap = /boot/slack.bmp
bmp-colors = 255,0,255,0,255,0
bmp-table = 60,6,1,16
bmp-timer = 65,27,0,255

prompt
timeout = 50
change-rules
reset
vga = normal
# End LILO global section
# Linux bootable partition config begins
image = /boot/vmlinuz
root = /dev/sda1
label = Linux
read-only
# Linux bootable partition config ends

Network Tweaking

While the wireless adapter seemed to work great for me out of the box this time, the ethernet adapter is still not functional. I compiled and installed the atl2 driver to solve the problem. You can get it from http://people.redhat.com/csnook/atl2/atl2-2.0.4.tar.bz2. Here are the steps I took to install it:

wget http://people.redhat.com/csnook/atl2/atl2-2.0.4.tar.bz2
tar jxf atl2-2.0.4.tar.bz2
cd atl2-2.0.4
make
cp atl2.ko /lib/modules/`uname -r`/kernel/drivers/net/
depmod -a
modprobe atl2
ifconfig

The next tweak I added for networking was to boost boot times... The DHCP address request hangs the entire boot process out of the box if you don't have an ethernet cable plugged in while booting. To remedy this problem, add the following line to the first section of your /etc/rc.d/rc.inet1.conf:

DHCP_TIMEOUT[0]="5"

This will tell your computer to continue booting if an IP address hasn't been assigned after 5 seconds of waiting.

Enable Frequency Scaling

We all like out battery to last a long time, right? Well, the EeePC 701 doesn't have the greatest battery in the world, but we can help increase the battery life by enabling the CPU frequency modules. I put this stuff in my /etc/rc.d/rc.local script:

#!/bin/sh
#
# /etc/rc.d/rc.local:  Local system initialization script.
#
# Put any local startup commands in here.  Also, if you have
# anything that needs to be run at shutdown time you can
# make an /etc/rc.d/rc.local_shutdown script and put those
# commands in there.

modprobe p4-clockmod
modprobe cpufreq_ondemand
modprobe cpufreq_conservative
modprobe cpufreq_powersave
modprobe cpufreq_performance

cpufreq-set -g ondemand -d 450Mhz -u 900Mhz

Add Your SD Card to /etc/fstab

I have an SD card that I leave in my EeePC all the time, and it's formatted with ext2 just like the internal SSD. Without this tweak, I have to mount the SD card each time I turn on the computer, which gets bothersome. My fix is to add the SD card to /etc/fstab, which takes care of mounting the device at boot.

First, you should make a directory that will be used to mount the device. I made one as such:

mkdir /mnt/sd

Now you need to determine your SD card's UUID. I started out by unmounting my SD card and taking it out of the slot. Then I executed this command:

ls /dev/disk/by-uuid

Next, I popped the SD card back in and executed that command again. The UUID that appears the second time but not the first time is your SD card's UUID.

It's time to add the magic line to your /etc/fstab. Add a line such as:

UUID=[your SD card's UUID] /mnt/sd ext2 defaults,noatime 1 1

somewhere in the file. While we're digging around in /etc/fstab, we might as well add the noatime option to the internal SSD to help reduce disk writes. Save the file and exit the editor. Then mount everything (using mount -a) or just the SD card (using mount /mnt/sd).

For posterity's sake, here's my entire /etc/fstab file:

/dev/sda1        /                ext2        defaults,noatime         1   1
UUID=30293ff4-5bee-457a-8528-ec296f099e9a /mnt/sd ext2 defaults,noatime 1 1
#/dev/cdrom      /mnt/cdrom       auto        noauto,owner,ro  0   0
/dev/fd0         /mnt/floppy      auto        noauto,owner     0   0
devpts           /dev/pts         devpts      gid=5,mode=620   0   0
proc             /proc            proc        defaults         0   0
tmpfs            /dev/shm         tmpfs       defaults         0   0

Preventing Shutdown Hangs

Sometimes the sound card seems to make Slackware hang when you're shutting down. Everything seems to turn off fine, but the little green power LED still shines bright. The solution to this problem appears to be adding the following line:

modprobe -r snd_hda_intel

to /etc/rc.d/rc.6 right before the "Unmounting local file systems." line (around line 195).

Enable Volume Hotkeys and Sleeping

Slackware 12.2 is already listening for ACPI events by default, so we just need to insert our custom stuff into /etc/acpi/acpi_handler.sh:

#!/bin/sh

IFS=${IFS}/
set $@

#logger "ACPI Event $1, $2, $3, $4, $5"

case "$1" in
    button)
        case "$2" in
            power) /sbin/init 0;;
            sleep) /etc/acpi/actions/lid.sh;;
            lid)
                if grep -q closed /proc/acpi/button/lid/LID/state
                then
                    /etc/acpi/actions/lid.sh
                fi
                ;;
            *) logger "ACPI action $2 is not defined";;
        esac
        ;;
    hotkey)
        case "$3" in
            # Fn+F2 Wireless/Bluetooth button
            # Fn+F7 Mute button
            00000013) amixer set Master toggle;;
            # Fn+F8 Volume down
            00000014) amixer set Master 10%-;;
            # Fn+F9 Volume up
            00000015) amixer set Master 10%+;;
        esac
        ;;
    *) logger "ACPI group $1 / action $2 is not defined";;
esac

And to handle the closing of the lid or pressing the sleep button, we need to create a new script in /etc/acpi/actions/ called lid.sh:

#!/bin/sh
# script by Fluxx from linuxquestions slackware forum
# discover video card's ID
ID=`/sbin/lspci | grep VGA | awk '{ print $1 }' | sed -e 's@:@/@'`

# securely create a temporary file
TMP_FILE=`mktemp /tmp/video_state.XXXXXX`
trap 'rm -f $TMP_FILE' 0 1 15

# switch to virtual terminal 1 to avoid graphics
# corruption in X
chvt 1

/sbin/hwclock --systohc

# remove the webcam module
rmmod uvcvideo

# write all unwritten data (just in case)
sync

# dump current data from the video card to the
# temporary file
cat /proc/bus/pci/$ID > $TMP_FILE

# suspend-to-ram
# (samwise) not using this it stuffs up the screen brightness
echo -n mem > /sys/power/state

# suspend-to-disk
#echo -n disk > /sys/power/state

# standby
#echo -n standby > /sys/power/state

# force on for now...
xset dpms force on

/sbin/hwclock --hctosys

# restore the webcam module
modprobe uvcvideo

# restore video card data from the temporary file
# on resume
cat $TMP_FILE > /proc/bus/pci/$ID

# switch back to virtual terminal 2 (running X)
chvt 6; sleep 2
chvt 2

# remove temporary file
rm -f $TMP_FILE

And we need to make sure the script is executable:

chmod +x /etc/acpi/actions/lid.sh

These scripts should enable us to use the mute key, the increase/decrease volume keys, and the sleep key. They should also allow us to close the lid of the EeePC to put it to sleep. Occasionally, when you wake up the computer, you will just see a blank black screen. To get around this, switch back to VT2 by using the keystroke Ctrl+Alt+F2.

Install Special Packages

Slackware comes with a lot of awesome stuff right out of the box, but it is missing some very important utilities at the same time. Included in this list, for me, is a program called wicd, or a network connectivity manager. This is similar to the "Network Manager" utility found in other mainstream distributions like Ubuntu, Fedora, and openSuSE. Slackware has yet to include such a utility by default.

Anyway, wicd can be found in the extra directory on the Slackware DVD or the 3rd (?) CD. To install it, find the package on the disc (or download it from the Internet) and execute the following command:

installpkg wicd-1.5.6-noarch-2.tgz

Be sure to check out the extra directory on the Slackware install disc. There are some neat tools in there. Some excellent resources for Slackware packages include:

There are some utilities out there to help you in your quest to resolve package dependencies. Two of the major ones that I've used in the past are swaret and slapt-get.

Using Slackware 12.2

My Slackware 12.2-powered EeePC 701 4G

I have to give the Linux kernel hackers props--the 2.6.27.7 kernel is amazingly fast! I'm sure the fact that I'm running a fairly stock Slackware installation (as opposed to something like Ubuntu) helps the speed quite a bit too. This past semester I had Linux Mint 5 (XFCE edition) installed on my EeePC, and that seemed fairly responsive. Slackware blew me away though, and I can still do everything I want to do!

The webcam and sound card work out of the box, just like the wireless. I rarely use the webcam, but it's fun to play with, and my mom appreciates seeing me on Skype occasionally. The wireless connection quality exceeds what it was with the madwifi driver I was using with Slackware 12.1 and other distros like Linux Mint. Programs are ultra speedy and responsive, even with the processor clocked at 450Mhz. I love it!!!

Boot times could be better, but I'm not too concerned with it. My setup takes approximately 50 seconds from boot to a useable desktop interface. Not horrible by any means, but perhaps not the best for a netbook when all you want to do is check your e-mail.

I would like to see the Network Manager that so many other distributions offer in Slackware some day. The wicd application is nice, but it's not nearly as intuitive as Network Manager, and it seems to be relatively limited in its capabilities in comparison. I know I'm not alone in my desire to see Network Manager included, or at least available, for Slackware. It would be tremendously beneficial in a world where wireless networking and laptops are more and more pervasive. Using the command line to adjust your wireless connection settings each time you have to hop to a new access point is just annoying.

In the end, I'm excited to have Slackware on my EeePC once again. I think it will be around for quite a while this time.

Please comment with any advice or problems that you have in regards to installing Slackware 12.2 on an EeePC.

Announcing django-smileys 0.1.0-rc1

I've released yet another absurdly useless application today. With all of my dirty finals lately, I needed something a little more leisurely to think about. I noticed that I put a lot of those funky smiley codes in my articles and whatnot, so I decided to beautify them a little by replacing the codes with emoticon images a la those silly forum sites I used to be crazy about as a kid.

It was nice to have a good 15-minute breather to work on this. Being such a quick application, I'm sure that there's a lot lacking in it. If you want more features or find a problem with it, just give me a holla and I'll try to update things.

Without any further ado, checkout the project pages:

B-)

Syntax Highlighting, ReST, Pygments, and Django

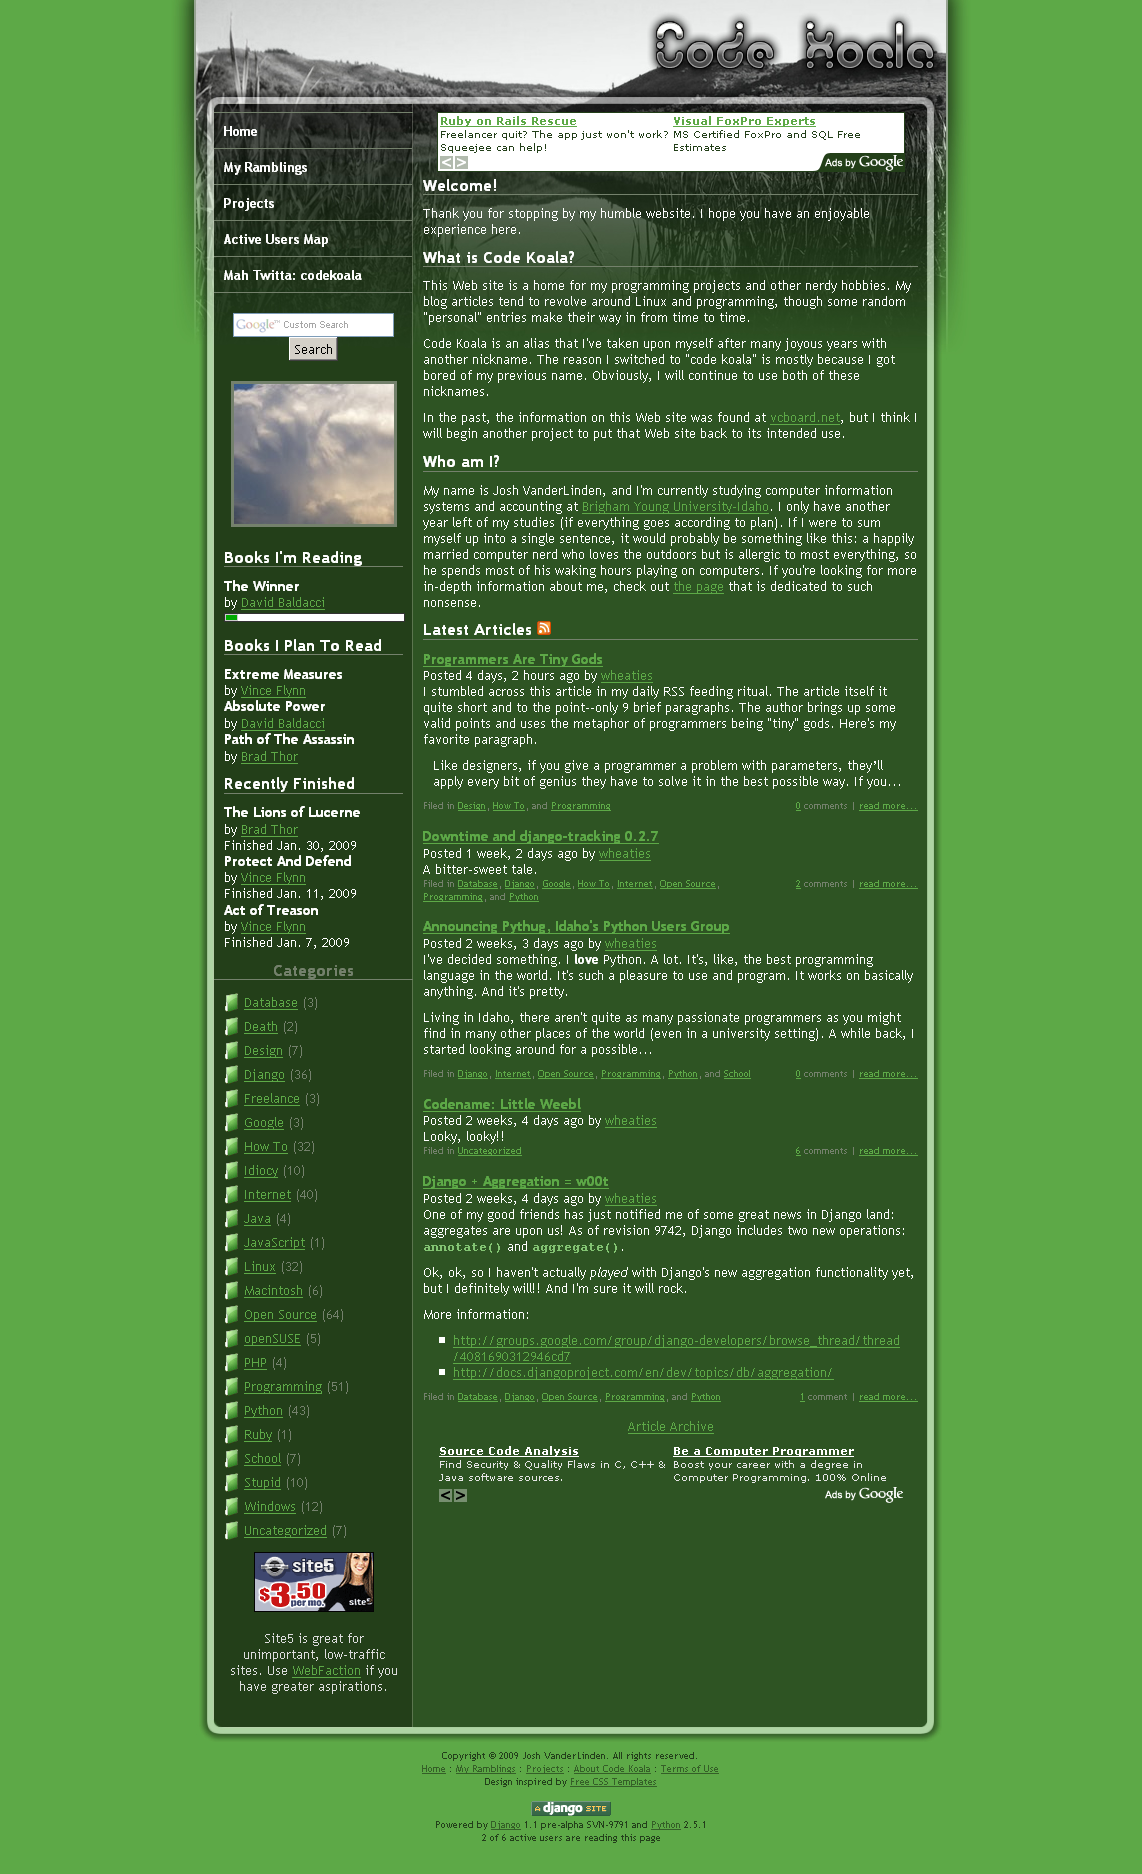
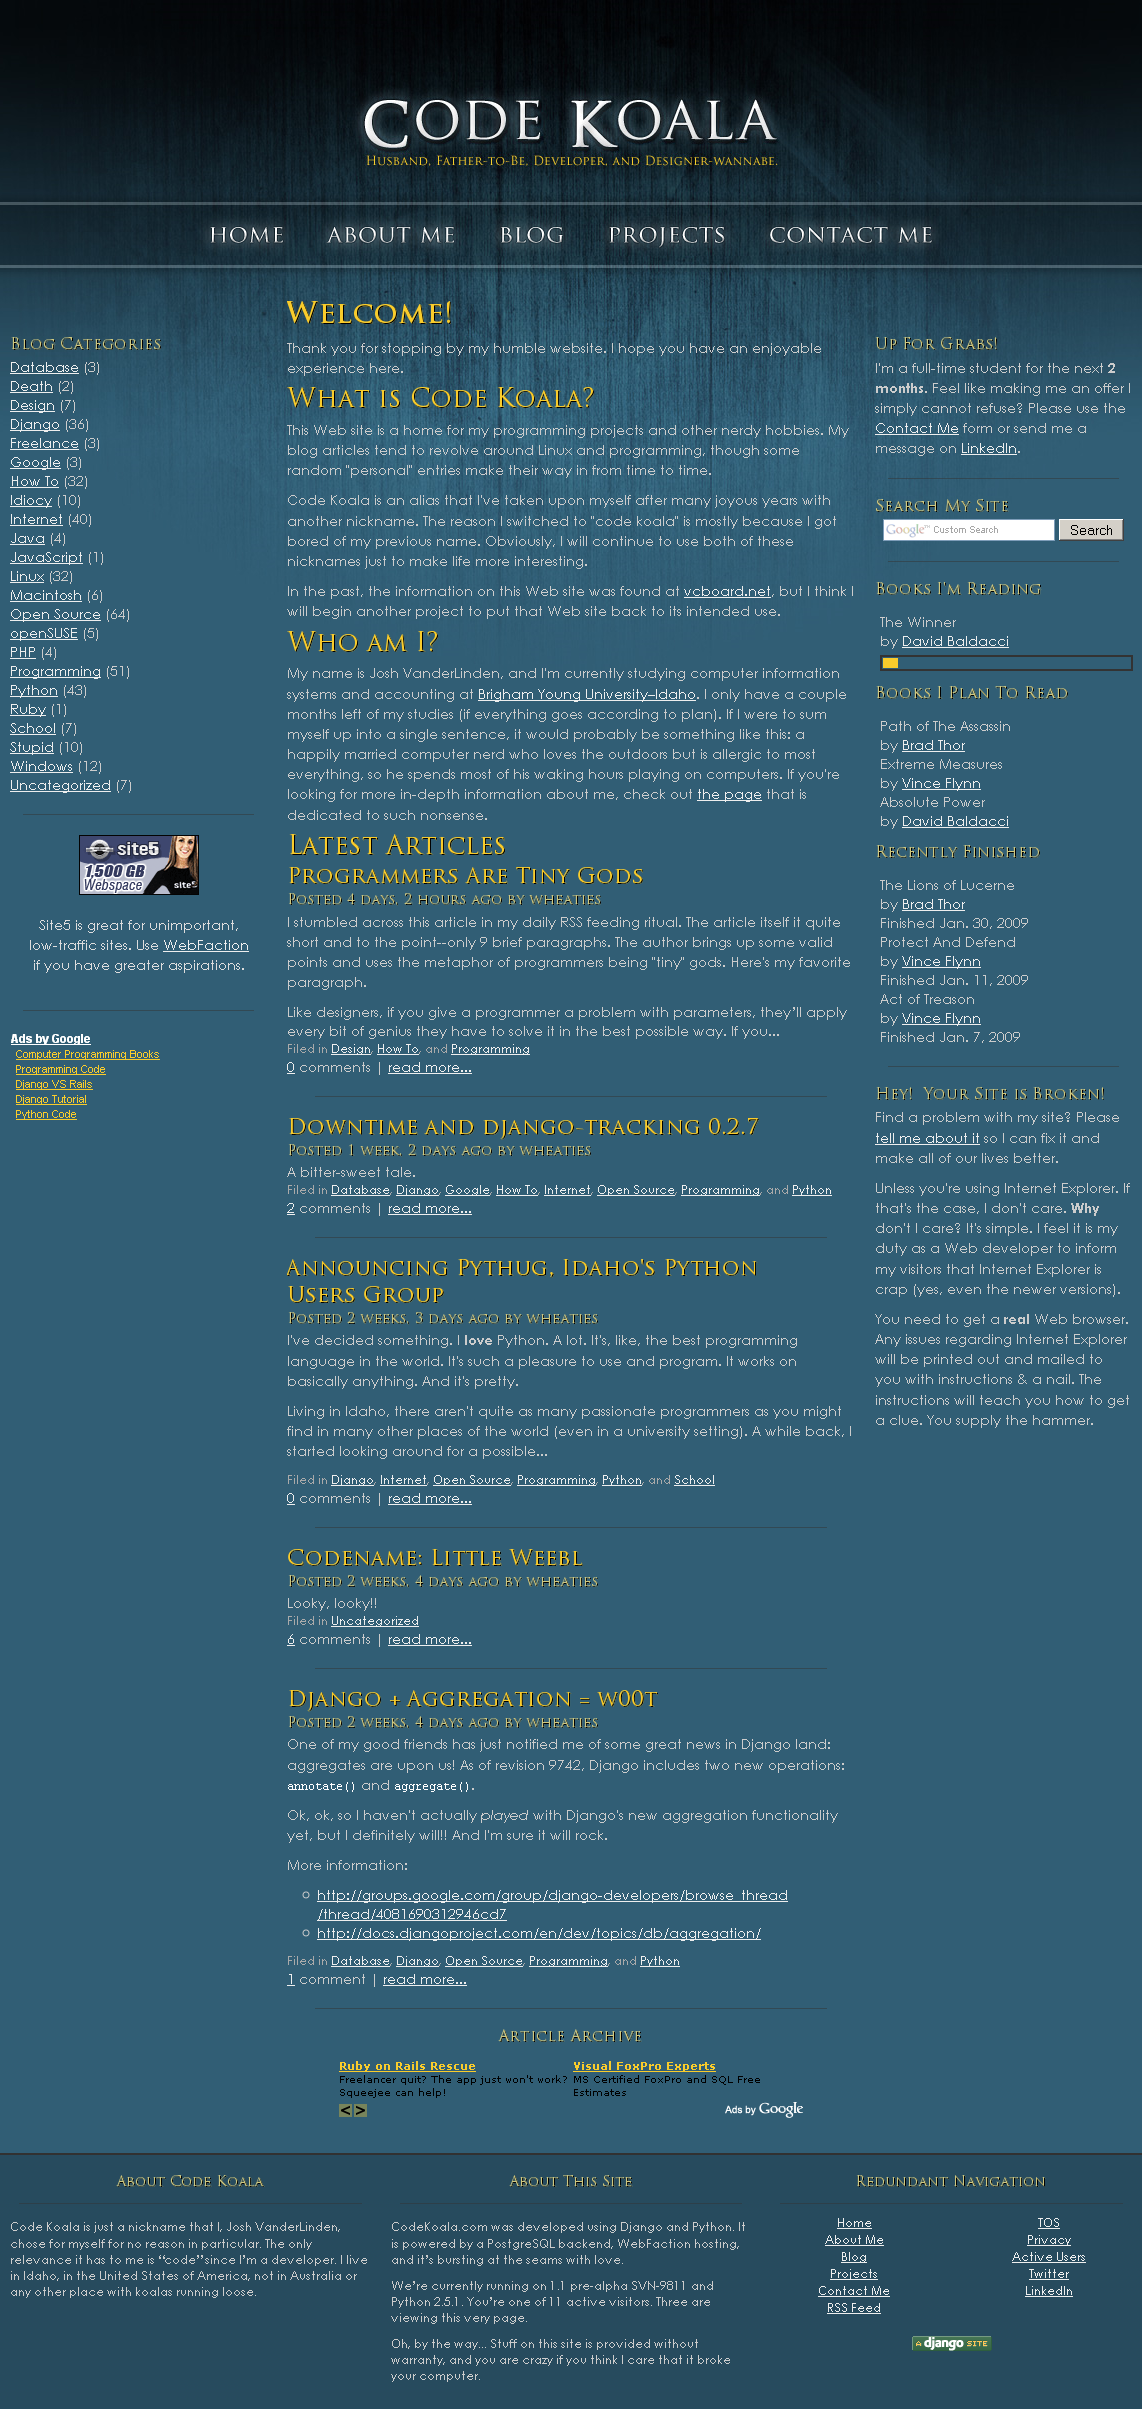
Some of you regulars out there may have noticed an interesting change in the presentation of some of my articles: source code highlighting. I've been interested in doing this for quite some time, I just never really got around to implementing it until last night.

I found this implementation process to be a bit more complicatd than I had anticipated. For my own benefit as well as for anyone else who wants to do the same thing, I thought I'd document my findings in a thorough article for how to add syntax highlighting to an existing Django- and reStructuredText-powered Web site.

The power behind the syntax highlighting is:

Python is a huge player in this feature because reStructuredText (ReST) was built for Python, Pygments is the source highlighter (written in Python), and Django is written in Python (and my site is powered by Django). Some of you may recall that I converted all of my articles to ReST not too long ago because it suited my needs better than Textile, my previous markup processor. At the time, I was not aware that the conversion to ReST would make it all the easier for me to implement the syntax highlighting, but last night I figured out that that conversion probably saved me a lot of frustration. Cascading Stylesheets (CSS) are responsible for making the source code actually look good, while Pygments takes care of assigning classes to various parts of the designated source code and generating the CSS.

So, the first set of requirements, which I will not document in this article, are that you already have a Django site up and running and that you're familiar with ReST syntax. If you have the django.contrib.flatpages application installed already, you can type up some ReST documents there and apply the concepts discussed in this article.

Next, you should ensure that you have Pygments installed. There are a variety of ways to install this. Perhaps the easiest and most platform-independent method is to use easy_install:

$ easy_install pygments

This command should work essentially the same on Windows, Linux, and Macintosh computers. If you don't have it installed, you can get it from its website. If you're using a Debian-based distribution of Linux, such as Ubuntu, you could do something like this:

$ sudo apt-get install python-pygments

...and it should take care of downloading and installing Pygments. Alternatively, you can download it straight from the PyPI page and install it manually.

Now we need to install the Pygments ReST directive. A ReST directive is basically like a special command to the ReST processor. I think this part was the most difficult aspect of the implementation, simply because I didn't know where to find the Pygments directive or how to write my own. Eventually, I ended up downloading the Pygments-1.0.tar.gz file from PyPI, opening the Pygments-1.0/external/rst-directive.py file from the archive, and copying the stuff in there into a new file within my site.

For my own purposes, I made some small adjustments to the directive over what come with the Pygments distribution. I think it would save us all a lot of hassle if I just copied and pasted the directive, as I currently have it, so you can see it first-hand.

"""
    The Pygments reStructuredText directive
    ~~~~~~~~~~~~~~~~~~~~~~~~~~~~~~~~~~~~~~~

    This fragment is a Docutils_ 0.4 directive that renders source code
    (to HTML only, currently) via Pygments.

    To use it, adjust the options below and copy the code into a module
    that you import on initialization.  The code then automatically
    registers a ``code-block`` directive that you can use instead of
    normal code blocks like this::

    .. code:: python

            My code goes here.

    If you want to have different code styles, e.g. one with line numbers
    and one without, add formatters with their names in the VARIANTS dict
    below.  You can invoke them instead of the DEFAULT one by using a
    directive option::

    .. code:: python
       :number-lines:

            My code goes here.

    Look at the `directive documentation`_ to get all the gory details.

    .. _Docutils: http://docutils.sf.net/
    .. _directive documentation:
       http://docutils.sourceforge.net/docs/howto/rst-directives.html

    :copyright: 2007 by Georg Brandl.
    :license: BSD, see LICENSE for more details.
"""

# Options
# ~~~~~~~

# Set to True if you want inline CSS styles instead of classes
INLINESTYLES = False

from pygments.formatters import HtmlFormatter

# The default formatter
DEFAULT = HtmlFormatter(noclasses=INLINESTYLES)

# Add name -> formatter pairs for every variant you want to use
VARIANTS = {
    'linenos': HtmlFormatter(noclasses=INLINESTYLES, linenos=True),
}


from docutils import nodes
from docutils.parsers.rst import directives

from pygments import highlight
from pygments.lexers import get_lexer_by_name, TextLexer

def pygments_directive(name, arguments, options, content, lineno,
                       content_offset, block_text, state, state_machine):
    try:
        lexer = get_lexer_by_name(arguments[0])
    except ValueError:
        # no lexer found - use the text one instead of an exception
        lexer = TextLexer()
    # take an arbitrary option if more than one is given
    formatter = options and VARIANTS[options.keys()[0]] or DEFAULT
    parsed = highlight(u'\n'.join(content), lexer, formatter)
    parsed = '<div class="codeblock">%s</div>' % parsed
    return [nodes.raw('', parsed, format='html')]

pygments_directive.arguments = (1, 0, 1)
pygments_directive.content = 1
pygments_directive.options = dict([(key, directives.flag) for key in VARIANTS])

directives.register_directive('code-block', pygments_directive)

I won't explain what that code means, because, quite frankly, I'm still a little hazy on the inner workings of ReST directives myself. Suffice it to say that this snippet allows you to easily highlight blocks of code on ReST-powered pages.

The question now is: where do I put this snippet? As far as I'm aware, this code can be located anywhere so long as it is loaded at one point or another before you start your ReST processing. For the sake of simplicity, I just stuffed it in the __init__.py file of my Django site. This is the __init__.py file that lives in the same directory as manage.py and settings.py. Putting it in that file just makes sure it's loaded each time you start your Django site.

To make Pygments highlight a block of code, all you need to do is something like this:

.. code:: python

    print 'Hello world!'

...which would look like...

print 'Hello world!'

If you have a longer block of code and would like line numbers, use the :number-lines: option:

.. code:: python
    :number-lines:

    for i in range(100):
        print i

...which should look like this...

for i in range(100):
    print i

That's all fine and dandy, but it probably doesn't look like the code is highlighted at all just yet (on your site, not mine). It's just been marked up by Pygments to have some pretty CSS styles applied to it. But how do you know which styles mean what?

Luckily enough, Pygments takes care of generating the CSS files for you as well. There are several attractive styles that come with Pygments. I would recommend going to the Pygments demo to see which one suits you best. You can also roll your own styles, but I haven't braved that yet so I'll leave that for another day.

Once you choose a style (I chose native for Code Koala), you can run the following commands:

$ pygmentize -S native -f html > native.css
$ cp native.css /path/to/site/media/css

(obviously, you'd want to replace native with the name of the style you like the most) Finally, add a line to your HTML templates to load the newly created CSS file. In my case, it's something like this:

<link rel="stylesheet" type="text/css" href="/static/styles/native.css" />

Now you should be able to see nicely-formatted source code on your Web pages (assuming you've already got ReST processing your content).

If you haven't been using ReST to generate nicely-formatted pages, you should make sure a couple of things are in place. First, you must have the django.contrib.markup application installed. Second, your templates should be setup to process ReST markup into HTML. Here's a sample templates/flatpages/default.html:

{% extends 'base.html' %}
{% load markup %}

{% block title %}{{ flatpage.title }}{% endblock %}

{% block content %}
<h2>{{ flatpage.title }}</h2>

{{ flatpage.content|restructuredtext }}
{% endblock %}

So that short template should allow you to use ReST markup for your flatpages, and it should also take care of the magic behind the .. code:: python directive.

I should also note that Pygments can handle a TON of languages. Check out the Pygments demo for a list of languages it knows how to highlight.

I think that about does it. Hopefully this article will help some other poor chap who is currently in the same situation as I was last night, and hopefully it will save you a lot more time than it took me to figure out all this junk. If it looks like I've missed something, or maybe that something needs further clarification, please comment and I'll see what I can do.

ReStructured Text

I've been working on updating all of my articles to use ReStructured text formatting these past couple of days. Basically ever since I started using Django on my personal sites, I used Textile formatting to make my articles look pretty, and it treated me well. However, I found myself with a few extra minutes to do some research this weekend, and the topic I happened to research was the difference between ReStructured text, Markdown, and Textile.

After my brief research into these utilities, I decided it would be worth my while to convert all of my articles and other Textile-formatted content to use ReStructured text instead. Most of this is due to personal preferences for certain conventions--very little technical reasoning came into play when I made the decision to switch (so don't ask me why I abandoned one for the other if you expect a technical pro/con list). Suffice it to say that I consider the ReST syntax to be superior to that of Textile.

In the conversion process, I realized that I wrote a whole lot more in my articles than I thought I did! It took much longer than expected, but the work is done now, and all of the articles should be updated. Most of you probably won't be able to tell much of a difference one way or another, but if you do find a problem with the formatting of any of my articles, please notify me!

Step-by-Step: Installing Django

Being the Django and Python zealot that I am, I often find myself trying to convert those around me to this awesome development paradigm. Once I break them, these people often ask me a lot of questions about Django. Over the past few months I've noticed that one of the biggest sticking points for people who are new to Django is actually getting it up and running to begin with. In response, this is the first in a series of articles dedicated to getting Django up and running.

What is Django?

The Django Web site describes Django as "a high-level Python Web framework that encourages rapid development and clean, pragmatic design." Basically, Django is just about the most amazing thing for Web development. I have tinkered with several different Web technologies, but nothing seems to even come close to what Django can do for me.

What is Python?

Python is a programming language used in numerous aspects of computing these days. It has a very simple yet powerful syntax. It's an easy language for beginners to pick up, but it provides adequate levels of power for the more experienced developers out there. If you have never programmed anything before, or you have dabbled with something like BASIC, Python should be fairly straightforward. If you are a programming veteran, but have only worked with languages like C, C++, Java, etc, you might struggle a bit with the syntax of the language. It's not difficult to overcome the differences in a couple hours of hands-on development.

Let's get started.

Installing Python...

Having Python installed is critical--Django does not work without Python. I'm guessing that you're relatively familiar with the procedures for installing software packages on your particular operating system. However, I will share a few notes to point you in the proper direction if you're lost. If nothing else, just head over to the Python download page to download anything you need to install Python. I whole-heartedly recommend using the latest stable version of Python for Django, but you should be able to get by with as early a version as 2.3.

...On Windows

Simply grab the latest version of the Python installer. It is currently version 2.5.2. Once the installer has downloaded successfully, just run through the installation wizard like any other setup program.

...On Mac OS X

Recent Mac OS X computers come with Python pre-installed. To determine whether or not you actually have it, launch the Terminal (Applications > Utilities > Terminal) and type python -c "import sys; print sys.version". If Python is already installed, you will see the version you have installed. If you have a version that is less than 2.3, you should download the newest version. If you don't have Python installed, you will get a "command not found" error. If you're in this boat, just download the latest version of the Python Universal installer and install it.

...On Linux

Most Linux distributions also have Python pre-installed. Just like with Mac OS X, you can check to see by opening up a terminal/konsole session and running the command python -c "import sys; print sys.version". If you have Python installed, you will see its version. If you get an error message when running that command, or you have a version earlier than 2.3, you need to download and install the latest version of Python.

If you're running a Debian-based distribution (like Ubuntu, sidux, MEPIS, KNOPPIX, etc), you can probably use sudo apt-get install python to get Python. If you're running an RPM-based Distribution, you can probably use something like Yum or YaST to install Python.

A sure-fire way to install Python on any Linux system, however, is to install from source. If you need to do this, you simply:

  1. download the source for the latest version of Python
  2. extract it: tar jxf Python-2.5.2.tar.bz2
  3. go into the newly-extracted directory: cd python-2.5.2
  4. configure it: ./configure
  5. compile it: make
  6. install it: make install

(I've only installed Python from source one time, so I might be wrong)

Setting Up Your PYTHONPATH...

Generally speaking, if you didn't have Python installed before starting this tutorial, you will need to setup your PYTHONPATH environment variable. This is a variable that lets Python know where to find useful things (like Django).

...On Windows

  • Open up your System Properties (Win+Break or right click on "My Computer" on your desktop and select Properties)
  • Go to the "Advanced" tab
  • Click the "Environment Variables" button
  • If you have permission to change system variables, click the "New" button in the bottom pane. Otherwise, create the PYTHONPATH variable for your user account using the "New" button in the top (User variables for [username]) pane.
  • Set the variable name to PYTHONPATH
  • Set the variable value to C:\Python25\Lib\site-packages (replace C:\Python25\ with whatever it is on your system if needed)
  • Save it

You may also need to add the python executable to your PATH. If you can successfully run python from a command prompt window, you don't need to worry about it.

If you can't run python from a command prompt, follow the procedure above, but use the PATH variable instead of PYTHONPATH. PATH most likely already exists, so you just need to append/prepend the existing value with something like C:\Python25\ (again, this might need to change depending on where you installed Python)

...On Mac OS X

Your PYTHONPATH should already be setup for you.

...On Linux

Usually you just need to edit your ~/.bash_rc script to setup your PYTHONPATH environment variable. Go ahead and open that up in your preferred text editor and make sure there's something in it like:

export PYTHONPATH=/usr/lib/python2.5/site-packages:$PYTHONPATH

Save any changes necessary and run the following command:

source ~/.bash_rc

This will take care of updating your current session with any changes you made to your ~/.bash_rc.

Installing Django

Once you have Python and have verified that you have version 2.3 or later, you are ready to install Django. Currently, the latest stable release is 0.96.1, but this is grossly out-dated. Django 1.0 will be released on September 2nd 2008, so the "unstable" copy of Django is pretty close to what 1.0 will have to offer. There are some incredibly useful improvements in the unstable version that I don't think I could do without anymore, so that's what I'll talk about installing here.

First, you need to have a subversion client. On Windows, the most popular one is called TortoiseSVN. On Mac OS X, I have played with a few, but I think Versions is a pretty decent one. Linux also has several to choose from, but if you're using Linux, you're probably going to use the command line anyway (right?).

For brevity, I will just use the subversion commands necessary to accomplish this task (instead of discussing all GUI interfaces to subversion).

The exact location that Django should be installed differs from system to system, but here are some guidelines for typical setups:

  • Windows: C:\Python25\Lib\site-packages
  • Linux: /usr/lib/python2.5/site-packages
  • Mac OS X: /Library/Frameworks/Python.framework/Versions/2.5/lib/python2.5/site-packages

If you want a definite location, run the following command:

python -c "from distutils.sysconfig import get_python_lib; print get_python_lib()"

Once you know that location, go there in your command prompt or terminal session. Then execute this command svn co http://code.djangoproject.com/svn/django/trunk/django django. You will see loads of output, showing all of the files that you are downloading as you install Django.

As soon as that process completes, you should run python -c "import django" to make sure everything worked properly. If the command doesn't display an ImportError, you're good. Otherwise, you need to try again.

Getting Access to Django Scripts...

Once you can successfully import django, you might want to make sure you can run the django-admin.py script that comes with Django.

...On Windows

This process is very similar to what we did with the PYTHONPATH environment variable earlier.

  • Open your System Properties again
  • Go to the Advanced tab
  • Click the Environment Variables button
  • Find your PATH environment variable (either for your user or system-wide)
  • Make sure that the variable value contains something like C:\Python25\Lib\site-packages\django\bin
  • Save any changes
  • Open a fresh command prompt
  • Try to run django-admin.py. If you're successful, you're ready to get started with Django. Otherwise, you need to fix your path to django/bin or just call the django-admin.py script using an absolute path when needed.

...On Mac OS X

You can run a command similar to this:

sudo ln -s /Library/Frameworks/Python.framework/Versions/2.5/lib/python2.5/site-packages/django/bin/django-admin.py /usr/local/bin

...On Linux

If you have "root" privileges on your Linux system, you can execute a command like:

sudo ln -s /usr/lib/python2.5/site-packages/django/bin/django-admin.py /usr/local/bin

If you don't have "root" privileges, you can setup your own /usr/local/bin:

mkdir ~/bin

Make sure your ~/.bash_rc contains something like:

export PATH=$HOME/bin:$PATH

Then update your current session with any changes you made to ~/.bash_rc by running this command:

source ~/.bash_rc

And that should do it! Now you should be ready to get started with Django.

Feel free to leave a comment if you're having problems installing Django. Good luck!

Check out Installing Django on Shared Hosting.

Installing Slackware 11.0 on An HP Pavilion dv8000

First of all, I have to tell everyone how great of a distribution Slackware is. I have personally sampled (meaning that I downloaded, installed, and ran for a trial period) at least 50 different distributions. It seems that, no matter how fancy a new distribution is, I always find myself returning to Slackware. I have to admit, it doesn't have a lot of the eyecandy and user-friendly features of other mainstream distributions right off the bat, but you could add them if you wanted to. Among my reasons for liking Slackware so much are:

  • It's the fastest (by default) I've used
  • Stability
  • Security
  • Educational value

Now that we have a little background as to why I like Slackware so much, let's move on to the installation, shall we? To make it a little more simple, I'm just including the notes that I took while installing.

  • Insert disc 1

  • Boot Menu: Hit enter to boot with default options

  • Select keyboard map: Enter for default US

  • Login as root

  • Check partition scheme: # fdisk /dev/hda

    Here are some useful commands to get around in fdisk:

    • p to print partition table
    • d to delete, followed by parition number
    • c to create; primary/extended; start sector; end sector
    • a to toggle bootable flag
    • w to write parition table
    • q to quit
  • # setup

  • ADDSWAP to activate swap partition

    • select your swap partition and hit ok
    • choose whether you wish to check for bad blocks while preparing the swap partition [no]
    • hit ok when your swap partition has been configured
  • Choose your root (/) parition

    • Select the proper partition from the list and hit select
    • Choose your formatting type
      • Format: Quick format with no bad block checking
      • Check: Slow format that checks for bad blocks
      • No: No, do not format this partition
      • [ FORMAT ]
    • Choose filesystem
      • ext2: Standard Linux Ext2 Filesystem
      • ext3: Ext3 Journaling Filesystem
      • reiserfs: ReiserFS Journaling Filesystem
      • [ REISERFS ]
    • Add other paritions and follow the same process as above, specifying the mount point
    • Hit ok when the partitions have been setup successfully
  • Specify whether you'd like any existing FAT or NTFS partitions to be mounted in Linux

    • [ YES ]
    • Select the partition
    • Specify the mount point
  • Hit ok when the FAT and NTFS partitions have been setup

  • Choose your installation source

    • Install from a Slackware CD or DVD
    • Install from a hard drive partition
    • Install from NFS (Network File System)
    • Install from a pre-mounted directory
    • [ CD or DVD ]
  • Choose the CD/DVD device

    • auto: Scan for the CD or DVD drive (recommended)
    • manual: Manually specify CD or DVD by device name
    • [ AUTO ]
  • Select the package sets you'd like to install and hit ok

  • Select prompting mode

    • full Install everything (3+ GB of software, recommended)
    • expert Choose individual packages from interactive menus
    • menu Choose groups of packages from interactive menus
    • newbie Use verbose prompting (and follow tagfiles)
    • custom Use custom tagfiles in the package directories
    • tagpath Use tagfiles in the subdirectories of a custom path
    • [ FULL ]
  • Specify your kernel

    • bootdisk Use the kernel from the installation bootdisk
    • cdrom Use a kernel from the Slackware CD or NFS mount
    • floppy Install a zimage or bzimage from a DOS floppy
    • skip Skip this menu (use the default /boot/vmlinuz)
    • [ CDROM ]
  • Re-insert disc 1

    • Select your kernel
    • [ /cdrom/kernels/sata.i/bzImage ]
  • Make a bootdisk

    • Create Make a Linux bootdisk in /dev/fd0
    • Skip Skip making a bootdisk
    • [ SKIP ]
  • Modem configuration [ NO MODEM ]

  • Specify whether you'd like to start hotplug/udev at boot [ YES ]

  • Install the bootloader, LILO

    • simple Try to install LILO automatically
    • expert Use expert lilo.conf setup menu
    • skip Do not install LILO
    • [ SIMPLE ]
  • Choose your frame buffer mode for LILO [ standard ]

  • Pass the kernel a parameter if you have an IDE CD/DVD-RW drive

    • [ hdc=ide-scsi ]
  • Select LILO destination

    • Root Install to superblock (not for use with XFS)
    • Floppy Install to a formatted floppy in /dev/fd0 (A:)
    • MBR Install to Master Boot Record (possibly unsafe)
    • [ MBR ]
  • Select your mouse type [ IMPS2 ]

  • Specify whether you'd like to start GPM at boot [ NO ]

  • Specify whether you'd like to configure your network

    • [ YES ]
    • Enter your hostname
    • Enter your domain name
    • Specify IP setup
      • static IP Use a static IP address to configure ethernet
      • DHCP Use a DHCP server to configure ethernet
      • loopback Set up a loopback connection (modem or no net)
      • [ DHCP ]
    • Specify DHCP parameters
    • Verify and accept network configuration
  • Specify services to start at boot time

    • rc.cups
    • rc.httpd
    • rc.mysqld
    • rc.pcmcia
    • rc.samba
    • rc.scanluns
    • rc.sendmail
    • rc.syslog
    • rc.sshd
  • Specify whether you'd like to try out some screen fonts [ NO ]

  • Specify whether your machine's clock is set to local time or UTC/GMT [ NO ]

  • Select timezone

  • Select your default desktop [ KDE ]

  • Set a root password

  • Reboot

  • Login as root

  • Add a new (normal) user: # adduser

  • Configure XWindows

    • # xorgcfg
    • save the configuration to /etc/X11/xorg.conf
  • Logout and back in as the new user

  • Bring up the GUI

    • $ startx

Begin using your system!!