Installing Arch Linux On EeePC 701 4G

I know, I know, a lot of you are asking, "Why on earth would you want to do anything with a machine that's 5 years old?!" The hardware is crap now, and it was crap when the EeePC came out. Well, my friends, that's one of the great things about Linux! It will put new life into old hardware. Granted, the EeePC 701 4G came with Linux on it and all that, but I'm talking about putting something modern on it. Regardless, this guide will hopefully be useful for others who are trying to get Linux installed using LVM that uses something like an SD card as part of the primary volume group.

I've had Arch Linux installed on my EeePC for quite a while, but I only recently began to appreciate the benefits of LVM. The key requirement for this installation was to use LVM partitioning instead of traditional partitioning. I wanted the built-in 4GB SSD and the 8GB SD card to appear as one hard drive to the operating system so I would have that much more space to actually use.

Another key requirement for this installation was that I wanted to do it using a PXE server instead of the usual USB/external CD drive method. I've used PXE servers in the past, but I never really did much with them. I wanted to use this as an excuse to learn a bit more about them.

Prerequisites

If you're following along at home, I'm assuming that you have (access to) the following:

  • An EeePC 701 4G
  • An SD card that will be a permanent fixture in your EeePC
  • A router running DD-WRT that serves as the DHCP server for your network (I am running v24-sp2). Alternatively, just use a USB/CD to install.

PXE Setup

If you want to save some time and just use a USB/CD to install Arch, go ahead and skip to the Arch Installation section.

For those who are unfamiliar with PXE servers, PXE stands for "Preboot eXecution Environment." It allows you to boot your computer over the network using images stored on a different machine. Since I didn't want to plug in my USB key or external DVD drive, this was a perfect option.

I used my main laptop as the PXE server. All I really did was install atftp from the AUR, copy ipxe.pxe from the Arch Linux Netboot page (from the "Using an iPXE image" section), and put it in /var/tftpboot. After that, it was a matter of running atftpd:

rc.d start atftpd

The next step required tweaking the dnsmasq configuration on my router. Here's what I did:

  • Login to router

  • Go to the Services tab

  • Find the DNSMasq section (mine is already enabled for other purposes, so I assume you will want to make sure yours is enabled)

  • In the "Additional DNSMasq Options" box, make sure you have something like:

    dhcp-boot=ipxe.pxe,[your PXE server's name],[your PXE server's IP]
    
  • Apply the changes. I rebooted my router just to be sure.

That's all there really is to the PXE side of things.

EeePC Setup

You'll want to make sure that booting from the network is enabled in your BIOS. I'll post a list of my BIOS settings later.

Then you should be able to boot your EeePC from the network. If your EeePC isn't configured to boot from the network first, you can simply hit Escape while the BIOS POST screen is still showing and select it from the menu that appears.

If all goes according to plan, your EeePC should receive an IP address and download the boot images from your PXE server. Once you select the appropriate Arch Install option from the menu, it should go out and download the ISO and boot it up. It's pretty neat to see in action. Maybe one day I'll try to tweak this to use an ISO image that's available on the local network instead of downloading it from the Internet every time.

Arch Installation

Installing Arch Linux should be fairly simple if you follow the installation guide (which is also available during installation these days at /root/install.txt). The key thing to remember, if you want to use the built-in SSD and a permanent SD card as one hard drive, is to use LVM partitioning.

LVM Partitioning

The Arch Linux LVM guide will likely be an invaluable resource if you're new to LVM. Here I will simply give a short list of commands that I think I used to get my EeePC setup (I did this several days ago, so I might miss something along the way...sorry)

It's important to note that, while it's supposedly possible, I've never had any luck keeping my boot partition in an LVM setup. As such, I first partition my SSD and SD cards using fdisk. There are plenty of resources for fdisk and cfdisk out there, so I'll skip over the specifics of how to use each one and just give you an idea of what needs to be done.

  • Wipe all partitions from both /dev/sda (the SSD) and /dev/sdb (the SD card)
  • Create a 50-100MB primary partition at the beginning of /dev/sda. Mark it as bootable. Set the partition type to 83 (Linux).
  • Create another primary partition on /dev/sda that consumes the remaining disk space. Set the partition type to 8e (Linux LVM).
  • Create a primary partition on /dev/sdb that consumes all space on the SD card. Set the partition type to 8e (Linux LVM).

Now that we have some "Linux LVM" partitions to deal with, we can begin using LVM. Each partition we wish to use (both /dev/sda2 and /dev/sdb1) needs to be configured as an LVM "physical volume":

pvcreate /dev/sda2
pvcreate /dev/sdb1

Next, we create an LVM volume group that uses both of our physical volumes:

vgcreate vg0 /dev/sda2
vgextend vg0 /dev/sdb1

Lastly, create the LVM logical volumes. It's up to you how you setup your partitions, but I chose to create a swap partition (since my EeePC only has 512MB RAM) and a root partition. To create a swap partition, you simply do something like this:

lvcreate -C y -l 1G vg0 -n swap

And here's what the arguments mean:

  • -C y: make the partition contiguous
  • -l 1G: number of logical extents to allocate for the new logical drive
  • vg0: the name of the volume group we created earlier
  • -n swap: the name of the new logical volume

I created my root partition to fill the remaining space in the volume group as follows:

lvcreate -l +100%FREE vg0 -n root

Then it's just a matter of formatting your partitions. I'm not up-to-date on the debate regarding which FS is ideal for solid state media, so I just chose ext2:

mkfs.ext2 /dev/sda1
mkfs.ext2 /dev/mapper/vg0-root
mkswap /dev/mapper/vg0-swap

It's probably worth noting that you now have several ways to reference your newly-created LVM volumes. Here are my favorites:

  • /dev/[volume group name]/[volume name]
  • /dev/mapper/[volume group name]-[volume name]

Install Arch

I really don't want to duplicate the Arch Linux installation guide, so I'll just leave you to follow along there. Go ahead and mount your new partitions, pacstrap everything you want, and arch-chroot your heart away. But you might want to come back before you exit the chroot, otherwise your EeePC might not boot and you'll have to waste some time trying to figure out why.

Help The EeePC Boot With LVM

Before you reboot, you'll probably want to modify your /etc/mkinitcpio.conf to let your EeePC understand your LVM setup. The two key lines are MODULES and HOOKS. Here's what I have:

MODULES="usb-storage scsi-mod sd-mod libata usbcore uhci-hcd ehci-hcd"
HOOKS="base udev autodetect pata scsi sata lvm2 filesystems usbinput fsck"

The key here is to ensure that lvm2 appears before filesystems in your HOOKS list. Also, you want to load some modules to allow the SD card to be detected before the LVM hook attempts to find your partitions. I'm not sure if you need all of those modules, but they worked on the first try for me. To make the changes useful, rebuild your boot images:

mkinitcpio -p linux

To go along with detecting your SD card at boot, you want to give it enough time to settle before LVM tries to use it. In my case, 3 seconds is sufficient, so I added this to my /boot/syslinux/syslinux.cfg:

lvmwait=/dev/vg0/root rootdelay=3

You should be able to add that to the APPEND lines in your syslinux.cfg or the kernel line in your GRUB configuration file. Or whatever it is with GRUB these days.

Also, while you're editing your bootloader configuration, be sure to change the root partition to /dev/vg0/root (or whatever you chose when you did your LVM partitioning). The default syslinux.cfg includes root=/dev/sda3, so I just changed that to root=/dev/vg0/root. Most bootloaders allow you to modify the boot line before you actually boot into Linux if you forgot this step.

Tweak Arch

I'll leave you to install and configure the packages that you find useful. I plan on using my EeePC as a jump box into my home network, so it doesn't need a GUI of any sort. Just OpenSSH and some other goodies.

You might also be interested in my previous article about bonding eth0 and wlan0 now that you have Arch on your EeePC though!
Bonding eth0 and wlan0 on Arch Linux

Bonding eth0 and wlan0 on Arch Linux

Yesterday at work, a couple of my coworkers were trying to bond two ethernet ports on a Synology NAS. For whatever reason, this made me want to play with bonding network interfaces on my own computers. So I began trying to come up with a good reason to use valuable time to play with interface bonding.

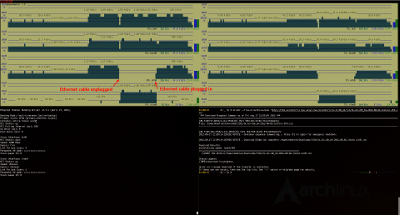
One thing that has always driven me nuts about laptops is that connections are severed when I have to unplug my ethernet cable and take the laptop elsewhere. It never seemed to matter if I was using NetworkManager or anything else--connections were dropped, and the resulting annoyances ranged from minor to much rage. Having Pidgin drop connections and reconnect was a minor annoyance. Downloading a 4.2GB linux ISO and having the connection cut at 96% caused much rage.

Anyway, I decided to see if I could use bonding to reduce the frustration with such situations. Since my laptop is usually plugged into the ethernet, I wanted to use eth0 as my primary interface. It's faster and more reliable than wireless. When my ethernet connection fails, for whatever reason, I wanted it to fall back to wlan0. Ideally, things like downloads or streaming music/movies would continue uninterrupted.

Furthermore, I wanted my KVM to be able to use the bonded interfaces inside of my virtual machines. This called for a bridge.

To quickly see this in action, check the videos below!

Software

I configured this on a relatively new Arch Linux installation. Here's the software I used:

  • linux: 3.4.8-1
  • initscripts: 2012.08.2-1
  • netcfg: 2.8.9-1
  • netcfg-bonding: 1.5.1-1
  • ifenslave: 1.1.0-7
  • bridge-utils: 1.5-1

Configuration

The first thing you need to do to get this working, after installing all of the above packages, is load the bonding kernel module. In my particular case, as I mentioned earlier, I wanted to use eth0 when available and use wlan0 otherwise. As such, I used the active-backup bonding mode. If you're interested in the other bonding modes, I would suggest reading up on bonding. I'm pretty new to all of this bonding magic, so I can't guarantee that I'll be of any use if you don't follow my instructions :)

Back to configuration. I placed my bonding configuration in /etc/modprobe.d/bonding.conf. The only thing that may not be self-explanatory is the miimon setting. I learned from this bonding article that this option "specifies the MII link monitoring frequency in milliseconds." In other words, this is how often the system will check to see if a failover is necessary.

/etc/modprobe.d/bonding.conf

options bonding mode=active-backup
options bonding miimon=100
options bonding primary=eth0

After creating that file, you simply insert the module into the kernel:

modprobe bonding

To get bonding to work when you reboot your machine, you should either add bonding to your MODULES array in /etc/rc.conf or, if you're using more recent initscripts stuff, place a file in /etc/modules-load.d. I chose the latter solution.

/etc/modules-load.d/bonding.conf

bonding

Next, you must create some network profiles for netcfg. Prior to this bonding project, I had been using wicd or networkmanager to handle most of my networking needs. It seems like a bad idea to try using either of these, or the standard network daemon even, if you plan to use a configuration similar to what follows. Just FYI.

I created a network profile for the bonded interfaces as such:

/etc/network.d/bonded

CONNECTION="bonding"
INTERFACE="bond0"
SLAVES="eth0"
IP="dhcp"
DHCP_TIMEOUT=10
SLAVE_TIMEOUT=5

Notice that wlan0 isn't in the SLAVES list. This is because I also have a network profile for my home wireless connection to handle the authentication and whatnot:

/etc/network.d/home

CONNECTION="wireless"
DESCRIPTION="Home connection"
INTERFACE="wlan0"
SECURITY="wpa"

ESSID="wouldntyouliketoknow"
KEY="derpies"

IP="static"
IFOPTS="0.0.0.0"
PRE_UP="ifenslave bond0 wlan0"
PRE_DOWN="ifenslave -d bond0 wlan0"

I have one more network profile for the bridged interface that allows my KVM guests to live on the same network as everything else. If you're not using KVM or don't want a bridged interface, you don't need this one.

/etc/network.d/br0

INTERFACE="br0"
CONNECTION="bridge"
DESCRIPTION="KVM Bridge Connection"
BRIDGE_INTERFACES="bond0"
IP="dhcp"
POST_UP="brctl setfd br0 0"

Finally, I added these profiles to my /etc/conf.d/netcfg:

NETWORKS=(bonded home br0)

Again, if you don't need a bridged interface, you don't need to include the br0 profile in there.

You may or may not want to test your individual network profiles by doing something like:

netcfg -u home # try to bring the profile up
netcfg -d home # bring the profile down

If you have problems connecting to your wireless access point, I suggest tweaking and testing your profile until it works. If you use MAC address filtering for wireless security on your router, you might want to make sure that the MAC of your ethernet interface is in the list of permitted MAC addresses. When you setup bonding, all of the bonded interfaces seem to share the same MAC.

Try It Out

Pretty much all that's left is starting up the new network configuration! To do this, first make sure your previous networking daemon is turned off. For example, you might run one of the following commands:

rc.d stop network
rc.d stop wicd
rc.d stop networkmanager

Once you've done that, you simply run:

rc.d start net-profiles

If your setup is anything like mine, you might see ifconfig output similar to this (notice that my MAC addresses have been changed, but that they're identical for bond0, br0, eth0, and wlan0):

bond0: flags=5443<UP,BROADCAST,RUNNING,PROMISC,MASTER,MULTICAST>  mtu 1500
        ether 00:24:be:00:24:be  txqueuelen 0  (Ethernet)
        RX packets 7318719  bytes 8578112000 (7.9 GiB)
        RX errors 0  dropped 33241  overruns 0  frame 0
        TX packets 3404477  bytes 3562828808 (3.3 GiB)
        TX errors 0  dropped 0 overruns 0  carrier 0  collisions 0

br0: flags=4163<UP,BROADCAST,RUNNING,MULTICAST>  mtu 1500
        inet 192.168.128.55  netmask 255.255.255.128  broadcast 192.168.128.127
        inet6 fe80::224:beff:fec7:9895  prefixlen 64  scopeid 0x20<link>
        ether 00:24:be:00:24:be  txqueuelen 0  (Ethernet)
        RX packets 4759641  bytes 4771378631 (4.4 GiB)
        RX errors 0  dropped 0  overruns 0  frame 0
        TX packets 2119926  bytes 3491247232 (3.2 GiB)
        TX errors 0  dropped 0 overruns 0  carrier 0  collisions 0

eth0: flags=6211<UP,BROADCAST,RUNNING,SLAVE,MULTICAST>  mtu 1500
        ether 00:24:be:00:24:be  txqueuelen 1000  (Ethernet)
        RX packets 7243938  bytes 8512402737 (7.9 GiB)
        RX errors 0  dropped 0  overruns 0  frame 0
        TX packets 3388055  bytes 3561344335 (3.3 GiB)
        TX errors 0  dropped 0 overruns 0  carrier 0  collisions 0
        device interrupt 18

lo: flags=73<UP,LOOPBACK,RUNNING>  mtu 16436
        inet 127.0.0.1  netmask 255.0.0.0
        inet6 ::1  prefixlen 128  scopeid 0x10<host>
        loop  txqueuelen 0  (Local Loopback)
        RX packets 338869  bytes 263959385 (251.7 MiB)
        RX errors 0  dropped 0  overruns 0  frame 0
        TX packets 338869  bytes 263959385 (251.7 MiB)
        TX errors 0  dropped 0 overruns 0  carrier 0  collisions 0

virbr0: flags=4099<UP,BROADCAST,MULTICAST>  mtu 1500
        inet 192.168.122.1  netmask 255.255.255.0  broadcast 192.168.122.255
        ether 36:11:59:de:92:73  txqueuelen 0  (Ethernet)
        RX packets 0  bytes 0 (0.0 B)
        RX errors 0  dropped 0  overruns 0  frame 0
        TX packets 0  bytes 0 (0.0 B)
        TX errors 0  dropped 0 overruns 0  carrier 0  collisions 0

wlan0: flags=6211<UP,BROADCAST,RUNNING,SLAVE,MULTICAST>  mtu 1500
        ether 00:24:be:00:24:be  txqueuelen 1000  (Ethernet)
        RX packets 74781  bytes 65709263 (62.6 MiB)
        RX errors 0  dropped 33241  overruns 0  frame 0
        TX packets 16422  bytes 1484473 (1.4 MiB)
        TX errors 0  dropped 0 overruns 0  carrier 0  collisions 0

Also, if you haven't been using netcfg already, you will probably want to update your DAEMONS array in /etc/rc.conf. Again, be sure you disable your previous networking daemon (if necessary) by placing a ! before the daemon's name (or just remove it from the array). Then add net-profiles into the array somewhere, probably closer to the beginning of the array.

Hopefully that works for you! Please share your experiences (both good and bad) in the comments! If you run into troubles, I will try to be of use, and hopefully others will chime in too.

Videos

Here are a couple of videos for those of you who are interested. The first is a lower-quality, but maybe easier-to-read-on-small-screens video. The second is just shy of 1080p size-wise.

My Fedora 11 Adventures: Part III

Alrighty folks. Good night's rest? Check. Need to get work done? Check. Today's adventure will be about getting my computer set up for the regular development tasks that I need to do every day for my work and hobbies.

Getting Work Done

The first thing I noticed this morning when I turned on my computer was that it took exactly 1 minute from the time I hit the power button to the time I hit the enter key to log into my computer. Logging in took an additional 15-20 seconds. That was quite nice.

The next thing I noticed was that I was not connected to my network as I should be. Clicking the system tray menu item as I did last night did the trick, but I'm going to have to investigate how to make it connect automatically at boot.

Automatic Network Connectivity

It looks like I can have my Ethernet be activated automatically by right clicking on the network manager icon in my system tray, selecting "Edit Connections," selecting "System eth0," clicking the "Edit" button, and finally checking the "Connect automatically" option in the subsequent window. We'll see if this truly activates my connection next time I boot.

In an effort to get my wireless working, I poked around a little more in the "Edit Connections" screen, but I didn't see anything that seemed useful. I did find something that seemed a bit more interesting by selecting Applications > Administration > Network Configuration from the KDE menu. This utility suggested that my wireless adapter was actually wlan1 instead of the wlan0 that the tray icon seemed to think it was.

I tweaked a few settings about my wireless adapter, such as marking the "Activate device when computer starts" and "Allow all users to enable and disable the device." In the Hardware Device tab, I selected my actual Broadcom wireless adapter instead of the non-existant wlan0. I also hit the probe button next to the "Bind to MAC address" box.

My network manager tray icon still shows no wireless networks (of which there is no shortage around here), and running iwlist scan as root says "Network is down" next to wlan1. I think I will just mess with it later. Maybe it will "just work" when I reboot next time.

Installing/Configuring The Tools

As I previously mentioned, I prefer to use things that work well without getting in my way. When talking about text editors, VIM is just fine for me, and VIM 7.2.148 is already installed on my Fedora 11. One less thing to install.

Next up comes the installation of all of the goods for Firefox. It turns out that Fedora comes with Firefox 3.5 Beta 4--a bold move. I hope my extensions all work! The extensions I will be installing right now include:

  • AdBlock Plus: get rid of pesky ads that slow down my computer
  • Firebug: an amazing tool when debugging Web pages
  • Web Developer: has some niceties that Firebug doesn't come with
  • Screengrab: fantastic for taking screenshots of full Web pages
  • 2Zeus: my own little extension that allows me to quickly get short URLs a la tinyurl.com and is.gd

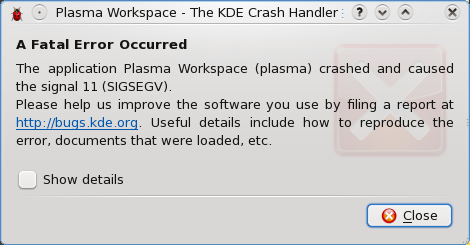
When I plugged in my external 1TB Seagate hard drive, I got a delicious Fatal Error message:

/images/fedora/p3/fatal_error.png

All appears to be in order, however, as I have access to all of the partitions on the external drive.

Next I want to install Opera. It appears that the place to look is Applications > System > Software Management in the KDE menu. Let's see what we have. Searching for Opera in the only obvious search box sent my computer into a crazy "let me do something without telling you" cycle. I have no idea what's really going on, but my processor has been maxed out for the past 3 minutes and my network has been working a little here and there. Can it really be that difficult to find a simple package? Oh! It finished! It took 6 minutes and 54 seconds to find nothing. Excellent. Let me look somewhere else.

Awesome. My computer is non-responsive. The hard drive is still working, but my GUI is doing nothing. I love it. Attempts to drop back to a trusty console using Control, Alt, and F1-F6 rendered no results. I wonder if I can SSH in from here... I sure can! Fantastic. Let's see what's happening.

It appears that X is taking up 90% of my processing power, but my computer is still not responding to any of my input. Dang it! Now my SSH session isn't working. Looks like the only option I have now is to do a hard reset. Joy of joys. Thank you for this opportunity, Fedora. Last time I did a hard reset, I was in Windows and it trashed my 1TB external.

So far rebooting seems to be going well. I wonder if my network will be setup properly still... Fantastic! It works! Wireless is still not available though. I can live without that for the time being.

Back in the Software Management utility, searching for Opera again proved to work much more quickly, but I didn't get any results. I suppose I'll just go download it from their site. The download for Opera 10 beta 1 is a mere 7.2MB, and it looks like it will open in the same Software Management utility that I've been dinking around in.

When I downloaded the Opera package, I asked it to open directly in the default program, KPackageKit. That doesn't seem to be working in the least, so I am going to try to just save it to my home directory and install it some other way. Sorry guys and gals, I ended up just dropping back to a terminal to run rpm -Uvh opera-10.00-b1.gcc4-shared-qt3.x86_64.rpm and that seemed to work fine. Opera appeared in my KDE menu, and it runs well now.

Next up is Pidgin. Pidgin 2.5.5 is installed by default, and getting it up and running was as trivial as ever.

Now to test Flash... YouTube, here I come!! Beh, Flash is not installed by default, and it's also not in the Software Management tool. What use is that thing?! Maybe if I apply all of the updates in the "Software Updates" section it will feel more useful... Here it goes.

Cool. System is unresponsive again. Let's see if I can reboot from here. Nope! Thank you, Fedora, for making me hard reset my system more in 2 hours than I have had to in YEARS. Yeah, thanks buddy.

10:50 AM So the software updates continue to not work. It appears that a ypbind package is the culprit which is causing everything to hang... I disabled it and tried to install the software updates again.

10:53 AM GUI is non-responsive again. Yay.

10:56 AM Third hard reset in 3 hours. Maybe I will have to modify my original parameters and try GNOME to see if that makes the computer usable for more than an hour at a time.

11:00 AM That's it! I'm getting rid of KDE 4... sorry folks, GNOME is my only hope of getting work done. Second clean shutdown out of 5 since the installation completed last night.