My VIM Adventures

Along with my recent adventures with Fedora 11, I decided to force myself to become more proficient with VIM. For those of you who do not know, VIM is based on perhaps one of the oldest surviving text editors around today. There are often religious-grade battles between those who believe in VIM and those who believe in Emacs, another long-surviving text editor. I'm not trying to get into any debates about which is better, and I'm not interested in why I should not be using VIM. If you still feel like I need to be set straight, please use the contact me form instead of the comments section.

Anyway, most people who use these editors fall into 1 of 3 categories (there are probably more categories actually):

  1. They're familiar with it enough to get the job done, but they're not exactly proficient. Therefore, they don't care about evangelizing the editor.
  2. They're proficient with the editor, but they're afraid of the politics involved in religious wars relating to text editors, so they don't evangelize.
  3. They're proficient with the editor and feel that the whole world would be better off if everyone used their preferred text editor. As such, they cannot shut up about the dang thing and drive all of their friends, coworkers, and acquaintances mad.

A few of you will probably agree with what I'm about to say. I fear I have transitioned from stage 1 to stage 3 fairly rapidly. I can't stop talking about VIM all of the sudden! You'd think it's the next best thing after sliced bread the way I've been blabbering about it. And here I am, writing an article about it. Hah.

Ever since I first started using Linux, I have been using vi to handle most of my text editing when I was in a terminal. I knew enough to get around. Basic things like navigation and inserting text were pretty much all I knew how to do. I dabbled with a tutorial here and there, but it wasn't long before the things I learned were lost, since I usually preferred a graphical text editor over VIM.

My recent experimentation with VIM has proved to be very fruitful, if I do say so myself. I am no longer tied down to some editor that is slow and bulky, I don't have much to worry about when I switch computers (chances are that VIM is on any computer I use regularly), and I don't even need to be sitting at the computer I'm using VIM on! In fact, today I was doing most of my work over an SSH session to my netbook. I felt more productive today than I have in a very long time.

It's been a long time since I've enjoyed using a mouse to perform basic tasks on my computer. Using VIM allows me to rid myself of the mouse entirely for my text editing tasks, and I don't feel at all limited in my capabilities. Things that used to be quite sketchy operations using my favorite graphical editors end up being very simple with VIM.

I also love the obscurity favor of it all.

Examples

I wish I could just keep adding stuff to this list! There are so many neat things I want to share with everyone about VIM! I'm sure there are more efficient ways to do some of the things I have been learning with VIM, but this works very well for me.

Laziness

I do a lot of reStructuredText for various things. In fact, I'm writing this article using VIM right now. ReST is fantastic, but it's horrible to do using an editor that is not set up with a mono spaced font. I like to see things nicely lined up (I'm a Python developer, after all). I also like to have my section headings have an underline that is as long as the heading itself. For example, the heading just above this looks like this:

Examples
========

In this particular instance, it's not a big deal to hold down the equals key long enough to underline the word "Examples". However, sometimes I get some pretty lengthy section titles. The lazy side of me doesn't want my finger to hang around on the same key for very long (or tap it dozens of times, for that matter). Also, trying to figure out how many characters are in a section title without a mono spaced font is very annoying.

The/a solution? Say I have a section heading that is 50 characters long. To underline it, all I have to do is type 50i= and hit the escape key.

Cutting Text Mid-Line

Another neat thing is being able to cut text from the cursor to a particular character somewhere later on (or earlier on!) in the same line. Say I have a hyperlink whose address I wish to change:

<a href="http://www.somelong.com/that/I/want/to/change/">Link Text</a>

Instead of using the mouse to highlight the href attribute's value (or highlight it using shift on the keyboard), I just position my cursor on the h in http and type dt". VIM will lop that address right out of there (and you can paste it elsewhere if you'd like). I used this particular shortcut countless times today as I replaced things like {% url some-named-url with,some,parameters %} with {{ some_object.get_absolute_url }} in some Django templates.

Search & Replace

And I cannot neglect the classic search and replace functionality in VIM. You can use fancy regular expressions in VIM to replace some text with something else. I was trying to do a little refactoring today, and I came up with a command like this:

:s/something/lambda (a,b,c): \0(a,b,c)/g

That sort of command works great to replace all occurrences of "something" on the current line with "lambda (a,b,c): something(a,b,c)". Fantastic. What about a global search and replace, instead of just the current line? Stash a % at the front of the command (:%s/something/lambda (a,b,c): \0(a,b,c)/g) and you're in business.

Now what if you only wanted to perform that search and replace over a certain group of lines instead of a single line or the whole file? This is one I'm particularly thrilled about:

:.,.+9 s/something/lambda (a,b,c): \0(a,b,c)/g

That little beauty will perform the search and replace on the current line and the following 9 lines. How awesome is that?

Moving & Deleting Words

Sometimes as I am writing something, I decide I would like to reword a sentence as I near the end. Sometimes this involves simply deleting a word or two. Sometimes it means chopping a few words out of the beginning part of a sentence to put them back at the end somewhere. Whatever the case, VIM seems to handle my needs perfectly well.

Say I have this sentence (from the Vimperator Web site): "Writing efficient user interfaces is the main maxim, here at Vimperator labs." If I want to move the "here at Vimperator labs" to the beginning of the sentence, assuming I just finished typing it, I would place my cursor over the period at the end, type dT,, hit ( to go to the beginning of the sentence, hit P to insert what I just copied, and then handle the rest of the clean up (capitalization, fixing the comma, etc). I could have also done something like, 4db instead of dT,.

If I want to cut/delete an entire word, or to the end of whatever word my cursor is currently on, I could use dw. For more than one word, just put a number before the command. It's great stuff!

Taking It Too Far

I've gotten so carried away with all of this VIM business. I really have. I installed vimperator in Firefox. This extension gives Firefox a VIM-like interface. Now I can do pretty much all of my regular surfing without using the mouse. Some may argue that this is absolutely impractical because it would take much longer to get to the right link on a page using the keyboard than it would with the mouse. That may be true. I dunno, but I still think it's awesome that I really don't need my mouse to browse the Internet now.

As I was playing with vimperator tonight, one of my buddies pointed out another useful extension called It's All Text. This extension allows you to use your preferred text editing program in regular old text boxes in Firefox. It is this extension which has just made writing my blog articles 200x more efficient. Now I can quickly and easily write my articles right here in VIM without having to copy and paste all over the place. Pretty dang incredible.

Oh yes, I'd like to thank Chad Hansen and Jonathan Geddes for helping me out as I explore the depths of VIM. You guys rock!

Installing Slackware 12.2 On Your EeePC (701 4G, in my case)

Welcome to my second article about installing Slackware on an Asus EeePC. This is a follow-up article to the one I posted in May 2008 soon after Slackware 12.1 was released. In this article, I will assume that you're doing a fresh installation of Slackware 12.2 and that you have access to an external USB CD/DVD ROM drive.

In all honesty, the installation process is extremely similar to what I did with 12.1. However, looking back at my previous article, I realize that my steps may not have been the most useful in the world. This time around I will try to be more helpful.

Getting Slackware

The first, and most obvious step, is to get a copy of Slackware. Simply head on over to http://www.slackware.com/getslack/ and retrieve the appropriate ISO(s) using whichever method you prefer. I downloaded the DVD version of Slackware. If you download the CD ISOs, you really only need the first 3 ISOs. The remaining 3 are source packages for the binary packages you install from the first three discs. Rarely do you need the source code for these packages.

After retrieving the Slackware ISO(s), you must burn them to a disc of some sort: ISOs that are ~650MB should be burned to CDs and anything larger should (obviously) be burned to a DVD. Be sure you burn each ISO using the "burn disc image" functionality in your disc writing software--simply burning the ISO file onto the disc in a regular data session will not do what we need.

Booting The Install Disc

After you have a good copy of the installation disc (the DVD or the first of the CDs), put the disc into your CD/DVD ROM drive and reboot your computer. To ensure that your computer boots from the disc rather than the hard drive, hit F2 when you see the initial boot screen. Then go to the "Boot" tab and verify that your external CD/DVD drive takes precedence over the internal SSD. While we're in the BIOS, let's hop over to the "Advanced" tab and set "OS Installation" to "Start". This will increase the chances that your external drive will be recognized or something.... mine didn't work until I made that change. When you're all done with that, exit your BIOS, saving your changes.

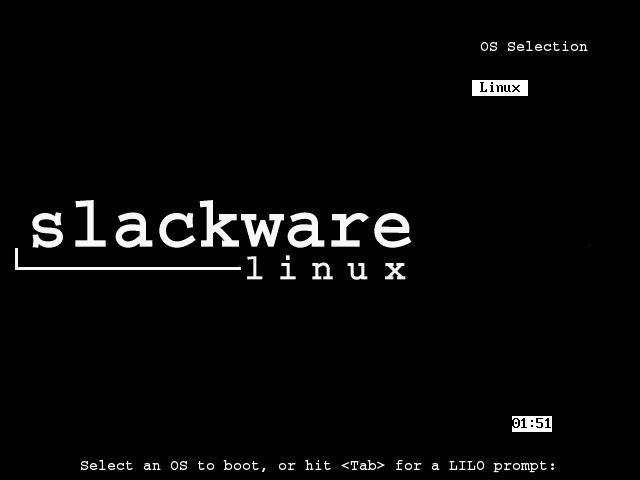
The computer will reboot, and it should access your installation disc immediately after the initial boot screen disappears. Once you boot from the installation disc, you should be presented with a screen which allows you to pass some settings to the installation kernel.

The installation boot screen

To make the installation go faster, use the following boot string:

hugesmp.s hdc=noprobe

This makes it so the installation will see the internal SSD as /dev/sda instead of /dev/hdc, which also boosts the read/write times by about 13 times.

During the boot process you will be asked to specify your keyboard map. Unless you want something special here, just hit the enter key to proceed.

Partition Your SSD

Next you will need to login as root and partition your SSD. You can do this using one of the following two commands:

fdisk /dev/sda
cfdisk /dev/sda

Here are some steps in case you're not familiar with these utilities:

  1. Remove all partitions (unless you know what you're doing)
    1. fdisk: d to delete (you may have to select multiple partitions to delete if you have more than one for some reason)
    2. cfdisk: Select all partitions individually with up/down arrow keys and use the left/right arrow keys to select delete from the menu at the bottom. Hit enter to run the delete command when it's highlighted.
  2. Create one partition that takes the whole SSD (again, unless you know what you're doing)
    1. fdisk: n (for new); enter; p (for primary); enter; 1 (for the first primary partition); enter; enter (to start at the beginning of the drive); enter (to select the end of the drive)
    2. cfdisk: Select the new command with the left/right arrow keys and hit enter when it's selected. Make it a primary partition, and have it take the whole SSD (3997.49MB in my case).
  3. Set the type of the new partition to be Linux
    1. fdisk: t (for type); enter; 83 (for Linux); enter
    2. cfdisk: Use the left/right arrow keys to select the type command at the bottom and hit enter when it's selected. Choose 83.
  4. Set the new partition (or the first, if you decided to make more than one) to be bootable
    1. fdisk: a (for bootable); enter; 1 (for primary partition 1); enter
    2. cfdisk: Select the bootable command from the bottom using the left/right arrow keys. Hit enter when it's selected.
  5. Write the changes to the partition table and quit
    1. fdisk: w
    2. cfdisk: Use the left/right arrow keys to select the write command from the bottom. Hit enter when it's selected. Type 'yes' to verify your intent, acknowledging that your previous data will be "gone". Then select the quit command.

Installing Slackware

As soon as your partitioning has finished, go ahead and run setup to begin the actual installation program.

The first screen of the installation program

Since we don't have a swap partition, can jump straight to the TARGET option. Use the arrow keys to highlight this option and hit enter. Select /dev/sda1 from the list, and format it with ext2. On the EeePC, most people prefer this format since it is a non-journaling filesystem. That means fewer writes to the SSD, which supposedly translates to a longer lifetime.

After the SSD is formatted, you will be asked to select the installation source. Again, I'm assuming that you want to use your fresh Slackware 12.2 disc, but you are free to choose what you want if you know what you're doing.

Selecting the installation source

I went with the default "Install from a Slackware CD or DVD" and told it to auto scan for my disc drive. It was found at /dev/sr0.

Choosing Your Packages

Next, you are given the opportunity to tweak the package series which will be installed on your EeePC. I chose the following series: A, AP, K, L, N, TCL, X, and XAP. I planned on using XFCE instead of KDE on my EeePC simply because it is much more light-weight and still capable of what I need. If you want KDE, be sure to check the appropriate series.
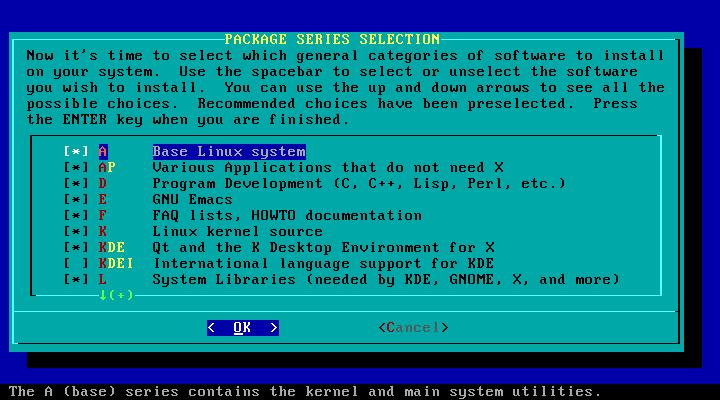
Selecting the packages to install

Once you mark each of the package series you wish to install, hit the "OK" button. You'll then have to choose which prompting mode to use. I chose menu, simply to be a little more picky about which packages I wanted installed. Installation took approximately 28 minutes with my package selection and setup.

Configuring Your System

When all of the packages are done being installed, you will be presented with some other screens to finish up the installation process.

  1. Choose whether or not you want to make a bootable USB... I skipped it.
  2. Choose how you wish to install LILO. I chose simple.
  3. Choose your frame buffer mode for the console. I chose 640x480x256.
  4. Specify any optional kernel parameters. Ensure that the hdc=noprobe from earlier is here to speed up your system considerably.
  5. Specify whether you wish to use UTF-8 on the console. I chose no.
  6. Specify where to install LILO. I chose MBR.
  7. Specify your mouse type. I chose imps2.
  8. Specify whether or not you wish to have gpm run at boot, which allows you to use your mouse in the console. I chose yes.
  9. Configure your network.
  10. Give your EeePC a hostname. This can be whatever you'd like.
  11. Specify the domain for your network. This can be whatever you'd like as well.
  12. Configure your IP address information. I just chose DHCP.
  13. Set the DHCP hostname. I left this blank.
  14. Review and confirm your network settings.
  15. Choose which services you wish to have running immediately after booting.
  16. See if you want to try custom screen fonts. I usually don't bother.
  17. Specify whether your hardware clock is set to local time or UTC.
  18. Choose your timezone.
  19. Select your preferred window manager. I chose XFCE.
  20. Set the root password.

At this point Slackware has been installed on your EeePC and you can exit the setup menu and hit Ctrl-Alt-Delete to reboot your computer.

First Boot

You should now go back into your BIOS and set "OS Installation" back to "Finished", exit and save changes, and reboot again.

Slackware's default LILO boot screen

You should then see the Slackware boot screen. By default, it has a 2-minute timeout, which seems absolutely absurd to me, so we'll change that later. Just hit enter for now and watch your new Slackware boot. The first boot will usually take a bit longer than subsequent reboots because all sorts of things need to generate their first configuration file.

When your system is ready, you'll be presented with a login prompt. Just login as root, using the password you specified in the last step of the installation process.

Tweaking Your Slackware

Here are some of the first things I do when I install a new copy of Slackware:

Add An Unprivileged User

This step is very important, because one thing that sets Linux apart from other operating systems is security ;). If you run your Linux system as root all the time, you're begging for problems.

To create a new unprivileged user, I use the adduser command. It walks you through the process of creating a user. This is the user you should use to do your day-to-day computing. Only use the root user when performing system administration tasks. Trust me :)

Tell X Windows to Start Automatically

I have no problem with the command line interface in Linux. I actually enjoy it quite a bit. However, on a device such as the EeePC, not having a GUI just doesn't seem all that practical. It's also not very impressive to your potential converts when they look over your shoulder and see that your tiny gadget just displays a black and white screen when you turn it on...

So, to help ourselves be a little more productive and to impress our followers, let's tell X Windows to start up automatically when we turn on the computer. To do that, we want to edit /etc/inittab and change the following line:

id:3:initdefault:

to be:

id:4:initdefault:

You can use whatever program you feel comfortable with, such as vi or nano. The next time you reboot your computer, you should see a GUI as soon as all of the services are fully loaded.

Along with this step, I suppose we can mention the configuration of X Windows. I usually run xorgsetup as root to get things up and running. Usually there is also a bit of tweaking to get things like the scroll wheel on the mouse to function. This part in particular took quite some time for me to figure out.

Enable The Scroll Wheel on the Trackpad

Some of you might be able to live without being able to scroll a page or whatever without using the scroll feature on most mouse devices these days, but I'm not one of them. Here is my entire /etc/X11/xorg.conf file:

Section "ServerLayout"
    Identifier     "X.org Configured"
    Screen      0  "Screen0" 0 0
    InputDevice    "Mouse0" "CorePointer"
    InputDevice    "SynapticMouse" "AlwaysCore"
    InputDevice    "Keyboard0" "CoreKeyboard"
EndSection

Section "Files"
    RgbPath      "/usr/share/X11/rgb"
    ModulePath   "/usr/lib/xorg/modules"
    FontPath     "/usr/share/fonts/TTF"
    FontPath     "/usr/share/fonts/OTF"
    FontPath     "/usr/share/fonts/Type1"
    FontPath     "/usr/share/fonts/misc"
    FontPath     "/usr/share/fonts/75dpi/:unscaled"
EndSection

Section "Module"
    Load  "xtrap"
    Load  "GLcore"
    Load  "record"
    Load  "dri"
    Load  "dbe"
    Load  "extmod"
    Load  "glx"
    Load  "freetype"
    Load  "type1"
    Load  "synaptics"
EndSection

Section "InputDevice"
    Identifier  "Keyboard0"
    Driver      "kbd"
    Option       "XkbModel"  "pc104"
    Option       "XkbLayout"  "us"
EndSection

Section "InputDevice"
    Identifier  "Mouse0"
    Driver "mouse"
    Option "Device" "/dev/input/mice"
    Option "Protocol" "IMPS/2"
    Option "Buttons" "5"
    Option "zAxisMapping" "4 5"
    Option "SHMConfig" "on"
EndSection

Section "InputDevice"
    Identifier "SynapticMouse"
    Driver "synaptics"
    Option "Device" "/dev/input/mice"
    Option "Protocol" "auto-dev"
    Option "SHMConfig" "on"
EndSection

Section "Monitor"
    Identifier   "Monitor0"
    VendorName   "Monitor Vendor"
    ModelName    "Monitor Model"
EndSection

Section "Device"
        ### Available Driver options are:-
        ### Values: <i>: integer, <f>: float, <bool>: "True"/"False",
        ### <string>: "String", <freq>: "<f> Hz/kHz/MHz"
        ### [arg]: arg optional
        #Option     "NoAccel"               # [<bool>]
        #Option     "SWcursor"              # [<bool>]
        #Option     "ColorKey"              # <i>
        #Option     "CacheLines"            # <i>
        #Option     "Dac6Bit"               # [<bool>]
        #Option     "DRI"                   # [<bool>]
        #Option     "NoDDC"                 # [<bool>]
        #Option     "ShowCache"             # [<bool>]
        #Option     "XvMCSurfaces"          # <i>
        #Option     "PageFlip"              # [<bool>]
    Identifier  "Card0"
    Driver      "intel"
    VendorName  "Intel Corporation"
    BoardName   "Mobile 915GM/GMS/910GML Express Graphics Controller"
    BusID       "PCI:0:2:0"
EndSection

Section "Screen"
    Identifier "Screen0"
    Device     "Card0"
    Monitor    "Monitor0"
    DefaultDepth 24
    SubSection "Display"
        Viewport   0 0
        Depth     1
    EndSubSection
    SubSection "Display"
        Viewport   0 0
        Depth     4
    EndSubSection
    SubSection "Display"
        Viewport   0 0
        Depth     8
    EndSubSection
    SubSection "Display"
        Viewport   0 0
        Depth     15
    EndSubSection
    SubSection "Display"
        Viewport   0 0
        Depth     16
    EndSubSection
    SubSection "Display"
        Viewport   0 0
        Depth     24
    EndSubSection
EndSection

A lot of that stuff might not be necessary, but it's what works for me. Normally the process for enabling the scroll wheel is pretty easy, but something seems to have changed in this respect with the release of Slackware 12.2. I had to edit the /etc/modprobe.d/psmouse script to make this line:

options psmouse proto=imps

look like:

options psmouse proto=any

After making that change, things seemed to work a lot better.

Make LILO to Boot Faster

There are a couple tricks we can use to make LILO boot our EeePC slightly faster. The first is to add the compact option somewhere, and the second is to decrease the menu timeout.

Open up /etc/lilo.conf with a text editor of your choosing as root. Add a single line with the word compact somewhere. I put it under the line that says boot = /dev/sda so the top of lilo.conf looks like this:

# LILO configuration file
# generated by 'liloconfig'
#
# Start LILO global section
# Append any additional kernel parameters:
append="hdc=noprobe vt.default_utf8=8"
boot = /dev/sda
compact

I also changed the line that said timeout = 1200 to be timeout = 50 to make LILO only hang around for 5 seconds instead of 2 minutes.

After making these changes, we must reinstall LILO to the MBR with the new settings:

lilo -v

Here's my /etc/lilo.conf with most of the commented lines removed:

# LILO configuration file
# generated by 'liloconfig'
#
# Start LILO global section
# Append any additional kernel parameters:
append="hdc=noprobe vt.default_utf8=0"
boot = /dev/sda
compact

# Boot BMP Image.
# Bitmap in BMP format: 640x480x8
bitmap = /boot/slack.bmp
bmp-colors = 255,0,255,0,255,0
bmp-table = 60,6,1,16
bmp-timer = 65,27,0,255

prompt
timeout = 50
change-rules
reset
vga = normal
# End LILO global section
# Linux bootable partition config begins
image = /boot/vmlinuz
root = /dev/sda1
label = Linux
read-only
# Linux bootable partition config ends

Network Tweaking

While the wireless adapter seemed to work great for me out of the box this time, the ethernet adapter is still not functional. I compiled and installed the atl2 driver to solve the problem. You can get it from http://people.redhat.com/csnook/atl2/atl2-2.0.4.tar.bz2. Here are the steps I took to install it:

wget http://people.redhat.com/csnook/atl2/atl2-2.0.4.tar.bz2
tar jxf atl2-2.0.4.tar.bz2
cd atl2-2.0.4
make
cp atl2.ko /lib/modules/`uname -r`/kernel/drivers/net/
depmod -a
modprobe atl2
ifconfig

The next tweak I added for networking was to boost boot times... The DHCP address request hangs the entire boot process out of the box if you don't have an ethernet cable plugged in while booting. To remedy this problem, add the following line to the first section of your /etc/rc.d/rc.inet1.conf:

DHCP_TIMEOUT[0]="5"

This will tell your computer to continue booting if an IP address hasn't been assigned after 5 seconds of waiting.

Enable Frequency Scaling

We all like out battery to last a long time, right? Well, the EeePC 701 doesn't have the greatest battery in the world, but we can help increase the battery life by enabling the CPU frequency modules. I put this stuff in my /etc/rc.d/rc.local script:

#!/bin/sh
#
# /etc/rc.d/rc.local:  Local system initialization script.
#
# Put any local startup commands in here.  Also, if you have
# anything that needs to be run at shutdown time you can
# make an /etc/rc.d/rc.local_shutdown script and put those
# commands in there.

modprobe p4-clockmod
modprobe cpufreq_ondemand
modprobe cpufreq_conservative
modprobe cpufreq_powersave
modprobe cpufreq_performance

cpufreq-set -g ondemand -d 450Mhz -u 900Mhz

Add Your SD Card to /etc/fstab

I have an SD card that I leave in my EeePC all the time, and it's formatted with ext2 just like the internal SSD. Without this tweak, I have to mount the SD card each time I turn on the computer, which gets bothersome. My fix is to add the SD card to /etc/fstab, which takes care of mounting the device at boot.

First, you should make a directory that will be used to mount the device. I made one as such:

mkdir /mnt/sd

Now you need to determine your SD card's UUID. I started out by unmounting my SD card and taking it out of the slot. Then I executed this command:

ls /dev/disk/by-uuid

Next, I popped the SD card back in and executed that command again. The UUID that appears the second time but not the first time is your SD card's UUID.

It's time to add the magic line to your /etc/fstab. Add a line such as:

UUID=[your SD card's UUID] /mnt/sd ext2 defaults,noatime 1 1

somewhere in the file. While we're digging around in /etc/fstab, we might as well add the noatime option to the internal SSD to help reduce disk writes. Save the file and exit the editor. Then mount everything (using mount -a) or just the SD card (using mount /mnt/sd).

For posterity's sake, here's my entire /etc/fstab file:

/dev/sda1        /                ext2        defaults,noatime         1   1
UUID=30293ff4-5bee-457a-8528-ec296f099e9a /mnt/sd ext2 defaults,noatime 1 1
#/dev/cdrom      /mnt/cdrom       auto        noauto,owner,ro  0   0
/dev/fd0         /mnt/floppy      auto        noauto,owner     0   0
devpts           /dev/pts         devpts      gid=5,mode=620   0   0
proc             /proc            proc        defaults         0   0
tmpfs            /dev/shm         tmpfs       defaults         0   0

Preventing Shutdown Hangs

Sometimes the sound card seems to make Slackware hang when you're shutting down. Everything seems to turn off fine, but the little green power LED still shines bright. The solution to this problem appears to be adding the following line:

modprobe -r snd_hda_intel

to /etc/rc.d/rc.6 right before the "Unmounting local file systems." line (around line 195).

Enable Volume Hotkeys and Sleeping

Slackware 12.2 is already listening for ACPI events by default, so we just need to insert our custom stuff into /etc/acpi/acpi_handler.sh:

#!/bin/sh

IFS=${IFS}/
set $@

#logger "ACPI Event $1, $2, $3, $4, $5"

case "$1" in
    button)
        case "$2" in
            power) /sbin/init 0;;
            sleep) /etc/acpi/actions/lid.sh;;
            lid)
                if grep -q closed /proc/acpi/button/lid/LID/state
                then
                    /etc/acpi/actions/lid.sh
                fi
                ;;
            *) logger "ACPI action $2 is not defined";;
        esac
        ;;
    hotkey)
        case "$3" in
            # Fn+F2 Wireless/Bluetooth button
            # Fn+F7 Mute button
            00000013) amixer set Master toggle;;
            # Fn+F8 Volume down
            00000014) amixer set Master 10%-;;
            # Fn+F9 Volume up
            00000015) amixer set Master 10%+;;
        esac
        ;;
    *) logger "ACPI group $1 / action $2 is not defined";;
esac

And to handle the closing of the lid or pressing the sleep button, we need to create a new script in /etc/acpi/actions/ called lid.sh:

#!/bin/sh
# script by Fluxx from linuxquestions slackware forum
# discover video card's ID
ID=`/sbin/lspci | grep VGA | awk '{ print $1 }' | sed -e 's@:@/@'`

# securely create a temporary file
TMP_FILE=`mktemp /tmp/video_state.XXXXXX`
trap 'rm -f $TMP_FILE' 0 1 15

# switch to virtual terminal 1 to avoid graphics
# corruption in X
chvt 1

/sbin/hwclock --systohc

# remove the webcam module
rmmod uvcvideo

# write all unwritten data (just in case)
sync

# dump current data from the video card to the
# temporary file
cat /proc/bus/pci/$ID > $TMP_FILE

# suspend-to-ram
# (samwise) not using this it stuffs up the screen brightness
echo -n mem > /sys/power/state

# suspend-to-disk
#echo -n disk > /sys/power/state

# standby
#echo -n standby > /sys/power/state

# force on for now...
xset dpms force on

/sbin/hwclock --hctosys

# restore the webcam module
modprobe uvcvideo

# restore video card data from the temporary file
# on resume
cat $TMP_FILE > /proc/bus/pci/$ID

# switch back to virtual terminal 2 (running X)
chvt 6; sleep 2
chvt 2

# remove temporary file
rm -f $TMP_FILE

And we need to make sure the script is executable:

chmod +x /etc/acpi/actions/lid.sh

These scripts should enable us to use the mute key, the increase/decrease volume keys, and the sleep key. They should also allow us to close the lid of the EeePC to put it to sleep. Occasionally, when you wake up the computer, you will just see a blank black screen. To get around this, switch back to VT2 by using the keystroke Ctrl+Alt+F2.

Install Special Packages

Slackware comes with a lot of awesome stuff right out of the box, but it is missing some very important utilities at the same time. Included in this list, for me, is a program called wicd, or a network connectivity manager. This is similar to the "Network Manager" utility found in other mainstream distributions like Ubuntu, Fedora, and openSuSE. Slackware has yet to include such a utility by default.

Anyway, wicd can be found in the extra directory on the Slackware DVD or the 3rd (?) CD. To install it, find the package on the disc (or download it from the Internet) and execute the following command:

installpkg wicd-1.5.6-noarch-2.tgz

Be sure to check out the extra directory on the Slackware install disc. There are some neat tools in there. Some excellent resources for Slackware packages include:

There are some utilities out there to help you in your quest to resolve package dependencies. Two of the major ones that I've used in the past are swaret and slapt-get.

Using Slackware 12.2
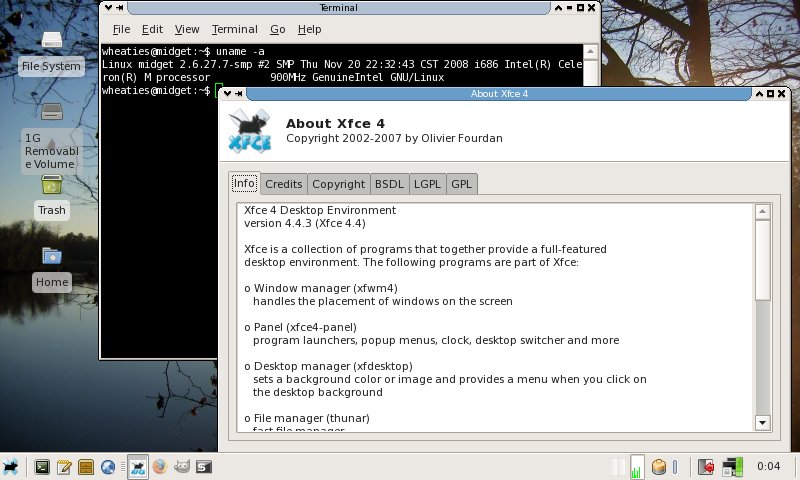
My Slackware 12.2-powered EeePC 701 4G

I have to give the Linux kernel hackers props--the 2.6.27.7 kernel is amazingly fast! I'm sure the fact that I'm running a fairly stock Slackware installation (as opposed to something like Ubuntu) helps the speed quite a bit too. This past semester I had Linux Mint 5 (XFCE edition) installed on my EeePC, and that seemed fairly responsive. Slackware blew me away though, and I can still do everything I want to do!

The webcam and sound card work out of the box, just like the wireless. I rarely use the webcam, but it's fun to play with, and my mom appreciates seeing me on Skype occasionally. The wireless connection quality exceeds what it was with the madwifi driver I was using with Slackware 12.1 and other distros like Linux Mint. Programs are ultra speedy and responsive, even with the processor clocked at 450Mhz. I love it!!!

Boot times could be better, but I'm not too concerned with it. My setup takes approximately 50 seconds from boot to a useable desktop interface. Not horrible by any means, but perhaps not the best for a netbook when all you want to do is check your e-mail.

I would like to see the Network Manager that so many other distributions offer in Slackware some day. The wicd application is nice, but it's not nearly as intuitive as Network Manager, and it seems to be relatively limited in its capabilities in comparison. I know I'm not alone in my desire to see Network Manager included, or at least available, for Slackware. It would be tremendously beneficial in a world where wireless networking and laptops are more and more pervasive. Using the command line to adjust your wireless connection settings each time you have to hop to a new access point is just annoying.

In the end, I'm excited to have Slackware on my EeePC once again. I think it will be around for quite a while this time.

Please comment with any advice or problems that you have in regards to installing Slackware 12.2 on an EeePC.

openSUSE 11.0: Round 2

Ok, ok... I decided to give openSUSE 11.0 another shot. Since my last blog post, I have read some reviews posted by some other people who encountered similar problems when attempting to actually use KDE4. Some of these people opted to install the KDE 3.5.9 remix after that and had more promising result. So, instead of letting my bias get the best of me, I am going to try openSUSE 11.0 one more time using KDE3. The following are the steps I took while going through this process:

  1. Booted from DVD (openSUSE 11.0 x86_64)

  2. Chose "Installation" from the boot menu

  3. After the installer is completely loaded, I selected "English (US)" for both the language and the keyboard layout, read the license agreement, checked the "I Agree to the License Terms" box, and clicked Next.

  4. I waited for a few seconds while the installer probed my hardware and updated some package lists, then I chose "New Installation" and clicked Next.

  5. The next step was to choose my timezone. They have a very simple interface for this--much less frustrating than the counterpart in the most recent release of Ubuntu (8.04 LTS). My system clock is set to Mountain time, so I left that stuff alone and clicked Next.

  6. This step is probably where I screwed up the most last time. It's where you choose which desktop environment you want. You can choose from GNOME 2.22, KDE 4.0, KDE 3.5, and XFCE Deskop. Last time I chose KDE 4.0. This time I chose KDE 3.5 and clicked Next.

  7. After choosing the desktop environment, the installer took me to the disk partition section of the installation. This should be pretty easy for most people, but I changed a few things. Namely, I put the root and home partitions together, and I deleted one of my Windows partitions because Windows is stupid and bloated. Once I verified the disk partition settings, I clicked Next.

  8. This part is where you get to enter the primary system user's information. You can specify the user's name, login, and password. You may also specify a few options including whether or not the root user will have the same password, whether that user will receive system mail, and whether or not that user will be logged in automatically. If you need to, you may change the authentication settings here too. I just entered the information and got on with it. (If you uncheck the box for the root user having the same password, you're prompted for the root password after this screen)

  9. Finally, we get to the step where you get to verify all of the installation settings. I think I'll just go with the configuration for now. When you click Install, you're prompted to verify that you really want to install. Use your head on this one.

  10. After all of that, it began to format my partitions. One neat thing that I noticed while it was installing was the fact that they rolled commonly-installed packages into what they call "images." This seems to increase installation speed considerably. In the past, I've had most RPM-based distribution installations take as long as (or longer than) Windows takes to install. Granted, the difference there is that you actually get useful stuff once Linux is installed, whereas with Windows, you're stuck with something barely usable and you still have to install drivers for every piece of hardware except your monitor.

    Anyway... the openSUSE folks seem to have addressed that problem recently (maybe just in this release). This went a LOT faster than I've ever seen (on any computer). Despite the use of those images, though, there were still nearly 500 packages that needed to be installed. It seems to be quite evident that the packages are working faster than ever before. It's refreshing (though it did still take quite a bit longer to install than most Debian-based distributions I've tried).

  11. After all of the packages are installed, the system does some configuration and then reboots itself. When it comes back up, the installer will appear, do some more hardware detection and configuration, and then go straight into your desktop.

openSUSE actually didn't detect my 1680x1050 resolution (I didn't know any modern distribution wouldn't anymore), so I just went into YaST and set the resolution to what it should be. And then it locked up, and I had to do a hard reboot. Let's hope I can stop that from happening again. I suppose so long as I can still see things other than my mouse, I should be good.

Upon rebooting into my desktop, the resolution was still crappy. When I went to change it this time, though, I noticed that dual-head mode was enabled. That's stupid. I never plug a second monitor into my laptop. I disabled that, then tried to change the resolution. After logging out and back in, it seems to have changed the resolution properly. While I realize that I do have an extremely crappy video card, Ubuntu and others have been able to offer me 3D acceleration. This option is currently unavailable with openSUSE. Perhaps a little research will solve that problem.

After a few minutes of configuration and preference setting, my system locked up yet again. And another hard reset did the trick of getting it operational again. One more and it's outta here!! I do have to say... Minus the quirks with the resolution and drivers, the distribution does not seem bad at all. It might be worth trying out on a different computer--maybe I'd have better luck.

Alright, now I'm going to check the software management tool for a real driver for my video card. Looks like I may have found some. I hope they work. I'm using a "1-click installer" that I found from a Google search. The installation went fine, but after logging out and back in (to have the drivers take effect), it locked up again.

So, round two folks. Again, it might just be user error. It might just be my computer. Or openSUSE really might just suck. I don't think I'll be trying it on my computer again for a while. I might try on a different system altogether, but not on my main laptop.

First Impressions: openSUSE 11.0

Those of you who have ever held any sort of conversation with me have probably heard or have personal experience with my bigotry concerning Linux. I absolutely love Linux, and I make all sorts of excuses for the things it doesn't to as well as Windows and Mac OS to convince people to use Linux. It's just the way I am.

I've been using Linux as my main operating system ever since about 2000, though I did dabble with it a few times before that. I started out with RedHat Linux way back when, and then moved on to Mandrake (now Mandriva) Linux. As time passed, I found out about this particular distribution called "SuSE Linux," which claimed to be able to detect hardware even better than the others I had tried. It even looked really pretty. I began to really want to use this distribution. It got to the point where I almost spent $80 on it, just so I could play around.

Eventually, I got my hands on a free copy by downloading all of the packages from their FTP server or something. I managed to get this installed, and I was even more impressed than I had anticipated. SuSE Linux was amazing. But by this time, I had already become addicted to downloading and trying out any distribution I could get my hands on. That meant that SuSE spent a few days or weeks on my computer before I replaced it with something else.

As I tried more and more distributions of Linux, I began to form opinions about them. I observed what certain distributions did well, and made hard mental notes about what each distribution didn't do so well. It wasn't long before I noticed that basically all of the RPM-based distributions I had tried suffered from two major problems: bloated installation packages and severe system slow-downs as time went on. It seemed that RPM-based distributions always slowed down just as bad as Windows machines. Other types of Linux, such as Slackware, Gentoo, and Debian, didn't seem to suffer from this nearly as bad.

With these opinions in mind, I carefully chose which distributions I elected to actually install with plans for keeping around a long time. It seemed like I would always download the RPM-based distributions, but I would do it "just in case" someone else wanted the CD or DVD. Sometimes I would download the distributions and never even bother to burn the CD image to disc. I would just stuff the image away for future reference.

However, despite my opinions of RPM-based distributions, I did end up installing SUSE Enterprise Linux Desktop/Server and openSUSE a few years ago. Part of it was for a class I had; another part was to find a distribution that would suit the needs of one of my buddies. I noticed several improvements in the distributions as the years passed, but those lingering problems with bloated packages and system slow-downs still plagued each distribution.

Last week, openSUSE 11.0 was finally released. Just like always, I downloaded the CD and DVD images with no plans of actually installing openSUSE anywhere. As the downloads were going, I read some reviews posted by other people. It sounded like this particular release of openSUSE actually addressed the issues of bloat and system slow-downs (finally!!), so that made me happy, but I still didn't quite consider installing it on any of my computers. I did use one of the live CD's at work for a day, though, and it treated me well.

This morning I got the itch to change the distribution I had installed on my main computer. I was going through the list of recent downloads that I had, and it occurred to me that the most recent version I had was openSUSE 11.0. It also occurred to me that it had been at least two years since I had seriously considered installing openSUSE or SLED/SLES on my computer. So I decided that maybe everything I had read was worth looking into on my own and possibly revisiting my biased opinion of RPM-based distributions.

I started the installation early this morning while I took notes and worked from another machine. The installation went very smoothly. Everything was logical and clean. It really was a good experience. The packages really did seem to install considerably faster than any release in the past, so I had high hopes for how the system would perform after installation. After everything was said and done, my computer rebooted into the freshly installed KDE 4.0 desktop of openSUSE 11.0. It looked nice, and it was actually functional--which I cannot honestly say about any other distributions that have a KDE 4.0 remix.

Since up to this morning I hadn't been able to use KDE 4 long enough to figure out what's changed, that's where I started. I explored the new menu, which I have to admit is quite funky, but I guess that's how the industry likes things nowadays. I played around with some of the personal settings that it offers. Things seemed logical enough, but it is quite a change from KDE 3.5, which I've been using for quite a while.

After a couple minutes of tinkering, I noticed a little bubble in the corner that said something about installing some system updates. I clicked it and ran through some sort of wizard, but I guess there were no updates to install. Or maybe I just have super-slow Internet and it was taking forever to download the changes. Whatever the case, I kept on tinkering with some settings while the updater did its thing.

Next thing I know, my screen goes black and flashes a few times. Then all I can see is a white mouse on a black background. That's it. Nothing else. I'm really not sure what the problem was. The settings I was playing with seemed fairly innocent, as I modify those sorts of settings all the time on KDE 3.5. After a few minutes of white-mouse-on-black-screen fun, I decided a reboot might solve the problem.

A couple minutes later, I was presented with my loading screen, followed by the black screen and white mouse. That's it. Nothing else.

Needless to say, despite all of the improvements that I did notice in this release of openSUSE, it left a rather bitter taste in my mouth in other areas. openSUSE is no longer on my computer--it's long been replaced with yet another distribution.

Maybe it's user error. Maybe it's my computer's hardware. Or maybe openSUSE really does suck. Whatever the case, it wouldn't surprise me if I wait another year or two to try out another RPM-based distribution.

Slackware 12.1 on an Asus EeePC 701

Attention!

This article has a follow-up for Slackware 12.2.

The following are the steps I took to install Slackware 12.1 on my EeePC this past weekend. I hope you find them complete and helpful!

Installing Slackware 12.1 on an Asus EeePC 701

  1. Burn DVD .iso to disc
  2. Turn on EeePC
  3. Hit F2 to run setup
  4. Go to the Advanced tab, and set "OS Installation" to "Start"
  5. Go to the Boot tab, and ensure that the external DVD drive will be used for booting before the internal SSD
  6. Exit and save changes
  7. Just hit enter after rebooting from BIOS configuration when the Slackware boot screen shows up
  8. Unless you want to use a different keymap for whatever reason, hit enter when asked to select a keyboard map
  9. Login as root
  10. Run fdisk or cfdisk on /dev/hdc
  11. Remove all partitions (unless you know what you're doing)
    1. fdisk: d to delete (you may have to select multiple partitions to delete if you have more than one for some reason)
    2. cfdisk: Select all partitions individually with up/down arrow keys and use the left/right arrow keys to select delete from the menu at the bottom. Hit enter to run the delete command when it's highlighted.
  12. Create one partition that takes the whole SSD (again, unless you know what you're doing)
    1. fdisk: n (for new); enter; p (for primary); enter; 1 (for the first primary partition); enter; enter (to start at the beginning of the drive); enter (to select the end of the drive)
    2. cfdisk: Select the new command with the left/right arrow keys and hit enter when it's selected. Make it a primary parition, and have it take the whole SSD (3997.49MB in my case).
  13. Set the type of the new partition to be Linux
    1. fdisk: t (for type); enter; 83 (for Linux); enter
    2. cfdisk: Use the left/right arrow keys to select the type command at the bottom and hit enter when it's selected. Choose 83.
  14. Set the new partition (or the first, if you decided to make more than one) to be bootable
    1. fdisk: a (for bootable); enter; 1 (for primary partition 1); enter
    2. cfdisk: Select the bootable command from the bottom using the left/right arrow keys. Hit enter when it's selected.
  15. Write the changes to the partition table and quit
    1. fdisk: w
    2. cfdisk: Use the left/right arrow keys to select the write command from the bottom. Hit enter when it's selected. Type 'yes' to verify your intent, acknowledging that your previous data will be "gone". Then select the quit command.
  16. Run setup
  17. Select TARGET to specify where you will be installing
  18. Select /dev/hdc1
  19. Format the partition
  20. To reduce write cycles, many people suggest formatting with ext2, which is a non-journaling filesystem. However, many people claim that the limited number write cycles of SSD is not something to worry about. Use your best judgement on this one. Hit OK after the format is complete.
  21. Select where you plan to install Slackware from. In my case, it's the DVD. I usually tell it to find the media automatically. Select manual if you know which device your DVD drive is. Mine was /dev/sr0.
  22. Select the packages you wish to install. This is where your installation will likely differ greatly from mine because of personal preferences. I do a lot of development, so I will keep a lot of things for that. Here's what I selected to install:
    1. Base Linux System
    2. Various Applications that do not need X
    3. Program Development (C, C++, Lisp, Perl, etc.)
    4. Linux kernel source
    5. Qt and the K Desktop Environment for X
    6. System Libraries (needed by KDE, GNOME, X, and more)
    7. Networking (TCP/IP, UUCP, Mail, News)
    8. Tcl/Tk script languages
    9. X Window System
    10. X Applications
    11. Games
  23. Choose whether or not you want to be picky about your software. To save a little extra disk space, I'm going to manually choose what I don't want. This includes:
    1. A: cpio, cryptsetup, cups, floppy, genpower, jfsutils, mdadm, mt-st, mtx, quota, reiserfsprogs, rpm2tgz, tcsh, xfsprogs
    2. AP: amp, cdparanoia, hplip, gutenprint, jed, joe, jove, ksh93, mysql, rpm, xfsdump, zsh
    3. D: gcc-gfortran, gcc-gnat, gcc-java, mercurial, p2c
    4. N: elm, epic4, httpd, mailx, mutt, netatalk, pine, popa3d, proftpd, rp-pppoe, samba, slrn, tin, trn, vsftpd
    5. TCL: hfsutils
    6. X: anthy, bdftopcf, beforelight, libhangul, sazanami-fonts-ttf, sinhala_lklug-font-ttf, tibmachuni-font-ttf, wqy-zenhei-font-ttf
    7. XAP: audacious, audacious-plugins, gftp, mozilla-thunderbird, pan, seamonkey
  24. Wait for the installation to complete. It took almost a full hour with my package selection, leaving me with 485.4MB free on my 4GB SSD.
  25. Choose whether or not you want to make a bootable USB... I skipped it.
  26. Choose how you wish to install LILO. I chose simple.
  27. Choose your frame buffer mode for the console. I chose 640x480x256.
  28. Specify any optional kernal parameters. I left this blank, originally, but later learned that having 'hdc=noprobe' increased my disk access speed by about 13 times.
  29. Specify whether you wish to use UTF-8 on the console. I chose no.
  30. Specify where to install LILO. I chose MBR.
  31. Specify your mouse type. I chose imps2.
  32. Specify whether or not you wish to have gpm run at boot, which allows you to use your mouse in the console. I chose yes.
  33. Configure your network.
  34. Give your eeepc a hostname. This can be whatever you'd like.
  35. Specify the domain for your network. This can be whatever you'd like as well.
  36. Configure your IP address information. I just chose DHCP.
  37. Set the DHCP hostname. I left this blank.
  38. Review and confirm your network settings.
  39. Choose which services you wish to have running immediately after booting.
  40. See if you want to try custom screen fonts. I usually don't bother.
  41. Specify whether your hardware clock is set to local time or UTC.
  42. Choose your timezone.
  43. Select your preferred window manager. I chose KDE.
  44. Set the root password.
  45. Slackware has been installed! Exit the setup program and reboot.
  46. Hit F2 to enter the BIOS again.
  47. Set OS Installation to "Finished" and exit the BIOS, saving changes.
  48. Reboot into Slackware! The first boot takes a while because of all the initial setup. It is faster on subsequent reboots, assuming you don't add new services (like apache and mysql) at boot.

Change a few settings around.

  1. vi /etc/inittab
  2. (set default runlevel to 4)
  3. vi /etc/lilo.conf
  4. add 'compact' somewhere to make it boot faster
  5. change the boot delay so it's not 120 seconds

Now for installing various drivers.

  1. Install the ethernet driver: http://people.redhat.com/csnook/atl2/atl2-2.0.4.tar.bz2
    1. wget http://people.redhat.com/csnook/atl2/atl2-2.0.4.tar.bz2
    2. tar jxf atl2-2.0.4.tar.bz2
    3. cd atl2-2.0.4
    4. make
    5. cp atl2.ko /lib/modules/2.6.24.5-smp/kernel/drivers/net/
    6. depmod -a
    7. modprobe atl2
    8. ifconfig
  2. Install the drivers for the wireless: http://snapshots.madwifi.org/special/madwifi-nr-r3366+ar5007.tar.gz
    1. wget http://snapshots.madwifi.org/special/madwifi-nr-r3366+ar5007.tar.gz
    2. tar zxvf madwifi-nr-r3366+ar5007.tar.gz
    3. cd madwifi-nr-r3366+ar5007.tar.gz
    4. scripts/madwifi-unload
    5. scripts/find-madwifi-modules.sh uname -r
    6. make && make install
    7. modprobe ath_pci

I kind of stopped taking notes after I realized how much fun it was to have Slackware on my EeePC. If you have questions, just add a comment below.

Big Day in My Career

To prefix this post, I would just like to make sure that you are aware of just how big a nerd I really am. I've probably got 7 computers laying around my apartment. I dream about programming (in fact, I've solved some frustrating programming problems in my sleep). The other day I had a conversation with a good friend of mine about how much faster and more efficient it is to use the keyboard for various things as opposed to moving a mouse around and clicking on things. That's just a taste.

Anyway, for several years, I've wanted to contribute something--a fix, a new feature, etc--to at least one open source project. The problem is that I've never really found anywhere to contribute amongst the programs I actually use. Either I didn't know how to accomplish something or I just didn't see that anything could be improved. It was quite frustrating.

Yesterday I was going along, doing my regular work, when I encountered a problem in an e-commerce framework called Satchmo. This problem made the website I was working on blow up. I couldn't successfully complete an order. At first I had no idea where the problem was. Eventually, I figured out a way to find what part of the framework was causing problems. I took a peek at the code and saw what seemed to be a solution. I made the change and all of the sudden I could complete orders on the website!

I was so stoked! I created a patch from the change that I made to the code. Then I opened a ticket on Satchmo's issue tracking system, described the problem briefly, attached my patch, and went on working. A few hours later, I got an email from the issue tracking system, saying that my patch has been accepted and has been applied to the codebase!

Finally!!! After all these years! I am an official contributor to an open source project. It feels good. Hopefully this is the first of many contributions to come.

Disable Page Navigation with Horizontal Scroll

The following information was snagged from http://gentoo-wiki.com/HARDWARE_Synaptics_Touchpad#Horizontal_Scroll_Issues_with_Firefox

I was looking for this information for a long time and couldn't find it. I finally found reference to this in a cached version of this (gentoo-wiki).

So that firefox will not misinterpret the horizontal scroll as 'back' and 'forward' For many like me this is irritating because you are reading a webpage and by moving the mouse you accidently go to another page.

Some forums suggest disabling horizontal scroll (editing xorg.conf to: Option "HorizScrollDelta" "0"), but instead the correct way is to configure firefox so that it doesn't misinterpret the horizontal scroll. In firefox type in URL (address bar):

about:config

and double-click on the line:

mousewheel.horizscroll.withnokey.action

to set it to 0. And then also set

mousewheel.horizscroll.withnokey.sysnumlines

to true.

Installing Slackware 11.0 on An HP Pavilion dv8000

First of all, I have to tell everyone how great of a distribution Slackware is. I have personally sampled (meaning that I downloaded, installed, and ran for a trial period) at least 50 different distributions. It seems that, no matter how fancy a new distribution is, I always find myself returning to Slackware. I have to admit, it doesn't have a lot of the eyecandy and user-friendly features of other mainstream distributions right off the bat, but you could add them if you wanted to. Among my reasons for liking Slackware so much are:

  • It's the fastest (by default) I've used
  • Stability
  • Security
  • Educational value

Now that we have a little background as to why I like Slackware so much, let's move on to the installation, shall we? To make it a little more simple, I'm just including the notes that I took while installing.

  • Insert disc 1

  • Boot Menu: Hit enter to boot with default options

  • Select keyboard map: Enter for default US

  • Login as root

  • Check partition scheme: # fdisk /dev/hda

    Here are some useful commands to get around in fdisk:

    • p to print partition table
    • d to delete, followed by parition number
    • c to create; primary/extended; start sector; end sector
    • a to toggle bootable flag
    • w to write parition table
    • q to quit
  • # setup

  • ADDSWAP to activate swap partition

    • select your swap partition and hit ok
    • choose whether you wish to check for bad blocks while preparing the swap partition [no]
    • hit ok when your swap partition has been configured
  • Choose your root (/) parition

    • Select the proper partition from the list and hit select
    • Choose your formatting type
      • Format: Quick format with no bad block checking
      • Check: Slow format that checks for bad blocks
      • No: No, do not format this partition
      • [ FORMAT ]
    • Choose filesystem
      • ext2: Standard Linux Ext2 Filesystem
      • ext3: Ext3 Journaling Filesystem
      • reiserfs: ReiserFS Journaling Filesystem
      • [ REISERFS ]
    • Add other paritions and follow the same process as above, specifying the mount point
    • Hit ok when the partitions have been setup successfully
  • Specify whether you'd like any existing FAT or NTFS partitions to be mounted in Linux

    • [ YES ]
    • Select the partition
    • Specify the mount point
  • Hit ok when the FAT and NTFS partitions have been setup

  • Choose your installation source

    • Install from a Slackware CD or DVD
    • Install from a hard drive partition
    • Install from NFS (Network File System)
    • Install from a pre-mounted directory
    • [ CD or DVD ]
  • Choose the CD/DVD device

    • auto: Scan for the CD or DVD drive (recommended)
    • manual: Manually specify CD or DVD by device name
    • [ AUTO ]
  • Select the package sets you'd like to install and hit ok

  • Select prompting mode

    • full Install everything (3+ GB of software, recommended)
    • expert Choose individual packages from interactive menus
    • menu Choose groups of packages from interactive menus
    • newbie Use verbose prompting (and follow tagfiles)
    • custom Use custom tagfiles in the package directories
    • tagpath Use tagfiles in the subdirectories of a custom path
    • [ FULL ]
  • Specify your kernel

    • bootdisk Use the kernel from the installation bootdisk
    • cdrom Use a kernel from the Slackware CD or NFS mount
    • floppy Install a zimage or bzimage from a DOS floppy
    • skip Skip this menu (use the default /boot/vmlinuz)
    • [ CDROM ]
  • Re-insert disc 1

    • Select your kernel
    • [ /cdrom/kernels/sata.i/bzImage ]
  • Make a bootdisk

    • Create Make a Linux bootdisk in /dev/fd0
    • Skip Skip making a bootdisk
    • [ SKIP ]
  • Modem configuration [ NO MODEM ]

  • Specify whether you'd like to start hotplug/udev at boot [ YES ]

  • Install the bootloader, LILO

    • simple Try to install LILO automatically
    • expert Use expert lilo.conf setup menu
    • skip Do not install LILO
    • [ SIMPLE ]
  • Choose your frame buffer mode for LILO [ standard ]

  • Pass the kernel a parameter if you have an IDE CD/DVD-RW drive

    • [ hdc=ide-scsi ]
  • Select LILO destination

    • Root Install to superblock (not for use with XFS)
    • Floppy Install to a formatted floppy in /dev/fd0 (A:)
    • MBR Install to Master Boot Record (possibly unsafe)
    • [ MBR ]
  • Select your mouse type [ IMPS2 ]

  • Specify whether you'd like to start GPM at boot [ NO ]

  • Specify whether you'd like to configure your network

    • [ YES ]
    • Enter your hostname
    • Enter your domain name
    • Specify IP setup
      • static IP Use a static IP address to configure ethernet
      • DHCP Use a DHCP server to configure ethernet
      • loopback Set up a loopback connection (modem or no net)
      • [ DHCP ]
    • Specify DHCP parameters
    • Verify and accept network configuration
  • Specify services to start at boot time

    • rc.cups
    • rc.httpd
    • rc.mysqld
    • rc.pcmcia
    • rc.samba
    • rc.scanluns
    • rc.sendmail
    • rc.syslog
    • rc.sshd
  • Specify whether you'd like to try out some screen fonts [ NO ]

  • Specify whether your machine's clock is set to local time or UTC/GMT [ NO ]

  • Select timezone

  • Select your default desktop [ KDE ]

  • Set a root password

  • Reboot

  • Login as root

  • Add a new (normal) user: # adduser

  • Configure XWindows

    • # xorgcfg
    • save the configuration to /etc/X11/xorg.conf
  • Logout and back in as the new user

  • Bring up the GUI

    • $ startx

Begin using your system!!

Enabling Mouse Scroll in Linux

Ok, just so everyone knows, I will not go into much depth about how to get your scroll button working, but I will cover the basics:

  • Open your xorg.conf file (it's likely to be hanging around /etc/X11/xorg.conf)
  • Find the section related to your mouse (search for the text "mouse" or "pointer")
  • Set your protocol to IMPS/2
  • Add the line below the protocol: Option "Buttons" "5"
  • Add the line below the buttons option: Option "zAxisMapping" "4 5"
  • Save the xorg.conf
  • Restart the X windowing system. If you did you editing from within X (using KDE, GNOME, or other environment) you should be able to hit CTRL-ALT-Backspace to restart X.

These instructions will likely vary depending on your distribution. Some distributions (like Fedora, SuSE, Ubuntu, etc) don't seem to play well with manually-edited files and prefer that you use their graphical interfaces to change settings like this. But you should also not have issues using the scroll button on your mouse with the distributions listed above.

Good luck!

Reinstalling SuSE 10.1

Ported From Blogger

The following post was ported from my old blogger account.

Welp, I was getting somewhat bored with my computer, so I decided that I would reinstall SuSE today. I finally got my dual-layer 32-bit/64-bit SuSE 10.1 DVD, so now I don't need to switch CDs every few minutes. That will be nice. Anyway, this time I plan to document the quirks that I run into as I attempt to get my laptop back to the state it was in before all of this mumbo jumbo.

First off, I was able to install SuSE earlier today.. Everything seemed to be going well up until I should have logged in the first time. The login screen never came--it just showed the 'busy' cursor for a few minutes. Then I restarted the computer and it did the same thing. Then I decided to reinstall again... just because I could. The same thing happened, even though I chose the GNOME setup that time (whereas I chose to use KDE the first time). Eventually it dawned on me that the 3D acceleration drivers I used before required that I share some of my real RAM with my video card. I thought it might be a good idea to try disabling that business and seeing how things went on only the dedicated video RAM. It worked. I logged into a great-looking GNOME setup and played around for a bit. I noticed that my synaptics touch pad thinger (mouse) wasn't responding too well, and I'm not really a big fan of GNOME to begin with. So I'm in the process of reinstalling SuSE for the third time today--this time with KDE. We'll see how things go this time.

The installation has finished, and now I'm working on getting my wireless to function. I had previously acquired the appropriate 64-bit drivers, so those weren't hard to get back. I installed the ndiswrapper package that came with SuSE 10.1, extracted the drivers, and installed them. My laptop locked up the first time I tried to modprobe the ndiswrapper system, but it works ok now. I can see the wireless network here on campus but I can't do anything with it yet.

I suppose my time is up for now, but I will continue this post later.