Quick And Easy Execution Speed Testing

There have been many times when I've been programming, encounter a problem that probably involves a loop of some sort, and I think of two or more possible ways to achieve the same end result. At this point, I usually think about which one will probably be the fastest solution (execution-wise) while still being readable/maintainable. A lot of the time, the essentials of the problem can be tested in a few short lines of code.

A while back, I was perusing some Stack Overflow questions for work, and I stumbled upon what I consider one of the many hidden jewels in Python: the timeit module. Given a bit of code, this little guy will handle executing it in several loops and giving you the best time out of three trials (you can ask it to do more than 3 runs if you want). Once it completes its test, it will offer some very clean and useful output.

For example, today I encountered a piece of code that was making a comma-separated list of an arbitrary number of "%s". The code I saw essentially looked like this:

",".join(["%s"] * 50000)

Even though this code required no optimization, I thought, "Hey, that's neat... I wonder if a list comprehension could possibly be any faster." Here's an example of the contender:

",".join(["%s" for i in xrange(50000)])

I had no idea which would be faster, so timeit to the rescue!! Open up a terminal, type a couple one-line Python commands, and enjoy the results!

$ python -mtimeit 'l = ",".join(["%s"] * 50000)'
1000 loops, best of 3: 1.15 msec per loop
$ python -mtimeit 'l = ",".join(["%s" for i in xrange(50000)])'
100 loops, best of 3: 3.23 msec per loop

Hah, the list comprehension is certainly slower.

Now, for other more in-depth tests of performance, you might consider using the cProfile module. As far as I can tell, simple one-liners can't be tested directly from the command line using cProfile--they apparently need to be in a script. You can use something like:

python -mcProfile script.py

...in such situations. Or you can wrap function calls using cProfile.run():

import cProfile

def function_a():
    # something you want to profile

def function_b():
    # an alternative version of function_a to profile

if __name__ == '__main__':
    cProfile.run('function_a()')
    cProfile.run('function_b()')

I've used this technique for tests that I'd like to have "hard evidence" for in the future. The output of such a cProfile test looks something like this:

3 function calls in 6.860 CPU seconds

Ordered by: standard name

ncalls  tottime  percall  cumtime  percall filename:lineno(function)
     1    0.000    0.000    6.860    6.860 <string>:1(<module>)
     1    6.860    6.860    6.860    6.860 test_enumerate.py:5(test_enumerate)
     1    0.000    0.000    0.000    0.000 {method 'disable' of '_lsprof.Profiler' objects}

This is useful when your code is calling other functions or methods and you want to find where your bottlenecks are. Hooray for Python!

What profiling techniques do you use?

My Fedora 11 Adventures: Part II

The Uneventful Installation

The installation for Fedora 11 went pretty smoothly. I began the installation around 11:10PM on June 10th, 2009. I did a fair amount of customization with my partitions and package selection, so the exact timing for installation is probably not a very fair figure to place here. But I'll share some numbers anyway, for my own benefit more than yours.

  • The "Starting installation. This may take several minutes..." took about 4 minutes
  • Installing 1,443 packages took 33 minutes

The timing seemed pretty typical of an RPM-based distribution to me.

First Boot

After the installation succeeded, it asked me to reboot. I noticed that the installer didn't eject the DVD when it was ready to actually reboot, so I just left it in there for kicks. When the DVD's boot menu came up, it showed a list of a few boot options, one of which was to boot from a local drive.

I selected the local drive option, but it failed--it apparently decided to look for a non-existant PXE server. Ejecting the DVD and rebooting again rendered the actual Fedora bootloader that was installed to my hard drive. It automatically launched Fedora after 5 seconds or so.

The boot screen is nice and pretty... none of the classical progress bar business, but rather the circular shape that makes up the Fedora logo. As the boot process proceeded, this shape was filled in a diagonal, bottom-left to top-right fashion. I like that.

Next, it presented me with a "Welcome" screen that said something about there being a few more steps before my system would be ready to use. These steps included a license information page, creating a regular, unpriviledged user, setting up the date and time, and an optional "send hardware profile" page. I opted to send my hardware profile just because I know what it's like to not have information like this when you're trying to figure out problems your users are having. You should be aware that opting in on the hardware profile submission enables a monthly submission, not just a one-time submission during setup.

First Login

After all that was done, I was presented with a login screen and a fairly ugly background. I will probably be changing that one. After logging in, the loading screen seems pretty slick... It has a fancy little progress dealy unlike no other I've seen before. Almost as impressive as the boot up screen, if not more so.

The sound levels after logging in were pretty obnoxious. If I were in a crowded workplace, I'm sure I would have been attacked with rotten lettuce and tomatoes because of that sound. That will also have to change...

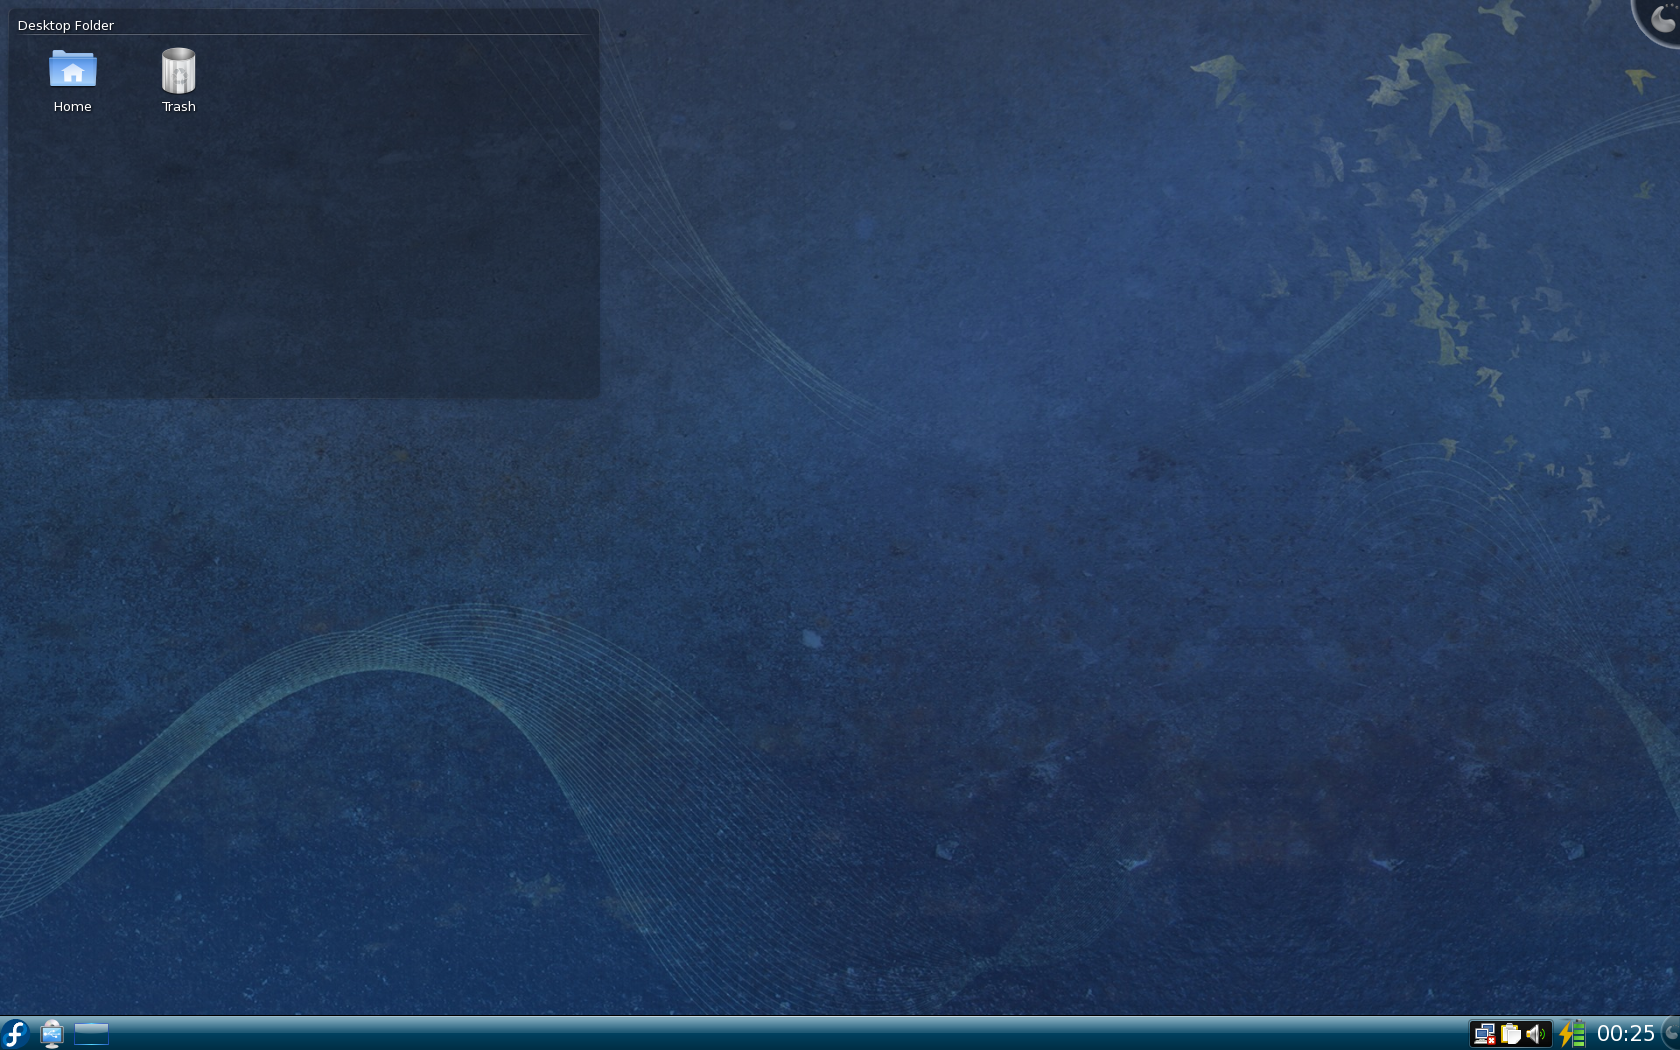
The default Fedora 11 KDE 4 desktop

My default background was the same that was used on the login screen. It was the first thing I decided to try to change.

Changing The Background

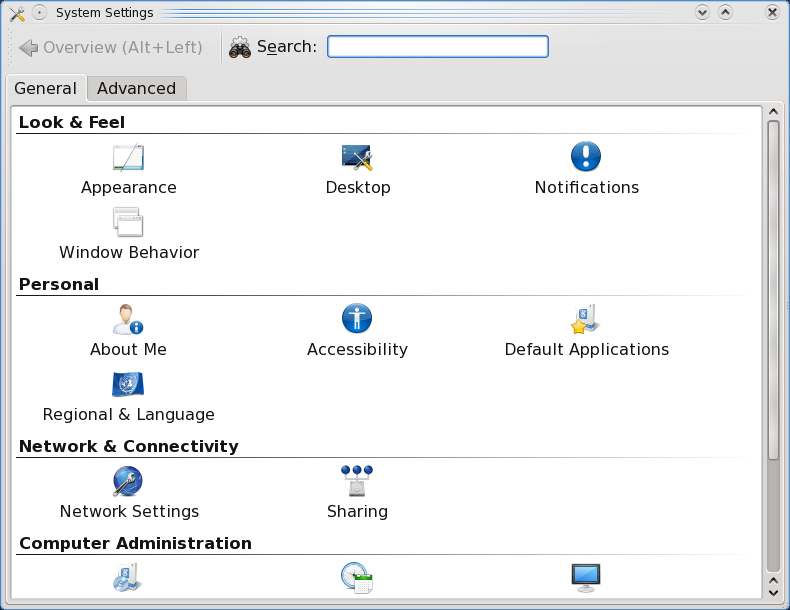
System settings

Clicking the Fedora button in the bottom-left corner of the screen pulls up the new KDE menu (which is going to take some getting used to for me). The initial menu showed a "System Settings" option, which is what I used to change the background image. On the screen that loaded immediately after selecting "System Settings," I was presented with several icons that seemed like they would do the trick.

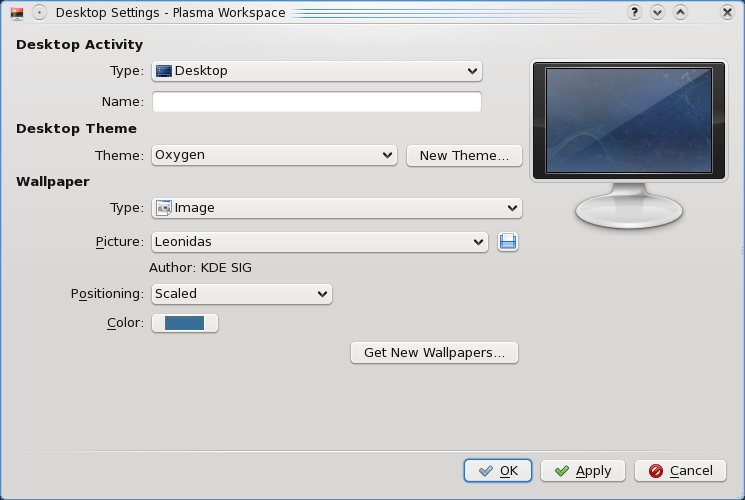
Appearance settings

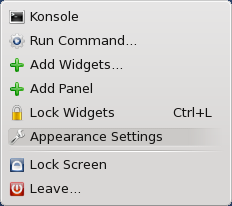
Well, after a little poking around, I decided it might be easier to just right click the desktop to see if the context menu had any suspicious items for changing the background. Lo and behold, I found an "Appearance Settings" item. That was the ticket.

The desktop context menu

Disappointment. Utter disappointment. When I went to select a new background image, I discovered that there was only one to choose from--the nasty default one! I tried clicking the "Get New Wallpapers..." button, but all that did was tell me I had network problems.

Connecting To The Network

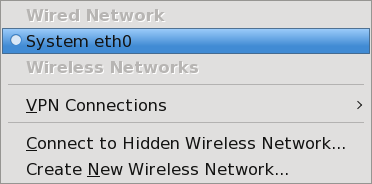
There was a nice little icon in my system tray that suggested it was a network manager, so I clicked on it. I suppose Fedora detected my Ethernet adapter just fine, as it was an option in the menu that popped up when I clicked the icon. My Broadcom wireless adapter apparently was not detected. Still, I find it curious that Fedora didn't connect to my Ethernet automatically (the cable was plugged in the entire time). Clicking the eth0 item in the menu was painless, though. It connected me directly to my network with no additional fuss.

The network manager menu

Back To Backgrounds

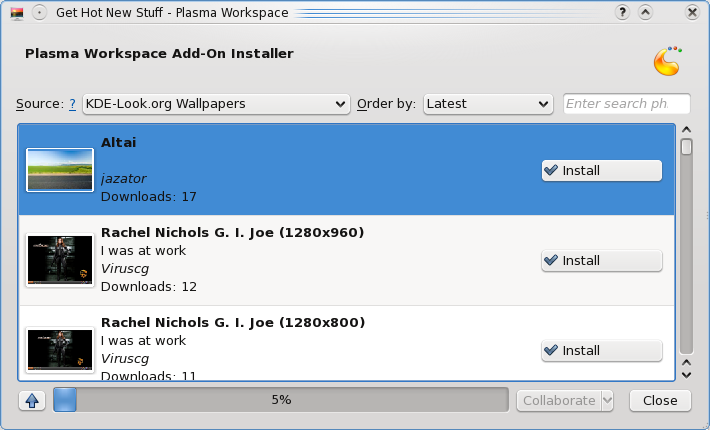
The "Get New Wallpapers..." button that I mentioned previously seemed to work a bit better after having connected to the network. When I clicked it, though, I was presented with a screen that apparently wanted me to do something before it would do anything for me. After waiting for a few seconds (because I was typing this), things started happening. New backgrounds started to appear, but there was no indication of any activity. I found that rather strange.

Getting new backgrounds

Selecting a few background images that looked appealing from their thumbnails was pretty straight-forward. The actual download, however, was less than impressive... either the server is overloaded with activity, or the images are very large, because my connection is quite idle right now.

It seems that all of the backgrounds that appeared are all of the classics from kde-look.org that were available in my trusty KDE 3.5. This is good.

Font Sizes

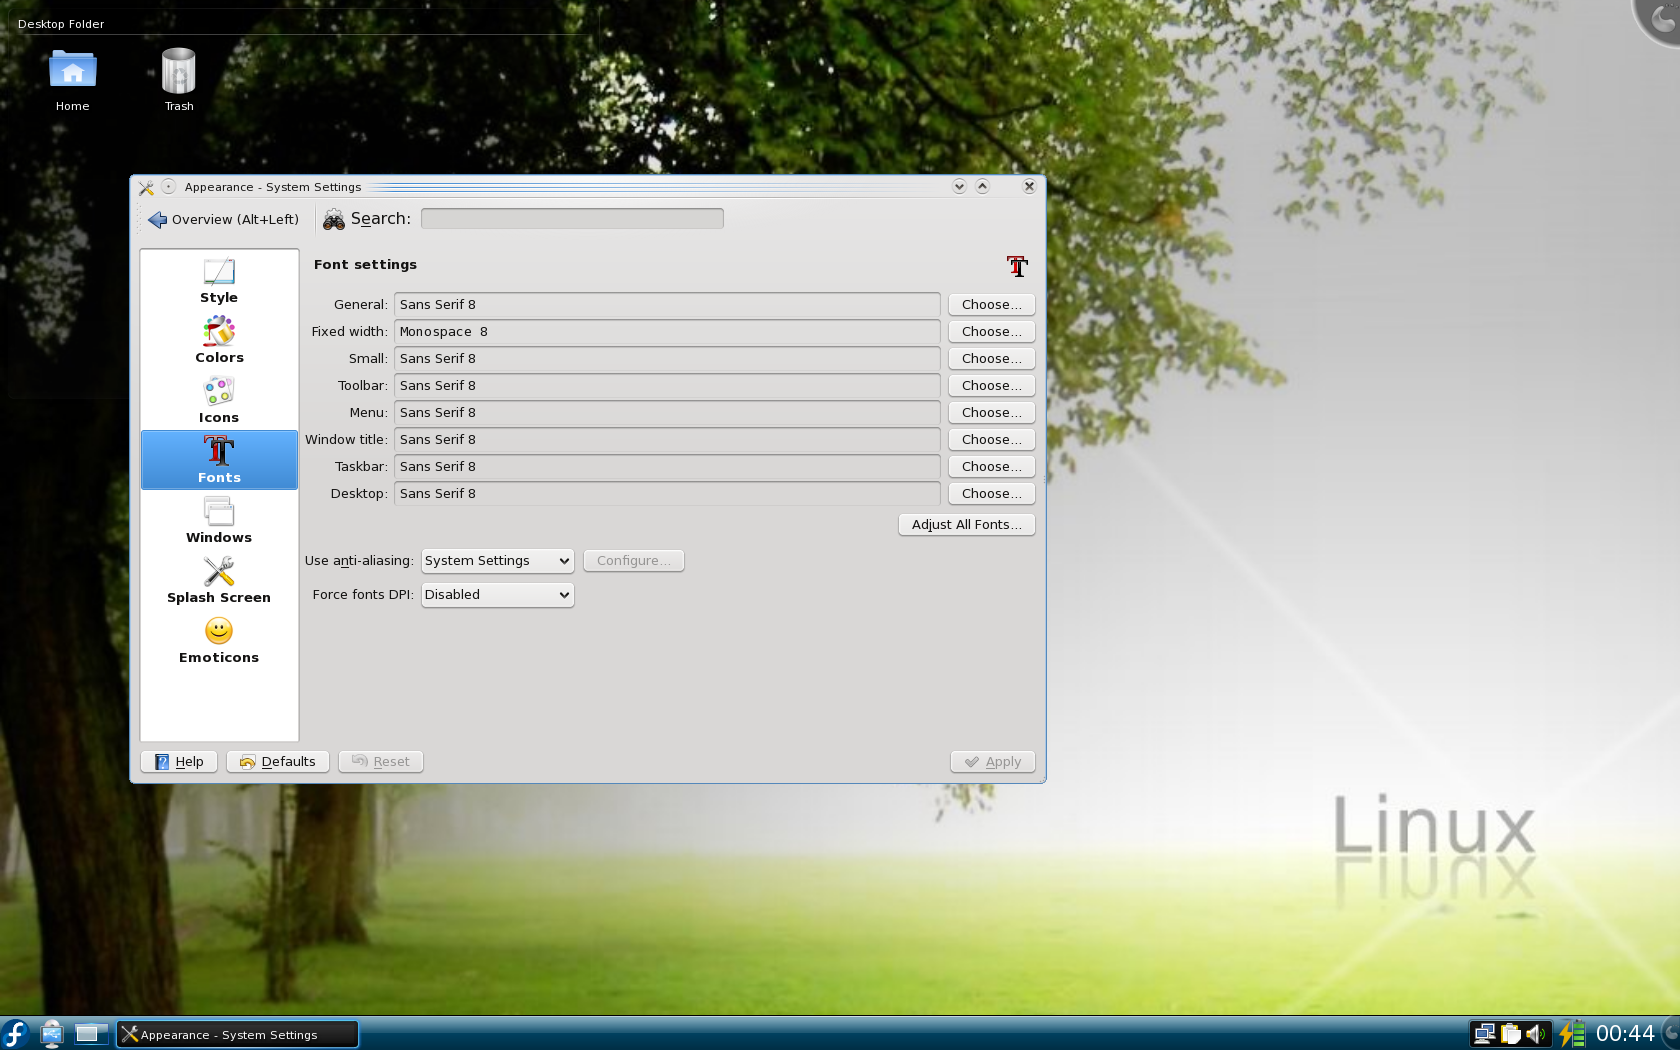
The next change I felt I must make before proceeding was reducing the size of the fonts. They are much too large for my preferences. Back to the System Settings I went. This time, the "Appearance" icon was the one that proved to be pertinent. Fedora's default font size was 10-point. I changed them all to 8-point. Things felt a lot better after doing that.

Things after changing the background and the fonts

Playing Sudoku

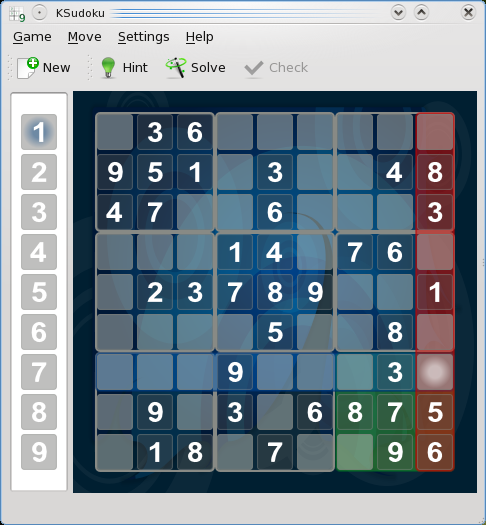
The new sudoku game

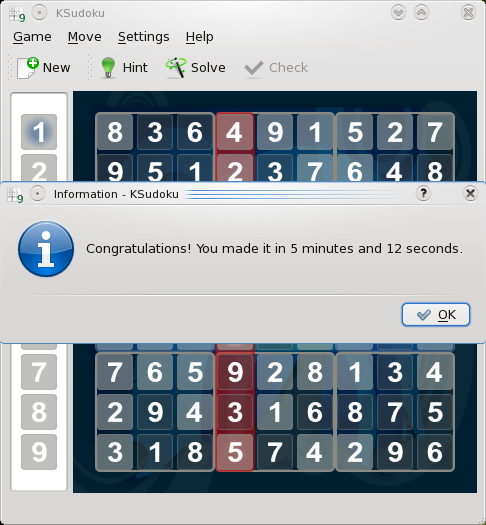
Now that it's close to bed time, I feel I must close this section with the requisite game of Sudoku :) The new KDE menu setup is really, really going to take some getting used to. I found Sudoku under Applications > Games > Logic Games > Sudoku Game.

I beat sudoku!

Tomorrow will be an interesting day, because I'm going to get my system setup for work! (By the way, Fedora 11 shuts down insanely fast!! It also blares another nasty sound when you begin the shutdown sequence... ugh)

A Quick Django Tip: User Profiles

I thought I would share with all of you a little trick that I've been using for quite some time in my Django applications. Personally, I find it to be very convenient and simple.

Django allows you to specify an AUTH_PROFILE_MODULE setting if you wish to maintain information about a user beyond the basic username, password, email, etc. To access the profile for a given User instance, you must do something like:

from django.contrib.auth.models import User
user = User.objects.get(pk=1)
user.get_profile().additional_info_field

That seems all find and dandy, right? Just a simple call to get_profile() isn't that difficult. However, if there is not yet an instance of whatever you set AUTH_PROFILE_MODULE to for the user in question, you'll get an error about it when you call get_profile().

My simple-minded way around this is to do something like this:

from django.db import models
from django.contrib.auth.models import User

class UserProfile(models.Model):
    user = models.ForeignKey(User, unique=True)
    additional_info_field = models.CharField(max_length=50)

User.profile = property(lambda u: UserProfile.objects.get_or_create(user=u)[0])

The magic is in the property() and get_or_create. Using the property() feature in Python, means you can just do something like:

from django.contrib.auth.models import User
user = User.objects.get(pk=1)
user.profile.additional_info_field

(with no parentheses after profile) The get_or_create method tells Django to look for any UserProfile objects whose user attribute is the user from which you are accessing the profile property. If no matches are found, an instance of UserProfile is created for you. The lambda function returns the UserProfile instance in both cases.

This trick is very simple. It's also very effective in my experience. I'm sure there are other ways of doing the same thing, but this works for me, and it's just one line of code--no need to even specify the AUTH_PROFILE_MODULE setting! You can apply the same trick to pretty much anything if you'd like. It doesn't have to be just for user profiles. Enjoy!

Beautiful, Beautiful Python

Today I was working on a USA ePay payment module for Satchmo. I had access to some work done by another chap, but I wanted to get a better feel for what needed to be happening in the payment module, so I examined some of the stuff that other people had done as well. I studied the "official" PHP version of the payment module for a little while. Things seemed pretty self-explanatory, so I decided I might as well translate the PHP library into Python.

Most of the translation process was quite mundane... removing dollar signs here and there, getting rid of the dirty -> junk, etc. However, toward the end of the translation process, I started to actually enjoy myself. That's because I wasn't just defining variables left and right--I actually started doing some stuff for processing. Here's some of the PHP code:

<?php
$this->result=(isset($tmp["UMstatus"])?$tmp["UMstatus"]:"Error");
$this->resultcode=(isset($tmp["UMresult"])?$tmp["UMresult"]:"E");
$this->authcode=(isset($tmp["UMauthCode"])?$tmp["UMauthCode"]:"");
$this->refnum=(isset($tmp["UMrefNum"])?$tmp["UMrefNum"]:"");
$this->batch=(isset($tmp["UMbatch"])?$tmp["UMbatch"]:"");
$this->avs_result=(isset($tmp["UMavsResult"])?$tmp["UMavsResult"]:"");
$this->avs_result_code=(isset($tmp["UMavsResultCode"])?$tmp["UMavsResultCode"]:"");
$this->cvv2_result=(isset($tmp["UMcvv2Result"])?$tmp["UMcvv2Result"]:"");
$this->cvv2_result_code=(isset($tmp["UMcvv2ResultCode"])?$tmp["UMcvv2ResultCode"]:"");
$this->vpas_result_code=(isset($tmp["UMvpasResultCode"])?$tmp["UMvpasResultCode"]:"");
$this->convertedamount=(isset($tmp["UMconvertedAmount"])?$tmp["UMconvertedAmount"]:"");
$this->convertedamountcurrency=(isset($tmp["UMconvertedAmountCurrency"])?$tmp["UMconvertedAmountCurrency"]:"");
$this->conversionrate=(isset($tmp["UMconversionRate"])?$tmp["UMconversionRate"]:"");
$this->error=(isset($tmp["UMerror"])?$tmp["UMerror"]:"");
$this->errorcode=(isset($tmp["UMerrorcode"])?$tmp["UMerrorcode"]:"10132");
$this->custnum=(isset($tmp["UMcustnum"])?$tmp["UMcustnum"]:"");

$this->avs=(isset($tmp["UMavsResult"])?$tmp["UMavsResult"]:"");
$this->cvv2=(isset($tmp["UMcvv2Result"])?$tmp["UMcvv2Result"]:"");
?>

Seems fairly self-explanatory, right? Heh. Now let's look at the Python version of this:

self.result = res.get('UMstatus', 'Error')
self.resultcode = res.get('UMresult', 'E')
self.authcode = res.get('UMauthCode', '')
self.refnum = res.get('UMrefNum', '')
self.batch = res.get('UMbatch', '')
self.avs_result = res.get('UMavsResult', '')
self.avs_result_code = res.get('UMavsResultCode', '')
self.cvv2_result = res.get('UMcvv2Result', '')
self.cvv2_result_code = res.get('UMcvv2ResultCode', '')
self.vpas_result_code = res.get('UMvpasResultCode', '')
self.convertedamount = res.get('UMconvertedAmount', '')
self.convertedamountcurrency = res.get('UMconvertedAmountCurrency', '')
self.conversionrate = res.get('UMconversionRate', '')
self.error = res.get('UMerror', '')
self.errorcode = res.get('UMerrorcode', '10132')
self.custnum = res.get('UMcustnum', '')

self.avs = res.get('UMavsResult', '')
self.cvv2 = res.get('UMcvv2Result', '')

<sarcasm>Wow, yeah... PHP really does rock! It must be the coolness factor behind the ternary operator they use! The Python code is just horrible compared to the PHP code.

How about the part where you check to see if a credit card number fits the profile of a known credit card? The PHP:

<?php
switch(substr($ccnum,0,1))
{
    case 2: //enRoute - First four digits must be 2014 or 2149. Only valid length is 15 digits
        if((substr($ccnum,0,4) == "2014" || substr($ccnum,0,4) == "2149") && strlen($ccnum) == 15) return 20;
        break;
    case 3: //JCB - Um yuck, read the if statement below, and oh by the way 300 through 309 overlaps with diners club.  bummer.
        if((substr($ccnum,0,4) == "3088" || substr($ccnum,0,4) == "3096" || substr($ccnum,0,4) == "3112" || substr($ccnum,0,4) == "3158" || substr($ccnum,0,4) == "3337" ||
            (substr($ccnum,0,8) >= "35280000" ||substr($ccnum,0,8) <= "358999999")) && strlen($ccnum)==16)
        {
            return 28;
        } else {
            switch(substr($ccnum,1,1))
            {
                case 4:
                case 7: // American Express - First digit must be 3 and second digit 4 or 7. Only Valid length is 15
                    if(strlen($ccnum) == 15) return 3;
                    break;
                    case 0:
                case 6:
                case 8: //Diners Club/Carte Blanche - First digit must be 3 and second digit 0, 6 or 8. Only valid length is 14
                    if(strlen($ccnum) == 14) return 4;
                    break;
            }
        }
        break;
    case 4: // Visa - First digit must be a 4 and length must be either 13 or 16 digits.
        if(strlen($ccnum) == 13 || strlen($ccnum) == 16)
        {
             return 2;
        }
        break;

    case 5: // Mastercard - First digit must be a 5 and second digit must be int the range 1 to 5 inclusive. Only valid length is 16
        if((substr($ccnum,1,1) >=1 && substr($ccnum,1,1) <=5) && strlen($ccnum) == 16)
        {
            return 1;
        }
        break;
case 6: // Discover - First four digits must be 6011. Only valid length is 16 digits.
        if(substr($ccnum,0,4) == "6011" && strlen($ccnum) == 16) return 10;
}
?>

Very eloquent. Let's see how bad the Python looks on this one:

first = ccnum[0]
four = ccnum[0:4]
if first == '2' and len(ccnum) == 15 and four in ['2014', '2149']:
    # enRoute: first four digits must be 2014 or 2149. Only valid length
    # is 15 digits
    return 20
elif first == '3':
    # JCB
    if len(ccnum) == 16 and four in ['3088', '3096', '3112', '3158', '3337'] \
        or ccnum[0:8] in ['35280000', '35899999']:
        return 28
    else:
        if len(ccnum) == 15 and ccnum[1] in ['4', '7']:
            # American Express: first digit must be 3 and second must be
            # 4 or 7.  Only valid length is 15 digits
            return 3
        elif len(ccnum) == 14 and ccnum[1] in ['0', '6', '8']:
            # Diners Club/Carte Blanche: first digit must be 3 and second
            # digit must be 0, 6, or 8.  Only valid length is 14
            return 4
elif first == '4' and len(ccnum) in [13, 16]:
    # Visa: first digit must be 4 and length must be either 13 or 16
    return 2
elif first == '5' and len(ccnum) == 16:
    # Mastercard: first digit must be a 5 and second must be in the range
    # 1 to 5 inclusive.  Only valid length is 16
    if int(ccnum[1]) in range(1, 6):
        return 1
elif first == '6' and len(ccnum) == 16 and four == '6011':
    # Discover: first four digits must be 6011.  Only valid length is 16
    return 10

Eek gads!!! It's so obvious why PHP is the language of choice for so many people out there. Python doesn't even have a switch statement, for crying out loud! Inconceivable!</sarcasm>

I'm so glad I was able to escape the grips of PHP.

Installing SuSE Linux Enterprise Desktop 10

This will be the second time for me putting SLED 10 on my laptop, but I've also put SLES 10, SuSE Linux 10.1, and various others on this laptop several times before. It _has_ been a few months since I last installed Linux on this laptop, so we'll see how well I remember how to do it. I will be installing the 64-bit DVD version, so as to take better advantage of the 64-bit capabilities of my processor. This shouldn't have a drastic effect on the overall procedure, compared to that of installing the 32-bit CD/DVD version.

Here are some specs of my laptop:

  • Make/Model: HP Pavilion dv8000
  • CPU: AMD Turion 64 ML-40 (2.2Ghz)
  • RAM: 1.25GB PC2700 DDR333 SODIMM
  • HDD: 5400RPM 80GB
  • Video: ATI Radeon Xpress 200M (128MB dedicated RAM, up to an additional 128MB shared RAM)

Note: I make a few assumptions in the writing of this article. One is that you are on a machine running Windows XP. If your computer can't handle Windows XP, you probably don't want to be running SLED 10. Another assumption is that you don't yet have your hard drive partitioned into more than one partition. I also assume that you already have the installation media in good working condition. For those of you in the BYU-I Linux Users Group (LUG), I am willing to make copies of the discs if you provide the media or discuss some sort of compensation if you want me to provide the media.

BACKUP ALL IMPORTANT DATA BEFORE PROCEEDING

We all hate losing the projects that we've slaved over for weeks and months. Take the proper precautions to backup anything you wouldn't like to lose before installing any flavor of Linux. That's not to say that you will lose everything, but it's not unheard of to wipe out all data from your drive while attempting to install Linux. With that warning out of the way, let's get started!!!

Defragment Your Hard Drive

If you have a secondary drive which you plan to dedicate to Linux, this step is not necessary. However, if you plan to install Linux on the same drive as your Windows installation, I would suggest defragmenting your drive prior to repartitioning your drive. In order to defragment your hard drive in Windows XP, open your Start menu and open the Control Panel. Once here, descend into Administrative Tools and run Computer Management. This utility is quite handy. On the left side of the Computer Management window, you should see a tree of options. Under Storage you will see the Disk Defragmenter. Simply click the Defragment button, and the program will begin optimizing your files. Defragmenting your hard drive basically puts each of your files into one piece instead of scattered across the drive (as they tend to be written). Defragmentation is a good process to run on a regular basis. Once again, this step is not necessary to the installation of Linux, but it is a good practice.

Begin The Installation

Once you're done backing up your files and defragmenting your hard drive, insert the first SuSE Linux Enterprise Desktop 10 CD/DVD into your CD/DVD drive and reboot your computer. You should be presented with a fancy blue welcome screen, but if you see the Windows boot screen, you'll have to change the settings in your BIOS to enable you to boot from your CD/DVD drive. That process will vary from machine to machine, so I won't even try to explain how to do it. Once you see the welcome screen, you are presented with several boot options:

  • Boot from Hard Disk
  • Installation
  • Installation--ACPI Disabled
  • Installation--Local APIC Disabled
  • Installation--Safe Settings
  • Rescue System
  • Memory Test

We're going to go with the first Installation option. In my experience, starting with SuSE Linux 10.1, I haven't had any issues at all getting Linux installed. Most people shouldn't have problems booting into the installation program, but if you do, try the other Installation options. Once we begin the installation process, the bootloader will load the Linux kernel into memory and begin booting the SuSE Linux Enterprise Desktop installation utility. It will probe several devices to make the installation usable, after which you are presented with a language selection menu. Choose the language of your preference. Next you will be asked to accept the License Agreement, which I would recommend reading (with any product, not just SLED). If you accept, check the "Yes, I Agree to the License Agreement" option box and hit "Next." If you don't accept the agreement, this is the end of the road--your installation process will end.

Once we accept the License Agreement, a few more devices are probed and we're asked what kind of installation we'll be doing. With the assumptions I've made for this tutorial, we will proceed with a New Installation. If you have the "extras" CD, you can check the "Include Add-On Products from Separate Media" checkbox. You'll then be asked to insert the disc so that a catalog of available applications can be made. However, I'll assume that we all just have the required media. Click "Next" to create a catalog of the software available.

Now we're presented with a Clock and Time Zone screen. Choose the appropriate options for your situation and click next.

Installation Settings

Once we have set our clock and time zone, we are shown an overview of the current installation settings. I personally prefer to see all of the details, so I am going to click on the Expert tab. I don't like the predefined partitioning scheme, so I am going to change that.

Partition Your Drive

Partitioning a hard drive basically allows you to split up that brand new 500GB SATA-II drive you bought into smaller "virtual hard drives." I like to partition my hard drive because it allows me to manage my files easier, and I don't have to worry about losing ALL of my data if one of the partitions needs to be reformatted. Each partition can have a different file system on it, which allows us to run a Windows file system (NTFS) and a linux file system (ext2/3 and reiserfs are the two main ones, at least for workstations) on the same physical hard drive.

This is the first time I will entrust all of the data on my hard drive to a Linux installation partitioning utility in a very long time. We're talking about 7 years... However, for the sake of others, I am willing to put it to the test to see if SuSE will not wipe my drive when I try to resize the Windows partition. I usually use a utility such as Partition Magic to resize and create new partitions.

To change my partitioning scheme, I click on the "Partitioning" subtitle on the Expert tab in the Installation Settings section. I want to base my partition setup on the default proposal, so I select the second option "Base Partition Setup on This Proposal" and hit next. This part could be a bit hairy if you've never partitioned a drive before. I want to be able to share files between Windows and Linux, so I am going to create a small ~20GB partition which I will format to be FAT32, a format readable and writable in both Windows and Linux.

First, I must resize my Linux partitions. I don't need my home partition to be 22GB, so I'm going to resize that one to be 5GB. To do that, I select the partition with /home listed as it's Mount point and click the "Resize" button at the bottom of the screen. The window that appears shows a graphical representation of the changes we make. All I need do is enter "5" into the "Space Free (GB)" box or move the slider to the right spot and click "OK". Now I'm left with 17GB to share between Windows and Linux. To create this new partition, I click on the "Create" button at the bottom.

The new partition window asks me what type of format I wish to have on the new partition--I want to select FAT. I want to have this partition listed in a place that makes sense to me, so I'm going to change the "Mount Point" field to /windows/share and click OK. I think I'm now satisfied with the partitioning scheme, so I click "Finish" to return back to the Installation Settings screen.

Partitioning Pointers

Let me share some pointers for partitioning schemes. Traditional Linux installations would ask for a partition twice as big as the amount of RAM you have in your machine. This is for the swap, which is synonymous with virtual memory in Windows lingo. That means that if you have 512MB of RAM, your swap partition should be at least 1024MB (1GB). Likewise, if you have 1GB of RAM, your swap partition should be at least 2048MB (2GB). In my opinion, the average Linux desktop does not require more than 512MB for a swap partition. I may be mistaken, but I think the "double your RAM" rule became somewhat obsolete for desktop workstations with the advent of 2Ghz+ processors with 1GB+ of RAM. It could just be me, but I've never even filled 256MB of swap. Just something to consider while partitioning your drive.

If you plan on experimenting with several distros of Linux without wiping other installations of Linux, I would recommend a partition dedicated to your /home folder. This way, you are able to keep your personal settings across most if not all distros. I've found it useful on countless occasions.

Software Selection

One thing I really like about SLED is the ease of package selection. Their default package selection will suit most people just fine. However, I have developed my own tastes for how I like my Linux, so I am going to customize the package selection a bit. To do that, I click on the "Software" heading in the Expert tab of Installation Settings.

I personally prefer KDE to GNOME as my window manager. So I am going to deselect GNOME from the Desktops category, but not so the "Do Not Enter" symbol shows up where there once was a check. I want to click the checkbox until I see a white box (no checkmark). I'm not sure if this is required, but usually different environments will require libraries from other environments in order for certain programs to run. I suspect that the Do Not Enter sign means that nothing for GNOME will be installed, but this is not fact--it's simply a notion of mine. Now I want to put a check in the checkbox next to KDE. Being a nerd, I want to have my compilers around, so I will also select that option.

According to the disk usage graphs in the bottom right of the screen, I'm only going to be installing about 1.9GB of software. That's interesting because I downloaded a whole DVD... If anyone wants to see what other software is available, you can click the Details button below the software category list. This might scare a few off, but it's all quite simple. If you want to see more categories to choose from, select "Package Groups" from the Filter list in the top left. This is where you can explore all of your software options available on your installation media. I am going to leave that sort of customization until after I'm all installed and running.

Once you're done selecting the packages you wish to have installed, click Accept from the bottom right. You will probably encounter a few more license agreements at this point. These are for non-open-source applications (Adobe Acrobat Reader, Macromedia Flash plug-in, etc) included with SLED. I recommend reading and accepting each license agreement. Now I am presented with the same Expert tab in the Installation Settings stage. Now we're ready to proceed, so click Accept in the bottom right again. We're asked to confirm that we want to install Linux, with a warning that certain parts of your hard drive will be formatted, thus erasing any data that were there before. If you're ready, click Install, sit back, and enjoy.

Installing Everything

At this point your partitions will be resized/formatted and the appropriate files will be installed. This process can take anywhere from 20 minutes to 2 hours or more, depending on the packages you selected and the speed of your system. You might be interested in seeing what exactly is being installed on your system at this point. If so, you can click the Details tab and see each package being installed. Apparently I chose some other packages along the way or something, because now it says that I'm installing about 2.5GB of software and that this segment should take about 30 minutes.

Once all of the files are copied, the installation settings will be saved to the hard drive and your system will reboot for the first time in your brand new SLED. At this point, you shouldn't remove your installation media, as it is required in the following steps.

The Initial Boot And Final Settings

When we boot up our SLED for the first time after installation, we are asked to provide a hostname to identify our machine on the network. When you have set the hostname and domain name as you want them, click next. Now we're asked to set the root password. Make sure this password is one that you'll not forget, but at the same time make sure that it's not easy to guess. If someone gets root access to your machine, there's no end to what they can do.

Network Configuration

This is another section that is mostly correct, but a few settings are not the way I would like them to be. For example, my ssh port is listed as disabled under the Firewall heading. To enable it, just click the word "blocked"--it will change to "open". The rest of the settings look fine for now. If you have any customizations to be made, go ahead and make them. I'll wait.

When we're ready to move on, click next. At this point, our network configuration is saved. Next we're asked if we wish to try out our Internet connection. Do as you please. I usually skip this step, but for your sake, I will try out my connection. When we test, it tries to download the latest changelogs. If your connection works, you will see "Success" in the Result field. Click next.

User Authentication Method

Most home users won't have their own LDAP server or Windows Domain setup, so I won't go into how these are to be set up. Let's just go with Local authentication for now, the default option. Click next.

New Local User

This is when we create our very own user account. This set is essential. DO NOT EVER RUN EVERYDAY APPLICATIONS AS ROOT. There are serious security implications involved if you choose to login and perform your daily tasks as the root, or all-powerful administrator, user in Linux. It's much easier to just create an "unprivileged" user and do your regular business with that account. Only login as root when you need to perform system maintenance or install something. When you're done with those tasks, logout of the root environment immediately. Trust me.

Anyway, back to our installation. Go ahead and create your user. You may or may not want to check the checkbox to receive system mail. System mail includes certain security breaches on most distributions. If you don't wish to have to enter your password in order to use your computer, click the automatic login checkbox. If you wish to add more than one user at this time, you can click on the User Management button. The process is pretty much the same as it is to add the first unprivileged user. Click next when you're ready to proceed.

Now our system configuration is saved again (this seems to happen all the time in SuSE... it gets rather annoying in my opinion). After our settings are saved, we are presented with the release notes (which may have been more useful had they been displayed during the file copy process, but whatever). Read them if you wish. Click next when you're ready to proceed.

Hardware Configuration

Now this is one of the selling points for me with SuSE. I have a 17" widescreen (1680x1050 max resolution) for my laptop. There weren't many distros for a while that could handle the resolution out of the box. Fedora Core 5 was the first that I tried that handled it without any manual configuration, and SuSE was the second. I'm pretty happy with the configuration listed here, so click next when you are too. Once again, the settings will be saved (seems like saving settings in SuSE is as bad as rebooting in Windows...).

If you have several similar machines, you can save your installation configuration by checking the "Clone This System for Autoyast" checkbox. If you choose this, the system will determine what settings exactly were used for installation and create a file somewhere that you can use in later installations. When this is done, or when you click finish if you don't want to clone, a login screen will appear.

First Login

When you see this login screen, enter the username and password that you created for the unprivileged user. You'll see a fancy loading screen while your profile is being created for the first time.

Now, you may or may not have noticed, but I wrote this article as I installed SLED. I want to watch a movie now, so subsequent configuration (wireless, 3D acceleration, etc) will take place later. I hope this is good enough for the time being.