In all honesty, the installation process is extremely similar to what I did with 12.1. However, looking back at my previous article, I realize that my steps may not have been the most useful in the world. This time around I will try to be more helpful.
Booting The Install Disc
After you have a good copy of the installation disc (the DVD or the first of the CDs), put the disc into your CD/DVD ROM drive and reboot your computer. To ensure that your computer boots from the disc rather than the hard drive, hit F2 when you see the initial boot screen. Then go to the "Boot" tab and verify that your external CD/DVD drive takes precedence over the internal SSD. While we're in the BIOS, let's hop over to the "Advanced" tab and set "OS Installation" to "Start". This will increase the chances that your external drive will be recognized or something.... mine didn't work until I made that change. When you're all done with that, exit your BIOS, saving your changes.
The computer will reboot, and it should access your installation disc immediately after the initial boot screen disappears. Once you boot from the installation disc, you should be presented with a screen which allows you to pass some settings to the installation kernel.
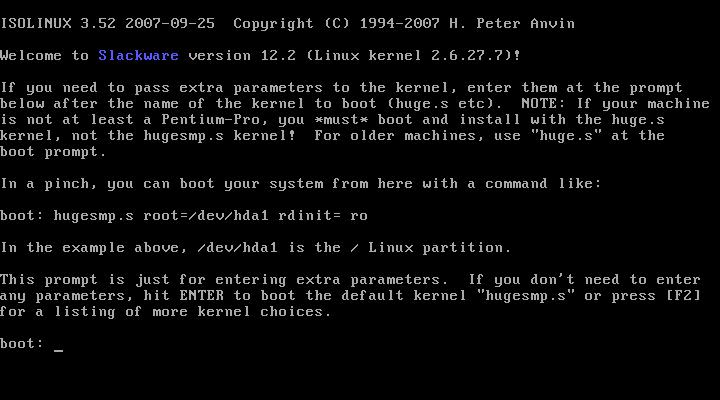
To make the installation go faster, use the following boot string:
hugesmp.s hdc=noprobe
This makes it so the installation will see the internal SSD as /dev/sda instead of /dev/hdc, which also boosts the read/write times by about 13 times.
During the boot process you will be asked to specify your keyboard map. Unless you want something special here, just hit the enter key to proceed.
Installing Slackware
As soon as your partitioning has finished, go ahead and run setup to begin the actual installation program.
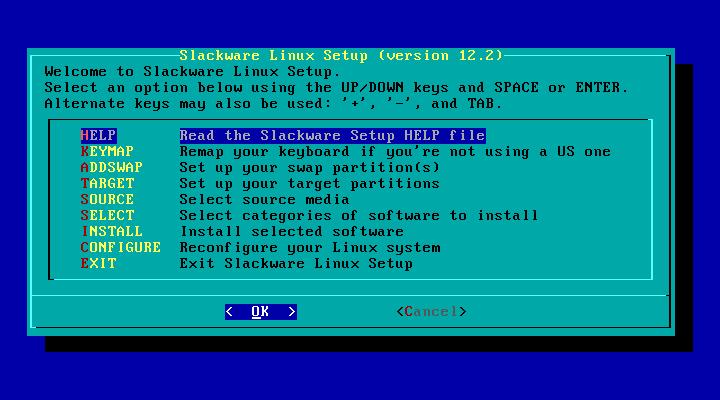
Since we don't have a swap partition, can jump straight to the TARGET option. Use the arrow keys to highlight this option and hit enter. Select /dev/sda1 from the list, and format it with ext2. On the EeePC, most people prefer this format since it is a non-journaling filesystem. That means fewer writes to the SSD, which supposedly translates to a longer lifetime.
After the SSD is formatted, you will be asked to select the installation source. Again, I'm assuming that you want to use your fresh Slackware 12.2 disc, but you are free to choose what you want if you know what you're doing.
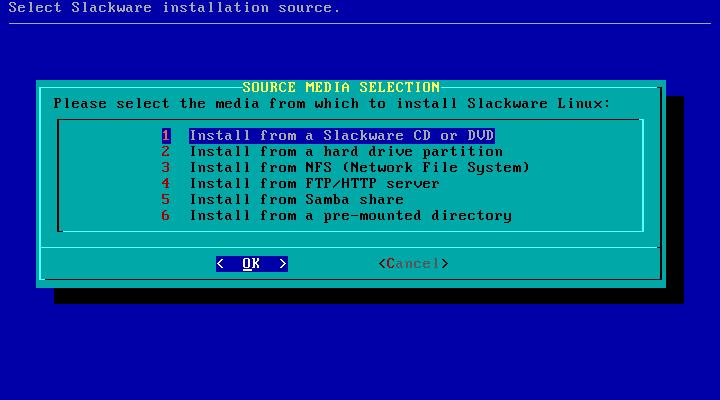
I went with the default "Install from a Slackware CD or DVD" and told it to auto scan for my disc drive. It was found at /dev/sr0.
Choosing Your Packages
Next, you are given the opportunity to tweak the package series which will be installed on your EeePC. I chose the following series: A, AP, K, L, N, TCL, X, and XAP. I planned on using XFCE instead of KDE on my EeePC simply because it is much more light-weight and still capable of what I need. If you want KDE, be sure to check the appropriate series.

Once you mark each of the package series you wish to install, hit the "OK" button. You'll then have to choose which prompting mode to use. I chose menu, simply to be a little more picky about which packages I wanted installed. Installation took approximately 28 minutes with my package selection and setup.
Configuring Your System
When all of the packages are done being installed, you will be presented with some other screens to finish up the installation process.
- Choose whether or not you want to make a bootable USB... I skipped it.
- Choose how you wish to install LILO. I chose simple.
- Choose your frame buffer mode for the console. I chose 640x480x256.
- Specify any optional kernel parameters. Ensure that the hdc=noprobe from earlier is here to speed up your system considerably.
- Specify whether you wish to use UTF-8 on the console. I chose no.
- Specify where to install LILO. I chose MBR.
- Specify your mouse type. I chose imps2.
- Specify whether or not you wish to have gpm run at boot, which allows you to use your mouse in the console. I chose yes.
- Configure your network.
- Give your EeePC a hostname. This can be whatever you'd like.
- Specify the domain for your network. This can be whatever you'd like as well.
- Configure your IP address information. I just chose DHCP.
- Set the DHCP hostname. I left this blank.
- Review and confirm your network settings.
- Choose which services you wish to have running immediately after booting.
- See if you want to try custom screen fonts. I usually don't bother.
- Specify whether your hardware clock is set to local time or UTC.
- Choose your timezone.
- Select your preferred window manager. I chose XFCE.
- Set the root password.
At this point Slackware has been installed on your EeePC and you can exit the setup menu and hit Ctrl-Alt-Delete to reboot your computer.
Tweaking Your Slackware
Here are some of the first things I do when I install a new copy of Slackware:
Add An Unprivileged User
This step is very important, because one thing that sets Linux apart from other operating systems is security ;). If you run your Linux system as root all the time, you're begging for problems.
To create a new unprivileged user, I use the adduser command. It walks you through the process of creating a user. This is the user you should use to do your day-to-day computing. Only use the root user when performing system administration tasks. Trust me :)
Tell X Windows to Start Automatically
I have no problem with the command line interface in Linux. I actually enjoy it quite a bit. However, on a device such as the EeePC, not having a GUI just doesn't seem all that practical. It's also not very impressive to your potential converts when they look over your shoulder and see that your tiny gadget just displays a black and white screen when you turn it on...
So, to help ourselves be a little more productive and to impress our followers, let's tell X Windows to start up automatically when we turn on the computer. To do that, we want to edit /etc/inittab and change the following line:
id:3:initdefault:
to be:
id:4:initdefault:
You can use whatever program you feel comfortable with, such as vi or nano. The next time you reboot your computer, you should see a GUI as soon as all of the services are fully loaded.
Along with this step, I suppose we can mention the configuration of X Windows. I usually run xorgsetup as root to get things up and running. Usually there is also a bit of tweaking to get things like the scroll wheel on the mouse to function. This part in particular took quite some time for me to figure out.
Make LILO to Boot Faster
There are a couple tricks we can use to make LILO boot our EeePC slightly faster. The first is to add the compact option somewhere, and the second is to decrease the menu timeout.
Open up /etc/lilo.conf with a text editor of your choosing as root. Add a single line with the word compact somewhere. I put it under the line that says boot = /dev/sda so the top of lilo.conf looks like this:
# LILO configuration file
# generated by 'liloconfig'
#
# Start LILO global section
# Append any additional kernel parameters:
append="hdc=noprobe vt.default_utf8=8"
boot = /dev/sda
compact
I also changed the line that said timeout = 1200 to be timeout = 50 to make LILO only hang around for 5 seconds instead of 2 minutes.
After making these changes, we must reinstall LILO to the MBR with the new settings:
lilo -v
Here's my /etc/lilo.conf with most of the commented lines removed:
# LILO configuration file
# generated by 'liloconfig'
#
# Start LILO global section
# Append any additional kernel parameters:
append="hdc=noprobe vt.default_utf8=0"
boot = /dev/sda
compact

# Boot BMP Image.
# Bitmap in BMP format: 640x480x8
bitmap = /boot/slack.bmp
bmp-colors = 255,0,255,0,255,0
bmp-table = 60,6,1,16
bmp-timer = 65,27,0,255

prompt
timeout = 50
change-rules
reset
vga = normal
# End LILO global section
# Linux bootable partition config begins
image = /boot/vmlinuz
root = /dev/sda1
label = Linux
read-only
# Linux bootable partition config ends
Network Tweaking
While the wireless adapter seemed to work great for me out of the box this time, the ethernet adapter is still not functional. I compiled and installed the atl2 driver to solve the problem. You can get it from http://people.redhat.com/csnook/atl2/atl2-2.0.4.tar.bz2. Here are the steps I took to install it:
wget http://people.redhat.com/csnook/atl2/atl2-2.0.4.tar.bz2
tar jxf atl2-2.0.4.tar.bz2
cd atl2-2.0.4
make
cp atl2.ko /lib/modules/`uname -r`/kernel/drivers/net/
depmod -a
modprobe atl2
ifconfig
The next tweak I added for networking was to boost boot times... The DHCP address request hangs the entire boot process out of the box if you don't have an ethernet cable plugged in while booting. To remedy this problem, add the following line to the first section of your /etc/rc.d/rc.inet1.conf:
DHCP_TIMEOUT[0]="5"
This will tell your computer to continue booting if an IP address hasn't been assigned after 5 seconds of waiting.
Enable Frequency Scaling
We all like out battery to last a long time, right? Well, the EeePC 701 doesn't have the greatest battery in the world, but we can help increase the battery life by enabling the CPU frequency modules. I put this stuff in my /etc/rc.d/rc.local script:
|
#!/bin/sh
#
# /etc/rc.d/rc.local:  Local system initialization script.
#
# Put any local startup commands in here.  Also, if you have
# anything that needs to be run at shutdown time you can
# make an /etc/rc.d/rc.local_shutdown script and put those
# commands in there.

modprobe p4-clockmod
modprobe cpufreq_ondemand
modprobe cpufreq_conservative
modprobe cpufreq_powersave
modprobe cpufreq_performance

cpufreq-set -g ondemand -d 450Mhz -u 900Mhz
|
Add Your SD Card to /etc/fstab
I have an SD card that I leave in my EeePC all the time, and it's formatted with ext2 just like the internal SSD. Without this tweak, I have to mount the SD card each time I turn on the computer, which gets bothersome. My fix is to add the SD card to /etc/fstab, which takes care of mounting the device at boot.
First, you should make a directory that will be used to mount the device. I made one as such:
mkdir /mnt/sd
Now you need to determine your SD card's UUID. I started out by unmounting my SD card and taking it out of the slot. Then I executed this command:
ls /dev/disk/by-uuid
Next, I popped the SD card back in and executed that command again. The UUID that appears the second time but not the first time is your SD card's UUID.
It's time to add the magic line to your /etc/fstab. Add a line such as:
UUID=[your SD card's UUID] /mnt/sd ext2 defaults,noatime 1 1
somewhere in the file. While we're digging around in /etc/fstab, we might as well add the noatime option to the internal SSD to help reduce disk writes. Save the file and exit the editor. Then mount everything (using mount -a) or just the SD card (using mount /mnt/sd).
For posterity's sake, here's my entire /etc/fstab file:
/dev/sda1        /                ext2        defaults,noatime         1   1
UUID=30293ff4-5bee-457a-8528-ec296f099e9a /mnt/sd ext2 defaults,noatime 1 1
#/dev/cdrom      /mnt/cdrom       auto        noauto,owner,ro  0   0
/dev/fd0         /mnt/floppy      auto        noauto,owner     0   0
devpts           /dev/pts         devpts      gid=5,mode=620   0   0
proc             /proc            proc        defaults         0   0
tmpfs            /dev/shm         tmpfs       defaults         0   0
Preventing Shutdown Hangs
Sometimes the sound card seems to make Slackware hang when you're shutting down. Everything seems to turn off fine, but the little green power LED still shines bright. The solution to this problem appears to be adding the following line:
modprobe -r snd_hda_intel
to /etc/rc.d/rc.6 right before the "Unmounting local file systems." line (around line 195).
Enable Volume Hotkeys and Sleeping
Slackware 12.2 is already listening for ACPI events by default, so we just need to insert our custom stuff into /etc/acpi/acpi_handler.sh:
|
#!/bin/sh

IFS=${IFS}/
set $@

#logger "ACPI Event $1, $2, $3, $4, $5"

case "$1" in
    button)
        case "$2" in
            power) /sbin/init 0;;
            sleep) /etc/acpi/actions/lid.sh;;
            lid)
                if grep -q closed /proc/acpi/button/lid/LID/state
                then
                    /etc/acpi/actions/lid.sh
                fi
                ;;
            *) logger "ACPI action $2 is not defined";;
        esac
        ;;
    hotkey)
        case "$3" in
            # Fn+F2 Wireless/Bluetooth button
            # Fn+F7 Mute button
            00000013) amixer set Master toggle;;
            # Fn+F8 Volume down
            00000014) amixer set Master 10%-;;
            # Fn+F9 Volume up
            00000015) amixer set Master 10%+;;
        esac
        ;;
    *) logger "ACPI group $1 / action $2 is not defined";;
esac
|
And to handle the closing of the lid or pressing the sleep button, we need to create a new script in /etc/acpi/actions/ called lid.sh:
|
#!/bin/sh
# script by Fluxx from linuxquestions slackware forum
# discover video card's ID
ID=`/sbin/lspci | grep VGA | awk '{ print $1 }' | sed -e 's@:@/@'`

# securely create a temporary file
TMP_FILE=`mktemp /tmp/video_state.XXXXXX`
trap 'rm -f $TMP_FILE' 0 1 15

# switch to virtual terminal 1 to avoid graphics
# corruption in X
chvt 1

/sbin/hwclock --systohc

# remove the webcam module
rmmod uvcvideo

# write all unwritten data (just in case)
sync

# dump current data from the video card to the
# temporary file
cat /proc/bus/pci/$ID > $TMP_FILE

# suspend-to-ram
# (samwise) not using this it stuffs up the screen brightness
echo -n mem > /sys/power/state

# suspend-to-disk
#echo -n disk > /sys/power/state

# standby
#echo -n standby > /sys/power/state

# force on for now...
xset dpms force on

/sbin/hwclock --hctosys

# restore the webcam module
modprobe uvcvideo

# restore video card data from the temporary file
# on resume
cat $TMP_FILE > /proc/bus/pci/$ID

# switch back to virtual terminal 2 (running X)
chvt 6; sleep 2
chvt 2

# remove temporary file
rm -f $TMP_FILE
|
And we need to make sure the script is executable:
chmod +x /etc/acpi/actions/lid.sh
These scripts should enable us to use the mute key, the increase/decrease volume keys, and the sleep key. They should also allow us to close the lid of the EeePC to put it to sleep. Occasionally, when you wake up the computer, you will just see a blank black screen. To get around this, switch back to VT2 by using the keystroke Ctrl+Alt+F2.
Install Special Packages
Slackware comes with a lot of awesome stuff right out of the box, but it is missing some very important utilities at the same time. Included in this list, for me, is a program called wicd, or a network connectivity manager. This is similar to the "Network Manager" utility found in other mainstream distributions like Ubuntu, Fedora, and openSuSE. Slackware has yet to include such a utility by default.
Anyway, wicd can be found in the extra directory on the Slackware DVD or the 3rd (?) CD. To install it, find the package on the disc (or download it from the Internet) and execute the following command:
installpkg wicd-1.5.6-noarch-2.tgz
Be sure to check out the extra directory on the Slackware install disc. There are some neat tools in there. Some excellent resources for Slackware packages include:
There are some utilities out there to help you in your quest to resolve package dependencies. Two of the major ones that I've used in the past are swaret and slapt-get.
Using Slackware 12.2
I have to give the Linux kernel hackers props--the 2.6.27.7 kernel is amazingly fast! I'm sure the fact that I'm running a fairly stock Slackware installation (as opposed to something like Ubuntu) helps the speed quite a bit too. This past semester I had Linux Mint 5 (XFCE edition) installed on my EeePC, and that seemed fairly responsive. Slackware blew me away though, and I can still do everything I want to do!
The webcam and sound card work out of the box, just like the wireless. I rarely use the webcam, but it's fun to play with, and my mom appreciates seeing me on Skype occasionally. The wireless connection quality exceeds what it was with the madwifi driver I was using with Slackware 12.1 and other distros like Linux Mint. Programs are ultra speedy and responsive, even with the processor clocked at 450Mhz. I love it!!!
Boot times could be better, but I'm not too concerned with it. My setup takes approximately 50 seconds from boot to a useable desktop interface. Not horrible by any means, but perhaps not the best for a netbook when all you want to do is check your e-mail.
I would like to see the Network Manager that so many other distributions offer in Slackware some day. The wicd application is nice, but it's not nearly as intuitive as Network Manager, and it seems to be relatively limited in its capabilities in comparison. I know I'm not alone in my desire to see Network Manager included, or at least available, for Slackware. It would be tremendously beneficial in a world where wireless networking and laptops are more and more pervasive. Using the command line to adjust your wireless connection settings each time you have to hop to a new access point is just annoying.
In the end, I'm excited to have Slackware on my EeePC once again. I think it will be around for quite a while this time.
Please comment with any advice or problems that you have in regards to installing Slackware 12.2 on an EeePC.